cauliflower pizza crust

Yes, it’s possible to be gluten-free and paleo and still love your pizza!

Last year I ran across a cauliflower pizza recipe which we tried while my mom in law was in town, and it was a BIG hit! We all loved it, though my only complaint was that it wasn’t sturdy enough to pick up and eat since I chose to leave out the cheese from the crust. But we all dug in with forks and knives, and while it wasn’t the same as the slices of heaven I used to love in NY, it was still a tasty version of pizza. Yay for options!

So here’s the original recipe; you can choose to eliminate the cheese from the crust as we did, but just be warned that it won’t be sturdy enough to pick up.

Note that I substituted goat cheese for mozzarella and instead of hawaiian style I added spinach and prosciutto. Delish!

Oh, and for those of you (like my husband) who don’t love cauliflower, no worries – the cauliflower flavor is undetectable 🙂

Enjoy!


cauliflower pizza crust


(more…)

About 6 months ago I discovered a blog that has quickly become one of my favorites; devoted to living a life free of grains, Lisa Leake runs 100 Days of Real Food where she dishes on living free of grains, gracing us with amazing recipes that grain-ful dieters would envy.  Browsing through her site, you quickly realize how talented she is in the kitchen, and her dedication to finding ways to help us live without grains is unmatched online. Here’s a quick snippet from her site that sheds some light on how she began this journey…

“At the beginning of 2010 our eating habits were just like those of any other average family. We thought we were making fairly healthy food choices, although we certainly weren’t following any special rules. Then came along the Oprah show “Food 101 withMichael Pollan”. As it turned out, a lot of what we thought were “healthy” food choices were actually just highly processed and what the food industry was labeling as ‘healthy.’

So it wasn’t easy at first, but we slowly revamped everything from what we bought, to where we shopped, to how we cooked… If all of us make the right choices together then we can make a big impact, which will help change our country’s food system for the better.”

How can you not love her?

Lisa, like many of us, is fighting the good fight to help change the way we think of our food supply. By eating natural, organic, unprocessed and unrefined foods, we are taking a very important step towards affecting the change needed to ensure our health is protected, and that our children can thrive free of the modern day health issues which plague so many of us.

So today I share a recipe that Lisa has allowed us to share – thanks Lisa!

This is a simple substitution we can make to avoid using bread for our child’s sandwich. Instead, Lisa uses an apple in place of bread, and fills the sandwich with peanut butter (any nut butter would do here) and raisins.  Other options are homemade chicken salad, or any organic carved lunch meats. Using toothpicks to hold it together is a smart trick and will make sure your child opens their lunch box and is greeted with a smart, healthy and delish meal.

I hope it inspires you to make some small changes that will make a big impact on your, and your children’s health.

Follow this link to learn how to make an apple sandwich today!

ps- here are some tips from her readers that I thought were worth sharing:

1. Dip the apple in salt water before making the sandwich to prevent browning.

2. Sprinkle some fresh lemon juice on the apple slices to prevent browning

3. Use chico chips in place of raisins for a sweeter touch

4. Create an apple, banana, choco chip cake

5. Use sun butter, cashew butter or almond butter to make it Paleo friendly

Is a gluten-free diet really healthier for us?

I’ve been asked often if a gluten-free diet is healthier for someone who isn’t gluten intolerant. Meaning, does everyone gain something from going gluten-free, or just those with a sensitivity or allergy (Celiac)? This is a tough one because it really comes down to how you treat the gluten-free lifestyle. If you’re simply replacing your gluten-ful products with their gluten-free counterparts, than my answer is NO, it’s not a healthier diet.

If however, you take this as a chance to get back to basics, and explore the many amazing foods that are available which don’t come processed and pre-packaged, you’re absolutely on your way to a healthier lifestyle. I have reversed some pretty scary health issues by removing grains and dairy from my diet, and I have talked to countless other folks who have as well. If you follow the Primal or Paleo movements, you know that there are medical professionals who share stories of patients who have reversed diabetes, lost  weight, reduced anxiety and depression, overcome fatigue, balanced blood pressure levels, stabilized thyroid functions and more.

While I avoid almost all packaged foods, I completely understand the need for having something quick and easy on-hand for those moments when hunger pangs strike. We all know what it feels like to have your sugar levels go crazy; in fact, we joke that our son is like the Snickers commercials – he’s just not himself when he’s hungry!

But let’s face it, the gluten-free versions of bread, muffins, cookies, crackers and the like are often made from rice grains, potato starch, sugar and/or HFCS (high fructose corn syrup) which can wreak havoc on our digestive tracts and our blood sugar levels. So unfortunately, the gluten-free stuff you’re eating now might not be any better for you, which is why it’s important to not over-due these foods (if at all).

So here are some tips for keeping it simple when you’re gluten (and grain) free. 

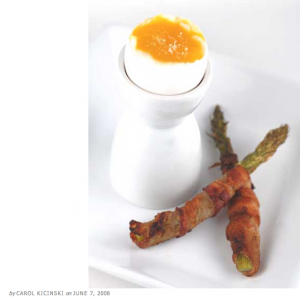
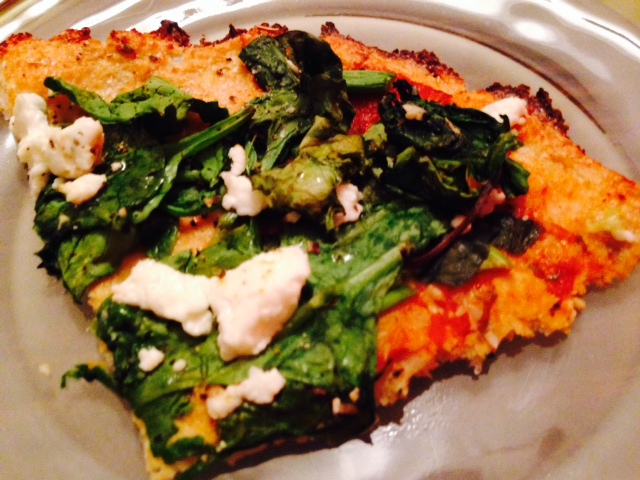
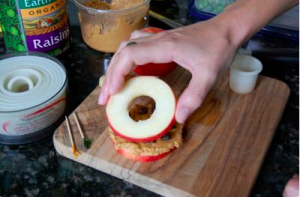
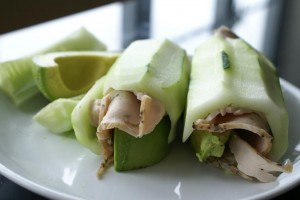
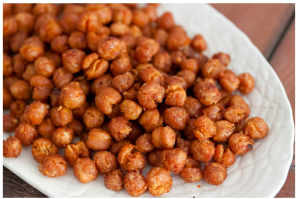
First, focus on nature’s foods. Fresh fruits and veggies, nuts, seeds and whatever protein sources you like. By cutting back on starchy carbs, you will naturally avoid the sugar spikes they cause and help your body to aid in easier digestion by focusing on foods which it was naturally designed to eat.

Second, be prepared. Yep, this lifestyle requires a bit more prep work than you’re used to, and while you can still enjoy the occasional gluten-free snacks, it’s best not to count on them.  We make our lunches the night before, prep our meals on Sunday for the week, pre-cook what we can, go to the grocery store often so our food is fresh and our supplies are full, and share recipes with friends and family who are on the same path so we can keep things interesting !

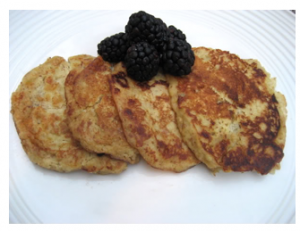
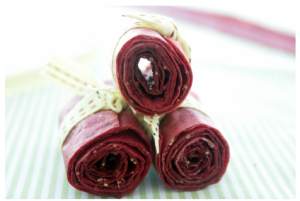
Here are some of the fresh snacks I keep on hand every day (had to upgrade my purse a bit to accommodate all our snacks, but it’s totally worth it): fresh sliced fruit, grapes, berries, nuts, seeds and trail mixes (just watch that the ingredients are gluten-free).  Some of the brands we love are Thunderbird Energetica bars, Larabars, Happy Hemp seeds and Kind Life snack kits.

And remember, it will take some time for your palette to adjust to the difference in appreciating naturally sweetened foods from artificially sweetened ones. There’s a big difference, and it will take a little while for both the cravings to stop, and for you to appreciate healthier foods.

Third, be kind to yourself. This whole journey will take some time to get used to, and you will have moments where you feel stronger than others. If you fall off the wagon into a glutenous cupcake, just get back up again when you’re done, and get back on track. if you’re intolerant or allergic, that misstep will set you back a week or two from the amazing improvements you had enjoyed, but it doesn’t mean you can’t get back to feeling great again.  And if you’re focused on a gluten-free diet because you just feel better when you avoid processed foods, then the same will be true of your progress, though you won’t feel nearly as bad as the allergic folks will from a set back.

So what do you think? Are you feeling better since going gluten-free? I’d love to hear your stories, what works for you, or even if you gave up and went back to gluten. No judgements – we can always take away something from other people’s journeys, so please share below!


Last night while browsing some of my favorite Facebook pages, I ran across this recipe on Primal Fitness Performance’s page; another version of the quick and simple, grain-less lunch option for our kid’s lunch boxes. I love the simplicity of the recipe, and it reminds me a bit of the sushi roll I posted about recently! The salt of the cucumber pairs well with the creamy avocado, and while the original recipe calls for shaved turkey, you can also substitute shaved chicken, or beef.

Keeping it vegan? Go with humus and sliced bell peppers, or perhaps some puree’d beans and sprouts.

In case you missed our last post on how to keep your child’s lunchbox grain-free, you can view it here and see how we suggest using sliced apples in place of bread.

There are so many smart options for going grain free these days, taking gluten-free to a new level. Remember, gluten allergies often go hand in hand with other grain sensitivities so if you’re trying a grain free diet to help heal your gut, this is a great option that lets you still pick up your ‘sandwich’.

Please share your ideas for grainless sandwiches with us in the comments below, and remember to always live inspired!

Paleo Turkey Avocado Cucumber Rolls

Prep Time: 10 minutes

Total Time: 10 minutes

Paleo Turkey Avocado Cucumber Rolls

Ingredients

  • 2 cucumbers
  • 8oz sliced turkey breast
  • 2 ripe avocado

Instructions

  1. First, peel your cucumbers - you can leave a tiny bit of skin on for the added texture if preferred.
  2. Cut the cucumber in half (not lengthwise!).
  3. Next, with a sharp paring knife, make an initial indentation lengthwise and start cutting the core of the cucumber out, creating a hollow log shape out of the cucumber.
  4. Next, core and slice your avocado in quarters.
  5. Layer the turkey in the cucumber and place the avocado in the turkey.
  6. Voila! You have yourself a fresh, paleo snack that’s refreshing and delicious!
  7. Feel free to add some basil or other herbs to add more flavors.

Notes

Serves 2 Shared from Primal Fitness Performance

http://inspiredeats.net/keeping-your-childs-lunch-box-grain-free-with-cucumber-sandwich-rolls/

Sometimes I miss the salty crunch of chips, pretzels or crackers, so when the urge kicks in I turn to these guys; roasted, spicy chickpeas. They’re a tasty, easy to make treat and I typically have all the ingredients in the pantry. I discovered the recipe on What’s Gaby Cooking and I have to admit, I love the warm, spicy, toasty, salty combo! They make a great snack on their own, or as a side dish to your fave main course. 

All you need is 30 minutes, a can of garbanzo beans and some typical household spices. Kick up the heat for those of you with a flair for spicy. Enjoy!


Allergy-free, paleo roasted chickpeas

Prep Time: 5 minutes

Cook Time: 20 minutes

Total Time: 25 minutes

Yield: 1 yummy bowlful

Allergy-free, paleo roasted chickpeas

Ingredients

  • 1 15-oz can Garbanzo Beans
  • 1/2 tsp salt
  • 1/2 tsp garlic powder
  • 1/2 tsp red pepper flakes
  • 1/2 tsp paprika

Instructions

  1. Preheat the oven to 400 degree F.
  2. Drain and rinse the garbanzo beans in a large colander. Continue to rinse until all the foamy liquid goes away.
  3. Line the counter with a few sheets of paper towel. Place the drained garbanzo beans on top of the paper towel and let them dry for a few minutes.
  4. Once the beans are dried, place them on a parchment lined baking sheet. Drizzle with olive oil and then sprinkle on the spices. Using your hands, toss the beans around so they are all fully coated.
  5. Place the baking sheet in the oven for 20 minutes and all to roast. After 20 minutes, remove the pan from the oven and give the beans a little shake and then place back into the oven for another 20 minutes.
  6. Season with salt if needed once fully roasted and then serve.
http://inspiredeats.net/allergy-free-paleo-roasted-chickpeas/

Are you gluten-free, but still want to enjoy some of the sinfully delicious recipes you were used to, such as P.F Chang’s Mongolian Beef?  Well now you can! Here’s a recipe for PF Chang’s Mongolian Beef (one of my hubby’s faves) as prepared gluten free. 

Note the nutritional content on the recipe below and keep in mind this is a splurge/indulgence 🙂 

Enjoy!


P.f. Chang’s Mongolian Beef (Gluten Free)

Prep Time: 30 minutes

Cook Time: 30 minutes

Yield: 2

Serving Size: 1 (492 g)

Calories per serving: 848.2

Fat per serving: 23.4

Ingredients

  • 2 teaspoons vegetable oil
  • 1/2 teaspoon ginger , minced
  • 1 tablespoon garlic , chopped
  • 1/2 cup tamari soy sauce (aka gluten-free soy sauce. DO NOT use regular soy sauce)
  • 1/2 cup water
  • 3/4 cup dark brown sugar
  • vegetable oil , for frying (about 1 cup)
  • 1 lb flank steak
  • 1/4 cup cornstarch (verify it has no wheat or wheat flour)
  • 2 large green onions

Instructions

  1. Make the sauce by heating 2 tsp of vegetable oil in a medium saucepan over med/low heat.
  2. Don't get the oil too hot.
  3. Add ginger and garlic to the pan and quickly add the soy sauce and water before the garlic scorches.
  4. Dissolve the brown sugar in the sauce, then raise the heat to about medium and boil the sauce for 2-3 minutes or until the sauce thickens.
  5. Remove it from the heat.
  6. Slice the flank steak against the grain into 1/4" thick bite-size slices.
  7. Tilt the blade of your knife at about a forty five degree angle to the top of the steak so that you get wider cuts.
  8. Dip the steak pieces into the cornstarch to apply a very thin dusting to both sides of each piece of beef.
  9. Let the beef sit for about 10 minutes so that the cornstarch sticks.
  10. As the beef sits, heat up one cup of oil in a wok (you may also use a skillet for this step as long as the beef will be mostly covered with oil).
  11. Heat the oil over medium heat until it's nice and hot, but not smoking.
  12. Add the beef to the oil and sauté for just two minutes, or until the beef just begins to darken on the edges.
  13. You don't need a thorough cooking here since the beef is going to go back on the heat later.
  14. Stir the meat around a little so that it cooks evenly.
  15. After a couple minutes, use a large slotted spoon to take the meat out and onto paper towels, then pour the oil out of the wok or skillet.
  16. Put the pan back over the heat, dump the meat back into it and simmer for one minute.
  17. Add the sauce, cook for one minute while stirring, then add all the green onions.
  18. Cook for one more minute, then remove the beef and onions with tongs or a slotted spoon to a serving plate.
  19. Leave the excess sauce behind in the pan.

Notes

Amount Per Serving % Daily Value Calories 848.2 Calories from Fat 211 24% Total Fat 23.4 g 36% Saturated Fat 8.4 g 42% Cholesterol 154.2 mg 51% Sodium 4255.9 mg 177% Total Carbohydrate 103.1 g 34% Dietary Fiber 1.5 g 6% Sugars 81.9 g 327% Protein 56.7 g 113

http://inspiredeats.net/p-f-changs-mongolian-beef-gluten-free/

Easy breezy, this brisket recipe is a no-brainer for an easy and delish dinner option.

With the use of Braggs Aminos, its not only paleo but gluten-free friendly too! So grab the crockpot, set it on simmer and come home to a house filled with the amazing aroma of brisket.  We enjoy this with mashed cauliflower, but asparagus, broccoli or any other fave veggie are great as well. 


(more…)

Today I stumbled upon a new site and found some delish looking baked zucchini chips which are a perfect solution for a no-grain diet. The site isn’t focused on allergy-free eating, but if you find yourself wanting some inspiration for yummy looking baked goods, it seems like Maggie of Vittles an Bits will be a good source I’ve copied her comments about the recipe below for reference and note that she’s very responsive if you have any questions so feel free to post them on her site.

For reference here is her link

Baked Zucchini Chips

Ingredients

  • 1 zucchini
  • Cooking spray
  • Seasoned salt, or other seasoning(s) of your choice

Instructions

  1. Preheat oven to 225 degrees Fahrenheit. Line a baking sheet with parchment paper or nonstick foil, and spray with canola oil. Set aside.
  2. Slice zucchini into thin medallions, about the thickness of a quarter. (You can either use a knife & a very steady hand, or a mandoline slicer.)
  3. Lay out slices on prepared baking sheet, and spray tops lightly with additional cooking spray. Sprinkle with seasonings of your choice. (A note on seasoning, however – use LESS than what seems appropriate. These shrink considerably in the oven, and if you use too much it gets very concentrated. It’s better to end up underseasoning and add more later.)
  4. Place in preheated oven and bake 45 minutes. Rotate baking sheet (don’t flip the chips though), and bake an additional 30-50 minutes, until chips are browned and crisped to your liking. These are best eaten within a couple hours of removing from the oven, as they start to get chewy if left out. One zucchini makes one serving (1/4 C. – 1/3 C. of chips depending on the size of your squash).
http://inspiredeats.net/baked-zucchini-chips/
 

From Maggie: 

To me, these chips taste kinda like thin & crispy pumpkin seeds.  (I guess that shouldn’t be too much of a surprise since they are relatives in the squash family).  Much lighter, but the taste is similar.

And the seasoning possibilities are endless – you can tailor them to your liking.  Garlic, paprika, chili powder… use your imagination!  I went with a basic Seasoned Salt and they came out great.  But whatever you choose, just make sure you go easy on the seasonings, and only use a little bit – these do shrink a lot in the oven, so what looks like a reasonable amount on the raw veggies could turn out to be way too much!

(more…)

For those of you following a gluten free and paleo diet, the occasional comfort food meal is encouraged, so long as you stick to the healthy Paleo guidelines. So when I saw this post on Cavegirl Cuisine’s site for a gluten free, paleo eggplant recipe, I had to share it. Our version is slightly modified, but you can see her original version here

What I love about this recipe is the almond meal which helps the eggplant maintain a crunchy, fried, aspect to it, even though it’s baked.  So you can enjoy this guilt-free, delish version of a formerly unhealthy meal! 

Paleo “Fried” Eggplant Marinara (on a bed of greens)

Prep Time: 15 minutes

Cook Time: 30 minutes

Total Time: 30 minutes

Yield: 4 servings

Paleo “Fried” Eggplant Marinara (on a bed of greens)

Ingredients

  • 1 medium eggplant
  • 2 cups almond meal
  • 1 cup marinara sauce or fresh diced tomatoes
  • 2 eggs
  • 4 cups of greens (I used arugula)
  • 1T macadamia nut oil

Instructions

  1. Preheat oven to 400 degrees.
  2. Line two cookie sheets with parchment paper.
  3. Peel eggplant and slice into 1/4 inch rounds.
  4. Whisk eggs in a medium bowl.
  5. Place almond meal in another bowl.
  6. Dredge each eggplant round in the eggs and then coat with the almond meal on each side.
  7. Place on the parchment paper
  8. Repeat for all of the eggplant.
  9. Drizzle or mist the oil over the coated rounds.
  10. Salt and pepper lightly.
  11. Cook for 30 minutes.
  12. In the meantime, place a cup of greens on each plate.
  13. Divide the cooked eggplant among the plates.
  14. Put a 1/4 cup of marinara sauce or fresh tomatoes over the top of each serving. Enjoy!
http://inspiredeats.net/paleo-fried-eggplant-marinara-on-a-bed-of-greens/


For those of us following the Paleo or Primal Blueprint diets, pancakes are a thing of the past, right?

At least, that’s what I thought until I ran across this recipe on Mark’s Daily Apple. It’s definitely more carb-centric than much of what he suggests but as he states many times, those of us following the Primal Blueprint can allow for an indulgence now and then and still keep on track with our goals for health, wellness, weight loss, etc. That said, this is a delish and healthy indulgence and one I’m excited to make again this weekend. I hope you enjoy it too!


Paleo ‘Pancakes’

Prep Time: 10 minutes

Cook Time: 10 minutes

Total Time: 20 minutes

Yield: 4 pancakes

Paleo ‘Pancakes’

Ingredients

  • 2 bananas
  • 1 egg
  • 1-2 Tbs almond butter
  • fresh blueberries
  • 1/4 cup walnuts, chopped
  • 1 tsp. coconut oil

Instructions

  1. Mash the bananas, add the egg and mix well.
  2. Stir in the almond butter, adding more than a tablespoon if you want a more pancake-like texture.
  3. Warm the coconut oil in a pan and pour batter into small cakes.
  4. Brown on each side and serve warm topped with fresh blueberries.
  5. Enjoy!!
http://inspiredeats.net/paleo-pancakes/


Ahh, the juicy, sticky, chewy goodness of fruit rollups brings back memories of  childhood –  twisting and pulling it from my teeth after making all sorts of weird shapes with it. Now that I think about it, I’m not sure how it got that pliable quality, and its probably best I dont know!

But, since I’m living Paleo, and trying to keep my son on the Paleo track too, they aren’t something I let him enjoy. So, when I found this recipe I was excited to give it a shot for him, and excited at how simple and clever the idea is!  They take a bit of time to bake, so you’ll have to plan ahead for a time when you’ll be around for a couple hours to let them bake, but they stay good for a couple weeks so go ahead and make a big batch and keep slipping them in your kids lunch boxes and feel good about it!

(more…)

Sometimes it’s hard to keep things interesting at breakfast when you’re on a gluten-free and paleo diet. I’ve read of some great paleo options that aren’t gluten-free so I can’t try them, so when I ran across this recipe today I fell in love with it – too bad it’s mid afternoon and I’ll have to wait till tomorrow morning to try them!


  (more…)