When we signed up for our weekly veggie share we made a pact to challenge our comfort zone and use every item, regardless of whether we’ve never heard of or tasted it.  Occasionally the obscure squash will throw us off a bit, but for the most part we’ve done pretty well learning to use all the items each week. In fact, we’re almost disappointed when something common, like lettuce, is thrown in the mix. This time of year our weekly veggie share is packed with items like crisp green apples, kale, cauliflower and mushrooms which are all items we regularly use so there’s not much exotic going on in our kitchen.

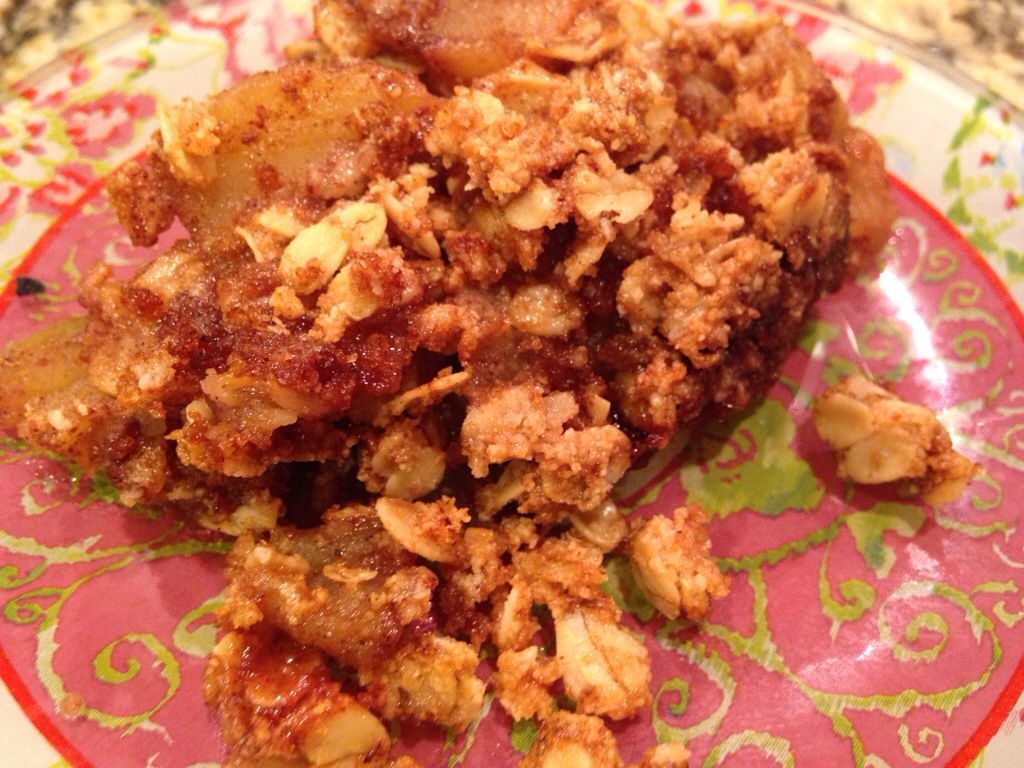
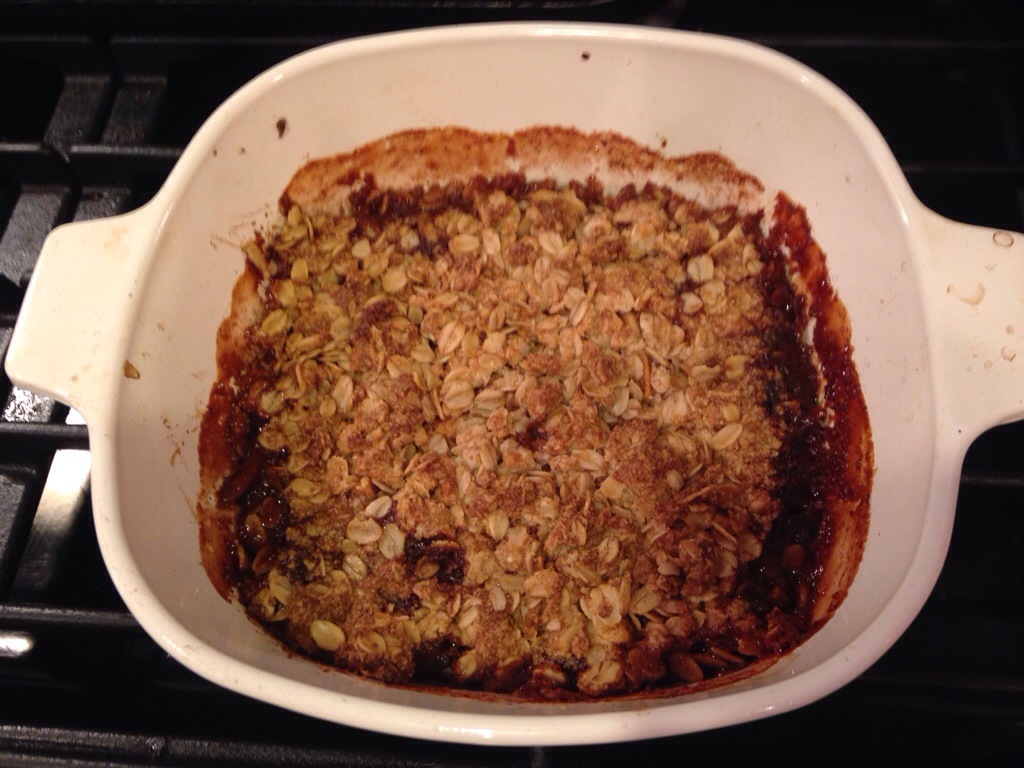
So when you find yourself with 8 delicious, crispy green apples, you can either throw them in a smoothie, juice them, make homemade apple sauce, or make something much more enjoyable. Like  Baked Apple Crisp.

Think apple pie, but healthier.

20140120-141717.jpg

Vegan, gluten-free Baked Apple Crisp

Vegan, gluten-free Baked Apple Crisp

Ingredients

  • 3 Large(or 4 small) Apples (Peeled and Sliced)
  • 1 Tbsp Lemon Juice
  • 1 tsp Ground Cinnamon
  • 1/4 tsp Ground Nutmeg
  • 4 Tbsp Agave, Honey or Maple Syrup
  • 1/3 Cup Almond Flour
  • 1/2 Cup Gluten Free Rolled Oats
  • 1/2 tsp Baking Soda
  • 1/2 tsp Baking Powder
  • 1 Pinch Salt
  • 2 Tbsp Coconut Oil (or Olive Oil)

Instructions

  1. Pre-heat oven to 350 F.
  2. In a bowl toss sliced apples, lemon juice, cinnamon, nutmeg and 1 tbsp of agave, honey or maple syrup.
  3. Lightly oil an 8 x 8 glass baking dish.
  4. Add apple mixture and bake for 10 minutes.
  5. While apples bake, mix the rest of the ingredients in a bowl.
  6. Break up coconut oil and mix it in as well as you can.
  7. After baking the apples for 10 minutes remove them from the oven.
  8. Sprinkle and spread the topping mixture over the apples.
  9. Place back in the oven and bake for 20-25 minutes.
  10. Apple Crisp is done when the topping is golden brown.
http://inspiredeats.net/vegan-gluten-free-baked-apple-crisp/

20140120-141659.jpg


I remember the first time I ever had mole sauce; I was visiting some friends in San Diego and we went to a highly recommended Mexican restaurant that served some incredibly delicious food – as authentic as we’ve ever had in Mexico. And when I asked the waiter what he recommended, he didn’t hesitate to suggest the Chicken Mole as his favorite. So I took his advice, placed the order, and so began my love affair with Mole sauce.

Over the years, I’ve tried to replicate it, but never been successful, though I keep at it in an ever-stubborn quest to get that perfectly balanced flavor that I still crave. And since we’re managing a couple food allergies around here, it’s nice to have a dish that feels more exotic than it is, which is one of the reasons I adore Mole. Not to mention that it’s a great way to sneak in some anti-oxidant rich Cocao into your diet!

And while I love mole sauce, I know it’s an acquired taste for many people, so when I make it for our son I use a variation that he prefers which leaves out the peppers and pumpkin seeds, and relies on peanut butter to give a toasty flavor to the sauce. I hope this version works well for you too, and would love to hear your thoughts on it below. Remember, this isn’t authentic Mole, but it’s a great way to get your kids to love it!


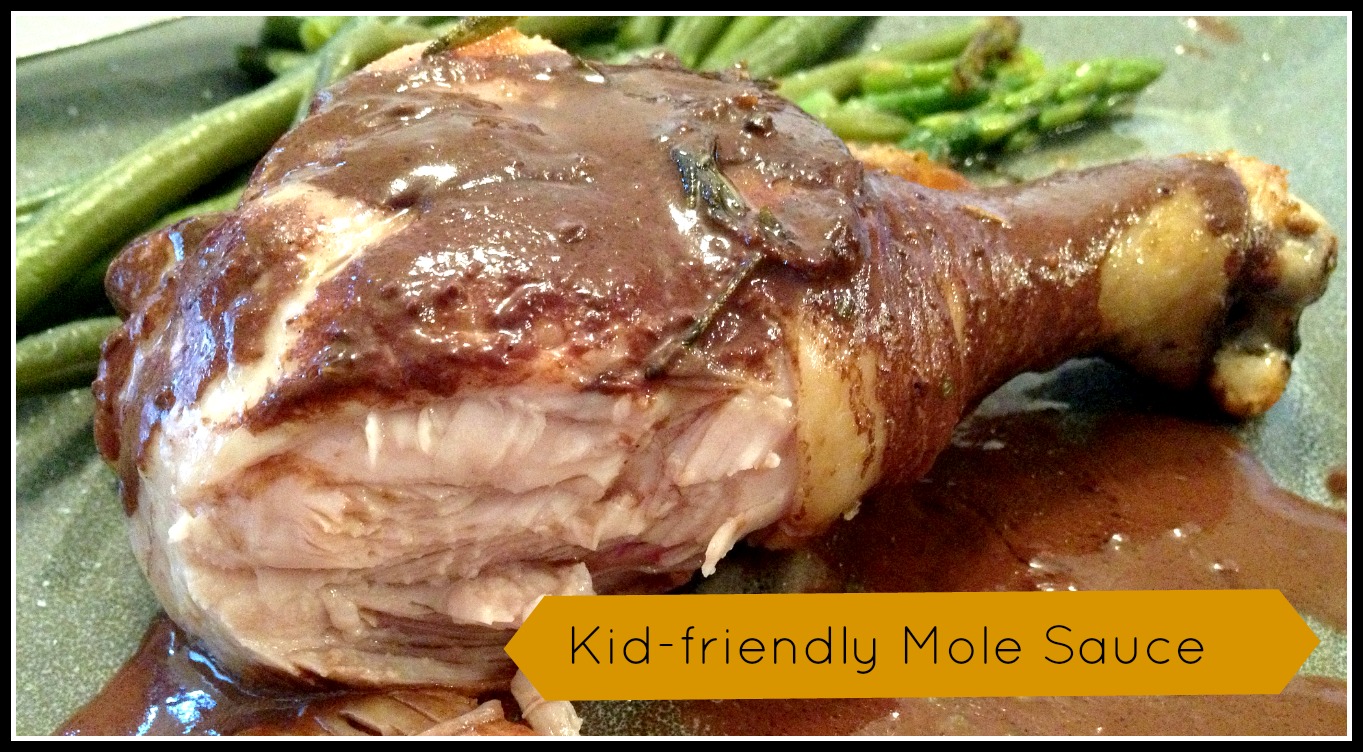
Chicken legs with Mole Sauce (Gluten & Dairy free)

Prep Time: 10 minutes

Cook Time: 30 minutes

Total Time: 40 minutes

Yield: 4 servings

Chicken legs with Mole Sauce (Gluten & Dairy free)

Ingredients

  • 4 Chicken legs
  • 1/2 Cup Olive Oil
  • 1/2 cup fresh rosemary
  • 1 Tbsp Oregano
  • Salt & Pepper to taste
  • Mole:
  • 1/2 cup hot water
  • 2 tablespoons olive oil
  • 1 1/2 medium onions, chopped
  • 2 garlic cloves, minced
  • 1 3/4 cups GF chicken stock
  • 3 tablespoons smooth Organic peanut butter
  • 1 tablespoon Coconut Palm sugar
  • 1 teaspoon dried oregano
  • 5.5 ounces dark Cocao, chopped
  • Kosher salt and freshly ground black pepper

Instructions

  1. Wash chicken legs and set aside.
  2. Preheat skillet over medium high heat until hot.
  3. Add 1/2 cup Olive Oil to skillet and let heat (approx 1 minute)
  4. Add chicken to the oil.
  5. Let simmer for 5 minutes, then flip chicken over.
  6. Cook another 5 minutes, flipping once.
  7. Continue to cook chicken for a total of 25-30 minutes until chicken is thoroughly cooked, flipping occasionally to ensure it's evenly browned.
  8. Sprinkle with fresh rosemary, oregano, salt & pepper to taste.
  9. Flip once more and reduce heat to low.
  10. For the Mole:
  11. In a heavy large saucepan, heat the oil over medium heat.
  12. Add the onions, season with a little salt and saute 3 minutes, or until translucent.
  13. Then add the minced garlic and cook 2 minutes more.
  14. Transfer onion and garlic mixture to blender with all remaining mole ingredients (except for the chocolate and chicken) and blend until very smooth.
  15. Transfer the sauce to a medium saute pan and bring to boil over high heat.
  16. Reduce the heat to medium, cover and simmer 20 minutes.
  17. Stir in the chocolate.
  18. Season the mole with salt and pepper to taste.
  19. Transfer chicken to serving dish and pour mole sauce over each leg, leaving some for a side dish that guests can use as they prefer.

Notes

To add the typical mole heat, add 5 dried pasilla chiles, (or dried anocho chiles) stemmed and seeded to the sauce. If using them, be sure to reconstitute the dried chiles by soaking them in 1 1/2 cups hot water for 15 minutes, then drain and set aside, adding them to the blender with other ingredients.

http://inspiredeats.net/chicken-legs-with-mole-sauce-gluten-dairy-free/


Like many of us are now, I’m craving comfort foods. Perhaps its the colder weather, perhaps its the Shady Hook tragedy, but this is a time when I’m craving comfort. And for my family, comfort = a warm bowl of fresh, homemade soup.

One of my fave soups is a carrot, ginger, cashew blend that’s super easy to make and is a perfect starter soup, or as a meal on its own. We tend to have a small cup of soup before our holiday meals, and while butternut squash is another favorite, this yummy carrot, ginger soup is a great alternative.  For those of you who are following a raw diet, you can juice the carrots and add 1 whole avocado. Rather than sautéing the onions and spices, simply add them to the carrot juice and blend, though you may want to add pine nuts for an enhanced nutty flavor.  I’ll follow this up with a full raw version, but for  now, I’m sharing the cooked version as I’m craving warmth.

Remember, the cashews give this a creamy base without the need for dairy, or dairy replacers, but if you’re nut sensitive you can swap out the cashews for a cup ‘or so’ of your dairy free milk of choice ( I would suggest full-fat coconut milk).

I hope this simple recipe gives you some much needed warmth and comfort. Make an extra batch and share with friends and family. Give the gift of loving warmth with homemade soup. Enjoy!

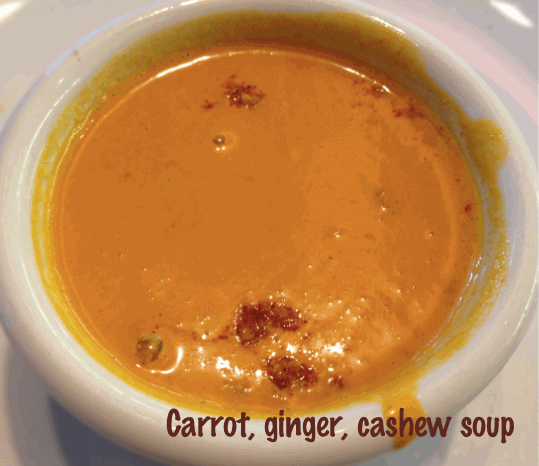
carrrot, ginger, cashew soup


Gluten & Dairy- free Carrot, Ginger & Cashew Soup (paleo)

Ingredients

  • 2 lb. carrots, peeled and cut into 1 inch pieces
  • 4 cups water
  • 1 Tablespoon olive oil
  • 1-1/2 cups chopped onion
  • 2 cloves garlic, minced
  • 2 Tablespoons freshly grated ginger
  • 1-1/2 teaspoons salt
  • 1/4 teaspoon cumin
  • 1/4 teaspoon ground fennel
  • 1/4 teaspoon cinnamon
  • 1/4 teaspoon allspice
  • 3-4 Tablespoons fresh lemon juice
  • 3/4 cup ground cashews
  • Crushed pecans or walnuts for toppings (if desired)

Instructions

  1. Place the carrots in a medium saucepan and add the water.
  2. Bring to a boil, cover and cook until the carrots are very tender (10-15 minutes)
  3. Heat the olive oil in a small pan.
  4. Add onion and cook over medium heat until translucent.
  5. Add ginger, garlic, salt and spices.
  6. Lower the heat and continue to saute for another 8-10 minutes, until the onions are soft.
  7. Stir in lemon juice.
  8. Combine the spice-onion mixture with the carrots and cashews.
  9. Slowly add the water used to boil the carrots.
  10. Use a handheld immersion blender to puree the mixture until smooth, adding water as needed until you reach desired thickness.
  11. Sprinkle with crushed pecans or walnuts if desired.
  12. Enjoy!
http://inspiredeats.net/gluten-dairy-free-carrot-ginger-cashew-soup-paleo/


Last night we had some friends over for dinner, and with 3 kids and a few special diets to accomodate, I wanted a meal that was quick and easy, and could keep a vegan and some gluten and dairy free peeps happy.

I needed something that wouldn’t keep me in the kitchen the whole time cooking since I had invited a friend and her 2 boys over, so I chose this Brazilian Chicken which has a rich, creamy texture in a dairy-free sauce. This recipe allowed me to prep some of the ingredients ahead of time, which left me time to chit chat, and the boys time to bond. Here’s a pic of our boys; her little guy just adores my son, and since mine is an only child, he loves the attention 🙂

Since I was starting with a base of gluten and dairy-free, this Brazilian Chicken is a great choice as it’s a Paleo meal that uses some simple spices to add an exotic flair, and gets it gravy-like consistency from rich coconut milk. The process is simple, and as my friend said, it “tastes a lot more complicated than it really is”. Gotta love an impressive dish that doesn’t kill you in the kitchen!

While this is adapted from All Recipes  we’ve made some adjustments along the way to make it our own and accomodate a nightshade free diet (the original recipe calls for tomatoes and jalapeño peppers).  I’m sure you can do the same by adding in some of what we’ve omitted  including cayenne pepper, jalapeños and parsley.

Turns out this recipe kept most of the guests happy, with the older boys devouring the chicken, though the littlest guest wasn’t having any of it.

While we tried our best, he wasn’t digging the chicken, spinach or roasted carrots but he was happy to chill with his big brother while he ate the goods. Here he is desperately searching for something yummy in the fridge after deciding he wasn’t loving my dinner.

Glad I could keep one of the guests’ bellies full of some good food!

(more…)

Living gluten, dairy and grain free means I sometimes miss foods of my past, especially around the holidays. It’s true that when you cut carbs and sugar from your diet, cravings fade, but what can sometimes stick around are the emotional cravings tied to foods that elicit a happy response. Meaning, the foods from our past that remind us of happy times can trigger a craving that feels just as strong as those which are more of a chemical response brought on by the consumption of carbs and sugar. If you’re curious about how sugar works against you and causes a whole crazy/scary range of health issues, check out this post from The Whole 30 – creators of the leading Paleo 30 day diet challenge. These guys have 10s of thousands of clients who have successfully gone through the Whole 30 challenge, and reversed some pretty amazing health issues from auto-immune disorders to diabetes, and a bunch of stuff in between.

So when I notice an emotional craving coming on, I try to have foods on hand that satisfy me in a similar way, without causing a negative ripple effect on the progress I’ve worked so hard to achieve. If you’re like me, and face the effects of an auto-immune disorder coupled with some other genetic deficiencies and a host of food allergies, than you can relate to the feeling of occasionally being overwhelmed by your restrictions. And no matter how devoted I am to health and healing, I sometimes find myself dreaming of the homemade pastries or potato and gluten-ful dishes of my past.

So when that craving hit today, I threw a butternut squash in the oven, roasted it for an hour, and out popped a semi-sweet, soft and delicious treat that didn’t exactly kill the cravings, but it helped me feel better!

I think the key to sticking with a restrictive diet when cravings hit is making sure you have foods on hand which keep you happy and satisfied so you don’t turn to the bad stuff instead.  For me, that means having root veggies and winter squashes alongside nuts and dark chocolate treats to keep my cravings at bay.

Here’s a quick and easy recipe for some roasted butternut squash that makes my belly happy. Enjoy!


Gluten-free, Vegan Roasted Butternut Squash

Gluten-free, Vegan Roasted Butternut Squash

Ingredients

  • 1 Butternut squash, cut in half (lengthwise)
  • Olive Oil for drizzling
  • Salt & Pepper to taste
  • Dash of Pumpkin Pie Spice
  • 1 tsp Ghee, butter or oil

Instructions

  1. Preheat oven to 400 degrees
  2. Place foil on a roasting pan and add some water to coat the bottom of the pan
  3. Place sliced butternut on roasting pan, flesh side down
  4. Drizzle with olive oil to coat the squash fully - feel free to rub oil on the skin to ensure its fully coated
  5. Bake in oven for 45-50 minutes, until desired tenderness is reached
  6. Remove from oven and flip squash so flesh side is up
  7. Scoop out seeds and stringy flesh around the seeded area
  8. Scoop remaining squash into a bowl and mix with 1 tsp Ghee, butter or oil of choice
  9. Season with Pumpkin Pie Spice and Salt & Pepper to desired taste
  10. Mash with fork
  11. Serve immediately
http://inspiredeats.net/gluten-free-vegan-roasted-butternut-squash/


Who says you can’t feel summer in the midst of a cold weather?

Thanks to our guest author, Manilyn with Better Cater for sharing this simple, healthy and oh-so-summery treat with us!

A bowl of healthy, fresh, and lusciously-yummy vegetarian salad will do so much to supply the body with all the nutrients you need to stay slim, fit and healthy at the same time. Even the simplest homegrown ingredients raised in your backyard can offer you a rich dose of nutrients that’ll surely do so much to keep your body at its best.

Tomatoes are all time favorite and, surely, any cuisine is never complete unless there are slices of them to add health and flavor to it. I’ve always loved to cook something nice even with just a bunch of tomatoes aside. I can put them on top of pizzas and spoil it with lots of cheese, or make a bowl of fresh and warm tomato sauce. But of course, nothing beats tomatoes when they’re tossed over for a plate or two of tomato salad. I use heirloom green or yellow tomatoes, which taste so nice, or I can also make something special with a bunch of reds. I once made a salad with kiwi fruit, I also tried pairing tomatoes with avocados, or green beans, and the result was a feast that my family and friends can’t help but love.

Right now, I’m going to share with you another nice tomato salad recipe. It’s a tomato salad mixed with red kraut. I tried this for the pot luck dinner at a friend’s house a few weeks ago and it was a huge hit! I brought two bowls of it and both were tidied up by the time I went home.

Tomato salad with red kraut is refreshing, tummy-filling and very easy-to-do. In fact, it won’t take more than 30 minutes to prepare! Grab a piece or two of fresh tomato, chop and mix with 1 clove fresh garlic, minced ¼ cup of red sauerkraut, a teaspoon or two of apple cider vinegar, olive oil,  oregano and oregano.  Store in the fridge and serve with sliced avocado; this is perfect to munch on warm afternoons or to pair with cool outdoor dinners.

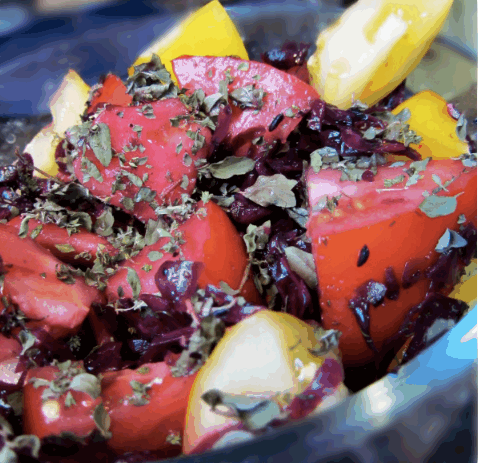
Gluten free, Dairy free Tomato Salad with Red Kraut

Prep Time: 15 minutes

Total Time: 15 minutes

Gluten free, Dairy free Tomato Salad with Red Kraut

Ingredients

  • Fresh tomatoes (as many as you want. You can use red, yellow, orange, or green or mix all of them for a colorful bonanza!)
  • Cloves of fresh garlic, minced (again, you have as many as you want for a rich flavor)
  • ½ cup red sauerkraut (you can use homemade or over-the-counter, but be sure it’s unpasteurized)
  • 2-3 tablespoons apple cider vinegar
  • 2-3 tablespoons olive oil
  • 1-2 tablespoons dried oregano (better if homemade)
  • sea salt, pepper and seasoning to taste.

Instructions

  1. Chop tomatoes into cubes or bite sizes and toss all the ingredients together.
  2. Mix red kraut and mix gently.
  3. Keep inside the fridge and wait until cold to serve.
http://inspiredeats.net/summer-themed-gluten-dairy-free-recipes-for-a-cold-wintry-day/

What’s nice with recipe is you can serve this any time of the year, whether you’re having this for a snack one a lazy night ( when you don’t want to do anything but watch movies) or bring this over for a picnic with friends. This recipe will always suit everyone’s palate because it’s light and refreshing, so you’ll find it a delight to match your cravings.

You can have you own diet-friendly meals prepared fresh and hot and fitting that’ll imbue the warmth of summer this season!

About the Author –  This article is contributed by Manilyn Moreno, on behalf of Better Cater, a company providing catering software that is easy to learn and use.

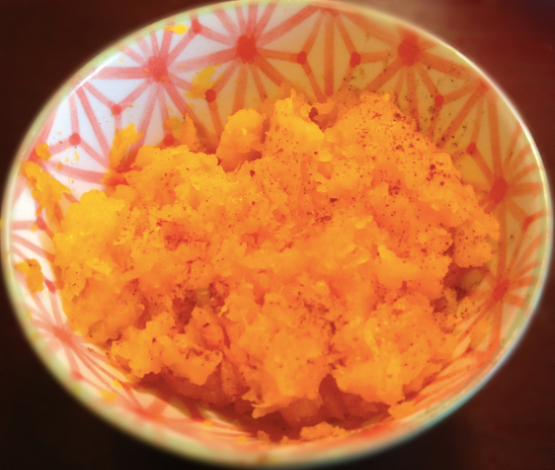
Gluten-free and Vegan, this roasted acorn squash mash recipe is a delish and easy side dish!

Sundays are my favorite day of the week; a lazy brunch followed by an early dinner, catching up with stuff around the house, friends coming over to visit, and just enjoying life in general. One thing I refuse to do on Sundays is grocery shop. I have to admit that while I love food, I hate grocery shopping, so I won’t taint my favorite day of the week with a mundane and annoying process (yep, that’s how I feel about it). I wish I looked forward to it like some of my friends; they revel in browsing the fresh produce, and gain recipe ideas from just wandering the aisles. Me? Not so much. It seems I always pick the worse time to go to the store, when the aisles are jam packed and I can’t stop to think about the foods I need to get. Babies are crying, employees are blocking the aisles while they restock the shelves, and I struggle with whether I’m buying the freshest produce so it doesn’t spoil in a couple days before I get around to making it. But, I digress.
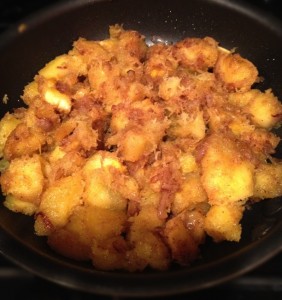
So last night we made one of our most simple and fave Pork Chop recipes, using ingredients we tend to just have around the house, and decided to spice things up a bit with some warm mashed Acorn Squash. I love this time of year, when most all farmers markets and grocery stores are lined with fresh squash varieties, and squash and pumpkin recipes are all the rage online. I’ve found some really interesting recipes online, and last night I decided to add some of the juice from the chops with the squash. The verdict? A happy family!

Here’s the recipe for the Pork Chops which inspired the mashed squash. Since the Pork Chops are made with a warm butter and apple glaze, I decided to use a bit of the sauce before it became a glaze, and added it to the squash.

If you choose to make the squash by itself, you can mimic the apple, butter sauce which I’ll list in the recipe below.  Note I used Ghee instead of butter, and avoid The Vegan butter substitutes as much as possible. If you’re using products like Earth Balance, you may want to do a bit of reading on the ingredients; while some use non-GMO oils, it’s important to note that non-organic canola and soy have a 93 percent chance of being genetically modified. There are a number of studies that show neither are ideal oils for human consumption—organic or not. Canola contains fats that experts say should not be exposed to heat, and canola has been shown to deplete vitamin E levels in mammals, while the plant itself (rapeseed) is an insect repellent and used in industrial manufacturing. Soy oil has been linked to breast cancer and its high levels of Omega-6s linked to inflammatory diseases.

I reach for Coconut Oil first, Olive second, and whenever I want that buttery flavor, I turn to Ghee. A good rule of thumb – anything butter can do, pure coconut oil can do (better). And healthy fats, like coconut oil, hemp and flax seed oil, walnut, almond and olive oil offer a wider range of benefits and unrivaled flavor than processed spreads.

So check out the recipe below for my Vegan, Gluten-free Mashed Acorn Squash and plan to pair it with any of your favorite Vegetarian, fish or meat dishes that are simply grilled or use a basic Mediterranean or Indian spice.

Roasted Acorn Squash Mash (Gluten Free, Dairy Free, Vegan)

Roasted Acorn Squash Mash (Gluten Free, Dairy Free, Vegan)

Ingredients

  • 2 medium acorn squash
  • 3 tablespoons butter
  • 2 onions, thinly sliced
  • 3 cloves garlic, minced
  • 1 teaspoon ground coriander seed
  • 1/2 teaspoon freshly grated nutmeg
  • 1/2 teaspoon salt

Instructions

  1. Preheat the oven to 375 degrees F (190 degrees C).
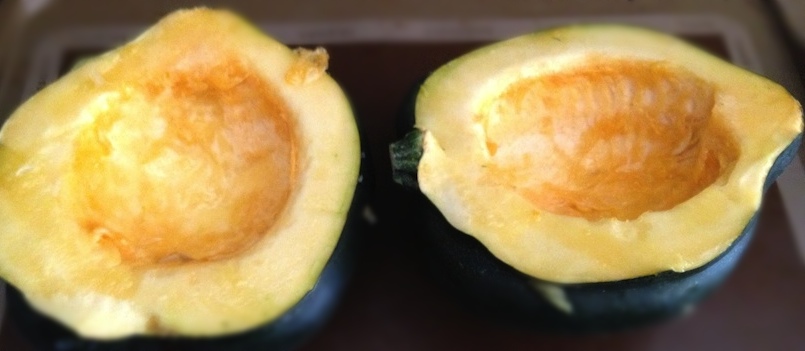
  2. Cut acorn squash in half and drizzle with olive oil.
  3. Roast them cut side up on a baking sheet for 50 minutes or until the flesh is just tender.
  4. Let the squash cool for 20 minutes.
  5. In a large skillet over medium heat melt the butter and add the onions.
  6. Stirring occasionally, cook the onions for 10 minutes, or until they begin to brown at the edges.
  7. Mix in the garlic, coriander, and nutmeg.
  8. Cook the mixture 2 minutes more; then reduce heat to low.
  9. Spoon the seeds and stringy middle out of the squash, and discard these.
  10. Spoon out the flesh, chop it and add it to the onion mixture. Discard the skins.
  11. Heat and stir the squash-onion mixture, then season it with salt and pepper. Serve the squash hot.

Notes

If you're making this with the Warm Apple Pork Chops, spoon some of the sauce from the pan right before you remove the chops and turn it to a glaze. Add sauce to the squash based on desired taste (I used 1 TBSP).

Alternate options: sauté 1/2 apple (peeled and cored) with 1 TBSP onions in coconut oil or ghee. Add 1/4 cup chicken stock or apple cider vinegar and simmer for 10 minutes. Use this sauce to add to squash to taste.

http://inspiredeats.net/roasted-acorn-squash-mash-gluten-free-dairy-free-vegan/


Let me know once you try this; I’d love to hear some of your favorite squash ideas too!

Live inspired, 

Jen

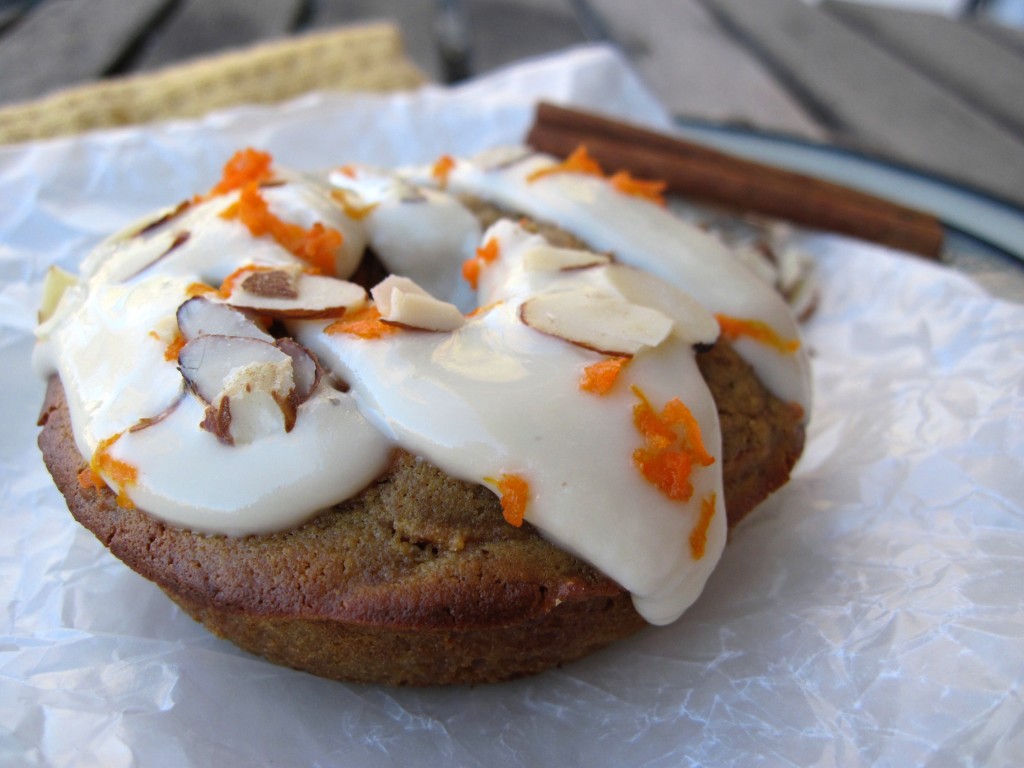
As a child, I used to make Carrot Cake for holiday desserts; it was my grandpa’s favorite cake and I was always so excited to make him happy with my version which I made by shredding whole carrots, using traditional wheat flour. So when I eliminated gluten and grains from my diet, I intitially thought carrot cake was a part of my past.

But, thanks to some of the many talented chefs sharing their amazing culinary skills online, I’ve run across several versions of carrot cake which I can now try. Love it!

You can view the full ingredients list and recipe for this amazing carrot cake donut here on PaleoOMG’s site. I’m excited to give this one a shot once I can eat coconut flour again, so until I make our own version with some subtle substitutes to allow for my dietary restrictions, I wanted to share the original post with you.

If you do get a chance to make these, please comment below and let me know how they turn out! Also, let me know if you make any substititions that work out well.

Ingredients:

3 large carrots, shredded
1/2 cup sunflower seed butter
4 eggs
3 tablespoons coconut flour
2 tablespoons raw honey
1 tablespoon cinnamon
1 teaspoon vanilla extract
1 teaspoon nutmeg
1/2 teaspoon ginger
1/4 teaspoon cloves
1/2 teaspoon baking soda
1/2 teaspoon baking powder
pinch of salt
1/8 cup chopped walnuts (optional-do not use for nut free version)
1/8 cup raisins (optional) Click here for full recipe....


Live inspired,

Jen

We don’t get many cold days in Austin, so it’s a bit surprising to have 50 degree weather in early October; not to worry though – we’ll be back in the 80s again next week :)

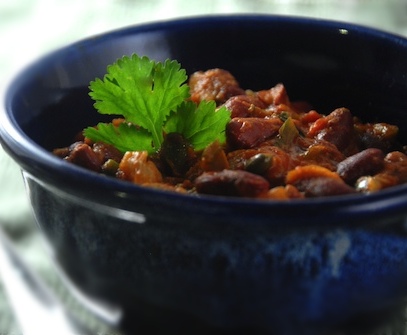
So, I’m taking full advantage of this chilly weather and making homemade dairy-free hot coca and this delicious 2 pepper chili which is a fave around here. It’s super simple to make, though it takes a bit of prepping, but once done you can head out and let it simmer for an hour and a half before coming back to add the final touches, letting it simmer for another 30 minutes before it’s ready.

It’s naturally gluten free with the use of gluten free broth, and I choose to omit the more typical cheese and sour cream that is often used as a topping to make sure it’s dairy free friendly as well. To be honest, we don’t miss the dairy at all, since the chili naturally has such a wonderful flavor, and it’s warm, hearty and satisfying.

Since we spent the day outdoors playing baseball with our son, I’m going to enjoy the evening with a movie snuggled with my guys on the couch.  I hope your plans are equally as satisfying, and as always, that you’re inspired to find some small ways to make big changes in your diet and health. Enjoy!

Gluten free 2 pepper chili is perfect for Fall’s chilly nights

Prep Time: 15 minutes

Cook Time: 3 hours

Total Time: 3 hours, 15 minutes

Gluten free 2 pepper chili is perfect for Fall’s chilly nights

Ingredients

  • 2 tablespoons olive oil
  • 3 1/2 pounds ground sirloin, preferably grass-fed
  • Salt and freshly ground black pepper
  • 1 large onion (1 1/2 pounds), coarsely chopped
  • 8 large garlic cloves, minced
  • 3 large jalapeño chiles, seeded and minced
  • 2 1/2 tablespoons sweet paprika
  • 1/4 cup tomato paste
  • Two 28-ounce cans peeled Italian tomatoes, coarsely chopped and juices reserved
  • 3 cups chicken or beef stock or canned low-sodium broth (GF)
  • Two 19-ounce cans kidney beans, drained and rinsed
  • 2 chipotle chiles in adobo sauce, seeded and minced
  • 1 tablespoon dried oregano
  • Pinch of cinnamon
  • Coarsely chopped cilantro, for serving

Instructions

  1. Heat the olive oil in a large pan.
  2. Add the ground beef in large chunks and season with salt and pepper.
  3. Cook over moderately high heat until brown on the bottom, about 4 minutes.
  4. Stir and cook until most of the pink is gone, about 3 minutes; keep the meat in large chunks. Transfer to a plate.
  5. Pour off all but 2 tablespoons of the fat from the pan (if using grass fed meat you won't need ot pour any out).
  6. Add the onion, garlic and jalapeños and cook over moderately low heat, stirring often, until softened, about 6 minutes.
  7. Add the paprika and cook over low heat, stirring often, until fragrant, about 5 minutes.
  8. Add the tomato paste and cook, stirring, until the paste starts to brown, about 5 minutes.
  9. Transfer to a large pot over medium heat.
  10. Stir in the tomatoes and their juices, the chicken stock and the cooked beef and any accumulated juices.
  11. Bring to a simmer over moderately high heat.
  12. Reduce the heat to low and simmer for 1 1/2 hours, stirring occasionally.
  13. Add the kidney beans, chipotles and oregano and simmer for 30 minutes longer.
  14. Season with salt, pepper and a large pinch of cinnamon.
  15. Remove from the heat and let stand for at least 20 minutes.
  16. Reheat before serving.
  17. Serve with a generous sprinkling of cilantro.
http://inspiredeats.net/gluten-free-2-pepper-chili-is-perfect-for-falls-chilly-nights/

Over the last four years,  our family has switched from plastic to glass containers, gone from traditional household cleaners to all-natural, plant-based versions and are eating foods we had never heard of before. We kind of feel like a lot of these changes are steps back to the way things used to be; free of processing, harmful additives and “helpful” conveniences that many believe are the root of some more common health conditions, including auto-immune disorders, increased rates in food allergies and asthma, autism, ADHD and more.

And while some things have changed quite a bit for our little family, we still find ourselves craving some of the same old comfort foods. Like meatloaf.

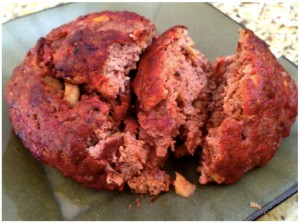
I grew up on meatloaf; we had it once a week, and I was always a big fan.  A perfectly warm, juicy slice of meatloaf with a sweet(ish) glaze for dinner that turned into a cold meatloaf sandwich the next day (if you were lucky enough to have any left over). Fast forward to my grown up, gluten-free, Paleo version and I still love it! My son is a fan too, which is always a good sign since he is sometimes a picky (8 year old) eater.

Since I’m avoiding grains, dairy and eggs, this updated meatloaf calls for an egg replacer and uses apples to help keep the meal moist, and add some healthy carbs to the dish.  I also love to add a touch of Coconut Aminos to give this dish an ever-so-slight but delicious flavor twist.

Alongside our meatloaf, we love a warm Roasted Fig and Pistachio salad and grilled asparagus or lightly steamed carrots with ghee.  Feel free to play around with the spices to suit your tastes, and remember this pairs perfectly with our Paleo BBQ Sauce or Ketchup. Leftovers? Just like meatloaf of my past, this version makes a yummy cold sandwhich on top of gluten free bread, or wrapped in lettuce wrap as I prefer it. 

Easy, healthy and delish. My 3 fave food requirements 🙂

Enjoy!

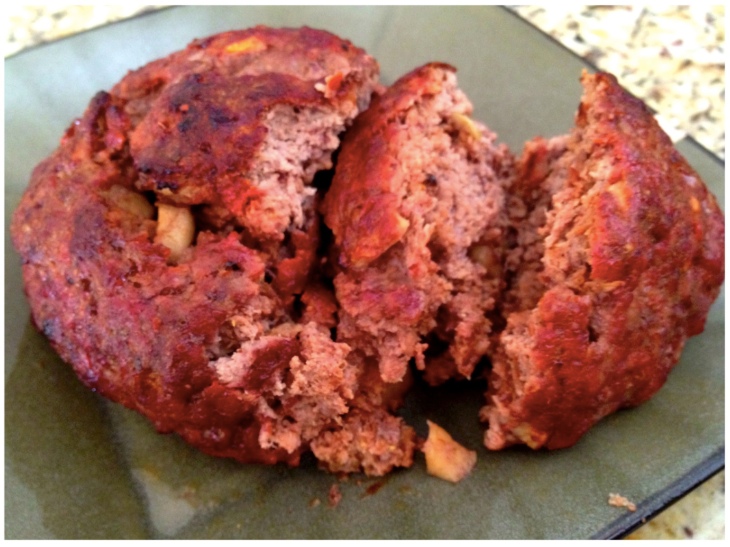
Paleo, Gluten-free Meatloaf

Prep Time: 5 minutes

Cook Time: 40 minutes

Total Time: 45 minutes

Yield: 4 servings

Serving Size: 1/4 lb

Paleo, Gluten-free Meatloaf

Ingredients

  • 1 lb ground beef or turkey (Organic or grass fed preferred)
  • 1/2 small red apple, diced (skin removed)
  • 1/4 cup chopped onions
  • 1 Tsp chopped garlic
  • Oregano, salt & pepper to taste
  • 1 large egg or egg replacer
  • Dash of Coconut Aminos (optional)

Instructions

  1. Mix all ingredients in large bowl except egg, making sure to mix well.
  2. Whisk egg and fold into meat mixture.
  3. Shake about 5-6 shakes of Coconut Aminos into mixture (approx 1 tsp)
  4. Form into a loaf and place in glass or metal loaf pan.
  5. Bake on 350 degrees for 35-40 minutes (times and temp vary by oven).
  6. Remove and let cool for 5 minutes before serving.
  7. Options: top with Paleo BBQ sauce or Ketchup recipes found here
http://inspiredeats.net/paleo-gluten-free-meatloaf/

It’s Gyro Time!

While catching up on my Facebook fan pages today I noticed a comment by someone who’s FB page title caught my eye: Gluten free & other allergen free recipes. So of course I headed on over to her site to see what it was about, and its a straightforward recipe site she built to help those of us trying to live the allergy-free life which she discovered after her children were diagnosed with food allergies. There are so many of us out here who just can’t tolerate the top food allergens, and more and more wonderful resources are popping up to help us manage the allergy-free lifestyle. I’ve mentioned this before, but my hope for Inspiredeats is to offer a destination site where you can bookmark any recipe you run across online in one place (and if we haven’t found it yet, we want you to be able to add it to our site). Alongside a fully stocked “allergy-free”  shop (which right now is powered by Amazon until we get the real one built), product reviews and a local guide for allergy free friendly restaurants.  So until then, we (being myself and my fabulous hubby and son) will keep testing and posting recipes, tips, tricks, and more to help you along your allergy-free path! Ok, back to the post at hand: I know so many people who are diagnosed with a gluten sensitivity, and if you’re lucky enough to have found it early (as I was for my son) then you can most likely live a life filled with as much or as little grains as you like without an issue (though it’s not my recommendation for a quest of optimal health). And while I prefer a life free of grains and dairy (for health and intolerance reasons) I know so many of you that would like to continue to eat your typical staples like rice, bread, pasta, pizza, pastries, etc. And while I discourage mass consumption of those guys, I think moderation is key for most of you to continue on a healthy and happy path.    So, with that said, this post is dedicated to those folks who have gone gluten-free, but don’t yet want to give up their sandwiches. Thanks to http://meganlierman.com/ for this recipe. Since my son eats grains now and then, and is a big fan of Udi’s, I’ll be making this for him as a taste test. I would omit the sour cream for personal reasons, but I imagine you can substitute some goat’s or sheep’s milk cream or just stick with the Feta cheese. Oh, and quick note on Feta – read the label carefully to make sure you’re not con suing cow’s milk if you prefer to avoid it when buying Feta as some manufacturers claim the name “Feta” on their cheese, but it’s made from cow’s milk. According to the EU, real Feta cheese must be made of at least 70% sheep milk and up to 30% goat milk, and it must be produced to definite specifications.

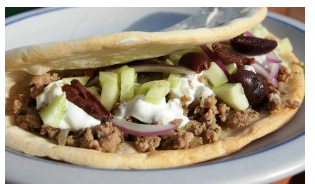
Gluten-free turkey gyros

Gluten-free turkey gyros

Ingredients

  • 1 lb. ground turkey
  • 1 tsp. oregano
  • 1 tsp. onion powder
  • 1 tsp. basil
  • 2-3 cloves garlic, minced
  • salt & pepper to taste
  • 1/2 c. sour cream (omit for dairy free option)
  • 1/4 red onion, sliced thinly
  • 1/2 cucumber, peeled & diced
  • 1 package Udi's gluten free pizza crust
  • handful of kalamata olives, pitted & halved
  • Optional
  • 1/4 c. feta cheese

Instructions

  1. Saute ground turkey in a little olive oil with garlic & dry spices; cook until no longer pink.
  2. In the mean time, mix feta with sour cream (omit this step if not using cheese).
  3. Heat gluten free pizza crusts in microwave until pliable; load up with turkey mixture and top with olives, red onion, sour cream mixture & cucumbers.
  4. Enjoy!
http://inspiredeats.net/gluten-free-turkey-gyros/

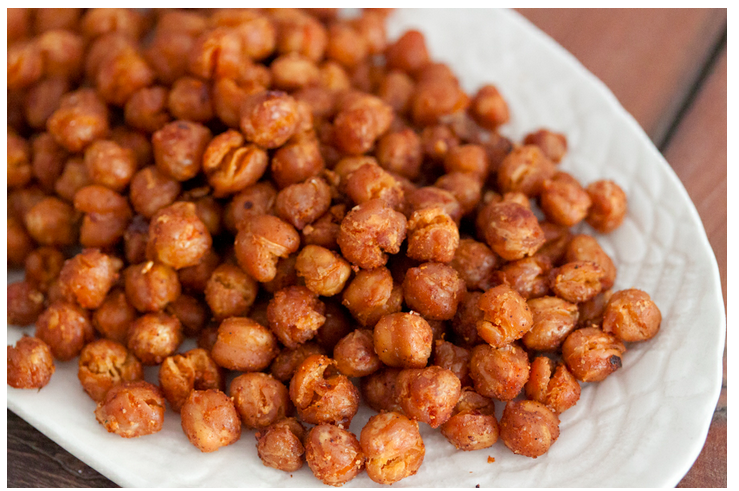
Sometimes I miss the salty crunch of chips, pretzels or crackers, so when the urge kicks in I turn to these guys; roasted, spicy chickpeas. They’re a tasty, easy to make treat and I typically have all the ingredients in the pantry. I discovered the recipe on What’s Gaby Cooking and I have to admit, I love the warm, spicy, toasty, salty combo! They make a great snack on their own, or as a side dish to your fave main course. 

All you need is 30 minutes, a can of garbanzo beans and some typical household spices. Kick up the heat for those of you with a flair for spicy. Enjoy!


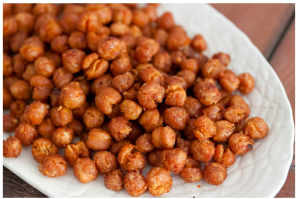
Allergy-free, paleo roasted chickpeas

Prep Time: 5 minutes

Cook Time: 20 minutes

Total Time: 25 minutes

Yield: 1 yummy bowlful

Allergy-free, paleo roasted chickpeas

Ingredients

  • 1 15-oz can Garbanzo Beans
  • 1/2 tsp salt
  • 1/2 tsp garlic powder
  • 1/2 tsp red pepper flakes
  • 1/2 tsp paprika

Instructions

  1. Preheat the oven to 400 degree F.
  2. Drain and rinse the garbanzo beans in a large colander. Continue to rinse until all the foamy liquid goes away.
  3. Line the counter with a few sheets of paper towel. Place the drained garbanzo beans on top of the paper towel and let them dry for a few minutes.
  4. Once the beans are dried, place them on a parchment lined baking sheet. Drizzle with olive oil and then sprinkle on the spices. Using your hands, toss the beans around so they are all fully coated.
  5. Place the baking sheet in the oven for 20 minutes and all to roast. After 20 minutes, remove the pan from the oven and give the beans a little shake and then place back into the oven for another 20 minutes.
  6. Season with salt if needed once fully roasted and then serve.
http://inspiredeats.net/allergy-free-paleo-roasted-chickpeas/