cauliflower pizza crust

Yes, it’s possible to be gluten-free and paleo and still love your pizza!

Last year I ran across a cauliflower pizza recipe which we tried while my mom in law was in town, and it was a BIG hit! We all loved it, though my only complaint was that it wasn’t sturdy enough to pick up and eat since I chose to leave out the cheese from the crust. But we all dug in with forks and knives, and while it wasn’t the same as the slices of heaven I used to love in NY, it was still a tasty version of pizza. Yay for options!

So here’s the original recipe; you can choose to eliminate the cheese from the crust as we did, but just be warned that it won’t be sturdy enough to pick up.

Note that I substituted goat cheese for mozzarella and instead of hawaiian style I added spinach and prosciutto. Delish!

Oh, and for those of you (like my husband) who don’t love cauliflower, no worries – the cauliflower flavor is undetectable 🙂

Enjoy!


cauliflower pizza crust


(more…)

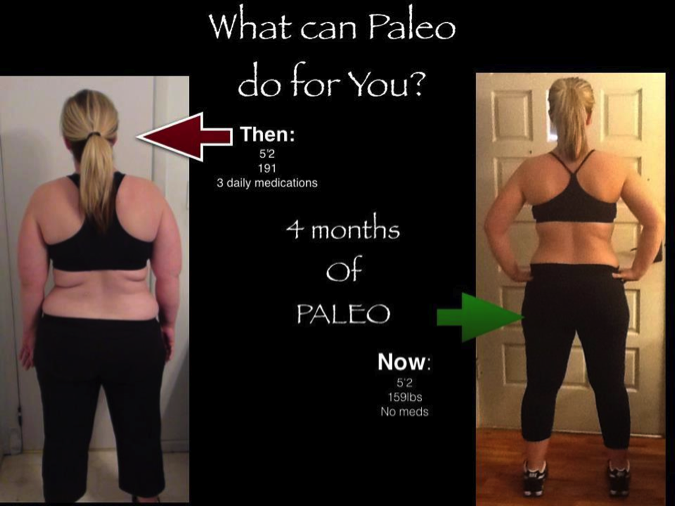
In the beginning I was just a sad lump of statistics: 5’2, 3 daily medications, knocking on the door of 200lbs at 191lbs.  Let me be clear:

Paleo  Belle

I DID NOT GET THIS WAY EATING TWINKIES AND SITTING ON THE COUCH.

I thought I knew what good nutrition was; I worked out, counted calories, and never snacked.  In the summer of 2012 I started a personal voyage to get into shape.  For 2 months I worked out 3-5 times a week and ate 1200-1400 calories a day.  I tracked everything.  Nothing worked. I thought long gone were the days of weighing 130 and being fit.

In late August 2012 my husband and I decided to try and start a family.  I was on a sleep narcotic for 6 years, blood pressure medicine (2 years), and stomach medicine (2 years).  I knew that if I wanted to create a healthy human being I would have to become healthy myself.


I called my doctor’s office to schedule a visit to change my medicine. Fortunately my doctor couldn’t squeeze me in for a few weeks and felt it was important for me to be seen immediately.  He passed the paper chart that defined ‘me’ around the practice to see if anyone would be willing to pick me up.

DIVINE INTERVENTION

This is the point where my life took a 180.  As my chart was passed around that office is came across Dr. Scott Kempton.  He saw the paper version of me:

27, 5’2, 191lbs, bp medication, stomach medication, sleep narcotic, wanted to start having babies.

Dr. Kempton blocked out 30 minutes of his last shift on a Friday to talk to me.

As I walked into the office of that blessed Friday I did not expect to find the angel that would save my life.  Dr. Kempton walked into the waiting room he informed me he was going to change everything I believed about nutrition and health.

He was right.   sickandtired

With conviction and passion Dr. Kempton explained to me the ideal ancestral life plan called Paleo.  A practice he had been diligently following for decades. Sitting there I learned about the dangers of gluten, grain, dairy, sugars, and processed food.  He also convinced me that I was suffering from metabolic syndrome; essentially my body was shutting down and packing on any gluten and non food items as fat.  He also gave me homework and answered all my questions. The puzzle of why I couldn’t loose weight was solved.  But would it fixed all the other issues; high blood pressure, acid reflux, indigestion, and insomnia?

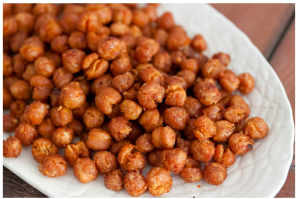
I left that office feeling refreshed and hopeful.  I immediately went to the store and bought all the essentials to start my journey.  When I got home my excitement and uncontainable, my husband was blown away by my enthusiasm.  I also think he was very overwhelmed.  The truth was:

I WAS SICK AND TIRED OF BEING SICK AND TIRED

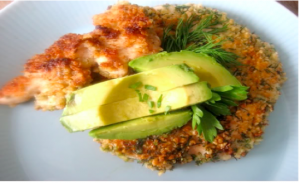
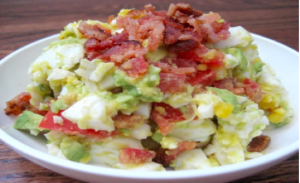
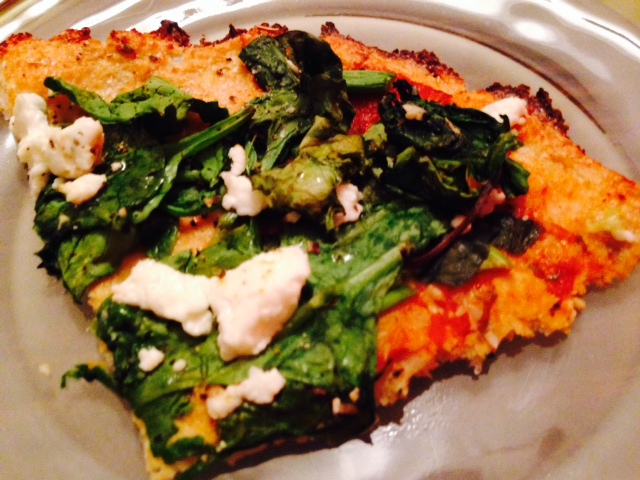
I got rid of all the gluten, legumes, grains, sugars, dairy, and processed food.  Within a couple days I was off my stomach medicine and sleeping like a baby. I was motivated to press on despite the ravaging cravings.

Within a week I was down 9lbs of water weight, my eyes were bright blue, lips were luscious red, my skin was soft and glowing.

In a month and a half I was down 15lbs, off all my medications, high energy, positive attitude, and my mind was clearer than it had ever been.  My life had been turned around and people were noticing my miraculous transformation. At 2 months I had been interviewed and been given the cover AND centerfold of the local magazine.

Dr. Kempton and Paleo saved my life.  I have been Paleo for 6 months. have not touched gluten for 5 months (and do not plan to touch it again), I am down 40lbs and I feel AMAZING!

My passion is to spread the word in the most positive and upbeat way possible.  Taking the first step is the hardest but I recommend JUMPING end.  In this case the grass is greener.  Leap in, there are a plethora of people and resources out there to help you get your own start.

Get your life back, find your passion, become healthy, LIVE!

Imagine what Paleo can do for you!
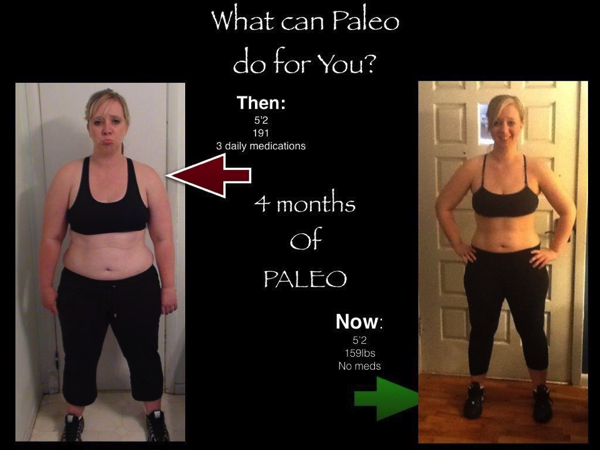
paleobelle2


Is a gluten-free diet really healthier for us?

I’ve been asked often if a gluten-free diet is healthier for someone who isn’t gluten intolerant. Meaning, does everyone gain something from going gluten-free, or just those with a sensitivity or allergy (Celiac)? This is a tough one because it really comes down to how you treat the gluten-free lifestyle. If you’re simply replacing your gluten-ful products with their gluten-free counterparts, than my answer is NO, it’s not a healthier diet.

If however, you take this as a chance to get back to basics, and explore the many amazing foods that are available which don’t come processed and pre-packaged, you’re absolutely on your way to a healthier lifestyle. I have reversed some pretty scary health issues by removing grains and dairy from my diet, and I have talked to countless other folks who have as well. If you follow the Primal or Paleo movements, you know that there are medical professionals who share stories of patients who have reversed diabetes, lost  weight, reduced anxiety and depression, overcome fatigue, balanced blood pressure levels, stabilized thyroid functions and more.

While I avoid almost all packaged foods, I completely understand the need for having something quick and easy on-hand for those moments when hunger pangs strike. We all know what it feels like to have your sugar levels go crazy; in fact, we joke that our son is like the Snickers commercials – he’s just not himself when he’s hungry!

But let’s face it, the gluten-free versions of bread, muffins, cookies, crackers and the like are often made from rice grains, potato starch, sugar and/or HFCS (high fructose corn syrup) which can wreak havoc on our digestive tracts and our blood sugar levels. So unfortunately, the gluten-free stuff you’re eating now might not be any better for you, which is why it’s important to not over-due these foods (if at all).

So here are some tips for keeping it simple when you’re gluten (and grain) free. 

First, focus on nature’s foods. Fresh fruits and veggies, nuts, seeds and whatever protein sources you like. By cutting back on starchy carbs, you will naturally avoid the sugar spikes they cause and help your body to aid in easier digestion by focusing on foods which it was naturally designed to eat.

Second, be prepared. Yep, this lifestyle requires a bit more prep work than you’re used to, and while you can still enjoy the occasional gluten-free snacks, it’s best not to count on them.  We make our lunches the night before, prep our meals on Sunday for the week, pre-cook what we can, go to the grocery store often so our food is fresh and our supplies are full, and share recipes with friends and family who are on the same path so we can keep things interesting !

Here are some of the fresh snacks I keep on hand every day (had to upgrade my purse a bit to accommodate all our snacks, but it’s totally worth it): fresh sliced fruit, grapes, berries, nuts, seeds and trail mixes (just watch that the ingredients are gluten-free).  Some of the brands we love are Thunderbird Energetica bars, Larabars, Happy Hemp seeds and Kind Life snack kits.

And remember, it will take some time for your palette to adjust to the difference in appreciating naturally sweetened foods from artificially sweetened ones. There’s a big difference, and it will take a little while for both the cravings to stop, and for you to appreciate healthier foods.

Third, be kind to yourself. This whole journey will take some time to get used to, and you will have moments where you feel stronger than others. If you fall off the wagon into a glutenous cupcake, just get back up again when you’re done, and get back on track. if you’re intolerant or allergic, that misstep will set you back a week or two from the amazing improvements you had enjoyed, but it doesn’t mean you can’t get back to feeling great again.  And if you’re focused on a gluten-free diet because you just feel better when you avoid processed foods, then the same will be true of your progress, though you won’t feel nearly as bad as the allergic folks will from a set back.

So what do you think? Are you feeling better since going gluten-free? I’d love to hear your stories, what works for you, or even if you gave up and went back to gluten. No judgements – we can always take away something from other people’s journeys, so please share below!


One of our favorite meals is a quick and easy fish dish; it’s a favorite of my husband and I, and our son loves it too, so we try to serve a healthy fish dish at least once weekly. This blackened catfish is an easy, quick and healthy dish that doesn’t require any prepping ahead of time, and you can swap out catfish for salmon, or any other preferred fish instead. Our son happens to love catfish, salmon, tuna and most white fishes, so we tend to make this with whichever fish is on sale when we’re at the store.

I’ve suggested you can top the fish with a sweet corn salsa, and another option is a fresh mango or similarly sweet salsa. The ingredients aren’t as important as the balance of salty fish with sweet topping, so go for the ones that suit your taste buds the best. Enjoy! 

Blackened Catfish with Asparagus (Paleo, DF, GF)

Prep Time: 10 minutes

Cook Time: 20 minutes

Total Time: 30 minutes

Yield: 2 servings

Blackened Catfish with Asparagus (Paleo, DF, GF)

Ingredients

  • 2 Wild Caught Catfish Filets (with skin)
  • 2-3 TBSP Coconut Oil
  • Cajun-style Seasoning OR
  • 1 Tbsp Paprika
  • 1 Tbsp Cayenne Pepper
  • 1 Tbsp Thyme
  • 1 Tbsp Oregano
  • 1 Tbsp Sea Salt
  • 1 Tbsp Black Pepper
  • Fresh Asparagus
  • Olive or Coconut Oil for drizzling on Asparagus
  • Salt & Pepper to taste

Instructions

  1. Wash asparagus and remove stems.
  2. Line a pan with aluminum foil and layer asparagus on top, in one layer.
  3. Drizzle with coconut or olive oil and generously sprinkle S&P.
  4. You can also squeeze fresh lemon or lime on top of the asparagus if desired.
  5. Place in oven on 300 degrees for 10 minutes.
  6. In the meantime, mix all spices together and spread out on a plate.
  7. Rub the flesh side of the catfish with a little olive oil and press the catfish (flesh side down) onto the spices.
  8. Heat 2-3 Tbsp of Coconut oil in a pan over medium heat.
  9. Once it is hot (or smoking), turn off the burner.
  10. Place the catfish flesh side down in the pan, on one layer, so they both have contact with the pan. Turn the heat back on medium and cook for 2 minutes.
  11. After 2 minutes, turn the heat down to medium-low and flip catfish over.
  12. The spiced, flesh side should be crispy.
  13. Cook at medium-low for another 3-5 minutes (skin should be crispy at this point).
  14. Remove asparagus from oven and cut spears in half.
  15. Serve immediately.
  16. Optional: sweet corn salsa - if desired you can top fish with a sweet corn salsa made of fresh corn and some cilantro.
http://inspiredeats.net/blackened-catfish-with-asparagus-paleo-df-gf/


Sometimes I miss the salty crunch of chips, pretzels or crackers, so when the urge kicks in I turn to these guys; roasted, spicy chickpeas. They’re a tasty, easy to make treat and I typically have all the ingredients in the pantry. I discovered the recipe on What’s Gaby Cooking and I have to admit, I love the warm, spicy, toasty, salty combo! They make a great snack on their own, or as a side dish to your fave main course. 

All you need is 30 minutes, a can of garbanzo beans and some typical household spices. Kick up the heat for those of you with a flair for spicy. Enjoy!


Allergy-free, paleo roasted chickpeas

Prep Time: 5 minutes

Cook Time: 20 minutes

Total Time: 25 minutes

Yield: 1 yummy bowlful

Allergy-free, paleo roasted chickpeas

Ingredients

  • 1 15-oz can Garbanzo Beans
  • 1/2 tsp salt
  • 1/2 tsp garlic powder
  • 1/2 tsp red pepper flakes
  • 1/2 tsp paprika

Instructions

  1. Preheat the oven to 400 degree F.
  2. Drain and rinse the garbanzo beans in a large colander. Continue to rinse until all the foamy liquid goes away.
  3. Line the counter with a few sheets of paper towel. Place the drained garbanzo beans on top of the paper towel and let them dry for a few minutes.
  4. Once the beans are dried, place them on a parchment lined baking sheet. Drizzle with olive oil and then sprinkle on the spices. Using your hands, toss the beans around so they are all fully coated.
  5. Place the baking sheet in the oven for 20 minutes and all to roast. After 20 minutes, remove the pan from the oven and give the beans a little shake and then place back into the oven for another 20 minutes.
  6. Season with salt if needed once fully roasted and then serve.
http://inspiredeats.net/allergy-free-paleo-roasted-chickpeas/

Sweet, salty, creamy and crunchy. Too good to pass up!

I’ve mentioned how much I like this site, Against All Grain, in the past so today I’m showcasing another of her fab recipes which is perfect for summer! As someone who eats a lot of salads, I can tell you I’m excited to give this one a shot.  The idea of combining the sweet and gritty texture of watermelon with arugula and goat cheese is just too tasty to imagine. So while I head out to the store to grab some watermelon, I wanted to throw this recipe up so you can enjoy it in the meantime. 


watermelon salad with arugula, goat cheese & candied walnuts

Yield: 6 servings

Serving Size: 1 individual salad

watermelon salad with arugula, goat cheese & candied walnuts

Ingredients

  • 6 pieces of watermelon, cut to 1 inch thickness
  • 2 cups baby arugula
  • 2 tablespoons fresh mint, chopped
  • 2 teaspoons extra virgin olive oil
  • 1 teaspoon fresh lemon juice
  • pinch of salt and pepper
  • 1/4 cup crumbled goat cheese (omit Goat Cheese or sub in Vegan cheese for vegan options)
  • 1 teaspoon balsamic vinegar
  • 1/2 cup Spiced Candied Walnuts, roughly chopped

Instructions

  1. Using a large biscuit cutter, or just great circle cutting knife skills!, cut the watermelon slices into round circles. Use a knife to trim off any parts that make the circle uneven so it sits flat on a plate.
  2. In a medium bowl, toss the arugula with the mint, olive oil, lemon juice, salt, and pepper.
  3. Arrange the watermelon circles on a plate, then top each with a small handful of the arugula mixture (roughly 1/3 cup each).
  4. Sprinkle each salad with goat cheese and the chopped walnuts, then drizzle the balsamic vinegar over the tops.
  5. Enjoy!

Notes

* If you’re serving to a larger crowd, or don’t want to take the time to cut the watermelon into rounds, you can use a melon baller to create cute balls or just simply cut the watermelon into chunks and pile it all into a salad bowl.

http://inspiredeats.net/watermelon-salad-with-arugula-goat-cheese-candied-walnuts/


I just discovered a new vegan foodie blog today and found this delish looking recipe for gluten free, vegan waffles. When you get a chance, hop over to visit An Unrefined Vegan, described as Unprocessed, unbleached and cruelty-free:  low-fat, low-sugar, whole food and plant-based recipes to nurture body, brain and conscience. Her food choices are creative, sound incredible and I love her photos! Great blog to bookmark 🙂

I’m sure it would taste just as good with traditional eggs and buttermilk for the non vegans here, so go ahead and experiment a bit and tell me how it turns out!

Gluten free, vegan: Banana-Chai Buttermilk Waffles with Cocoa-Coconut Butter

Prep Time: 10 minutes

Cook Time: 10 minutes

Total Time: 20 minutes

Yield: 3+ 8" waffles

Serving Size: 1 8

Ingredients

  • 1 cup spelt flour (use gluten-free flour or flour substitute such as almond flour for gluten free version)
  • 1/3 cup oat flour (use certified gluten free oats and process them in a food processor)
  • 1/2 cup almond meal (I used the meal left over from making almond milk, dried and processed in food processor)
  • 1 1/2 tsp. baking powder
  • 1/2 tsp. salt
  • 1/4 tsp. baking soda
  • 1/4 tsp. powdered stevia
  • 1/4 tsp. anise seeds (ground in coffee grinder)
  • 1/4 tsp. powdered cardamom
  • 2 pinches ground black pepper
  • 1/4 tsp. ground cinnamon
  • 1/8 tsp. ground cloves
  • 1/4 tsp ground ginger
  • 2 tbsp. egg replacer + 6 tbsp. water (whisk together until frothy, then let sit for a minute)
  • 1 large, very ripe banana, mashed
  • 1 1/2 cups vegan buttermilk
  • 1 tsp. vanilla extract

Instructions

  1. Combine the flours, almond meal, baking powder, salt, baking soda, stevia and spices in a large bowl.
  2. In a smaller bowl, whisk together the egg replacer, banana, buttermilk and vanilla extract. Add the wet ingredients to the dry ingredients and stir just until the dry ingredients are just moistened. Let the batter sit for about 15 minutes. (Turn the oven on to 200F so you can warm the plates and keep the cooked waffles crispy – and heat up the waffle iron, too.)
  3. Lightly spray waffle iron with cooking oil and ladle on the batter. Cook for about 4-5 minutes and gently remove waffle and place on oven rack to keep warm while you prepare the rest of the waffles.
  4. Top with a dab, slab or slice of Cocoa-Coconut Butter and your other favorite waffle toppings!
http://inspiredeats.net/gluten-free-vegan-banana-chai-buttermilk-waffles-with-cocoa-coconut-butter/


Cocoa-Coconut Butter

Ingredients

  • Cocoa-Coconut Butter
  • 1/4 cup + 2 tsp. soy milk
  • 1 tsp. apple cider vinegar
  • 1/8-1/4 tsp. salt
  • 2 1/4 tsp. soy lecithin granules
  • 1/4 tsp. xanthan gum
  • 1/2 tbsp. unsweetened cocoa powder
  • 3 tsp. agave nectar
  • 1/4 tsp. vanilla extract
  • 1/2 cup + 2 tbsp. + 1 tsp. refined coconut oil
  • 1 tbsp. canola or vegetable oil

Instructions

  1. In a small measuring cup, whisk together the soy milk and cocoa powder until thoroughly combined. Whisk in the salt and apple cider vinegar and let sit for 10 minutes.
  2. Melt the coconut oil in a small measuring cup. It’s not necessary to completely melt it down – some small solid bits are okay. In the bowl of a food processor, add the melted coconut oil, canola oil, soy milk mixture, soy lecithin granules, xanthan gum, agave nectar and vanilla extract.
  3. Process for 1 minute, then scrap down the sides and bottom – sometimes the soy lecithin granules get stuck near the blade. Process for an additional minute, then carefully pour the mixture into the molds.
  4. Chill in the freezer for at least one hour before removing from molds. Store in the refrigerator or freezer.
http://inspiredeats.net/gluten-free-vegan-banana-chai-buttermilk-waffles-with-cocoa-coconut-butter/


Today I stumbled upon a new site and found some delish looking baked zucchini chips which are a perfect solution for a no-grain diet. The site isn’t focused on allergy-free eating, but if you find yourself wanting some inspiration for yummy looking baked goods, it seems like Maggie of Vittles an Bits will be a good source I’ve copied her comments about the recipe below for reference and note that she’s very responsive if you have any questions so feel free to post them on her site.

For reference here is her link

Baked Zucchini Chips

Ingredients

  • 1 zucchini
  • Cooking spray
  • Seasoned salt, or other seasoning(s) of your choice

Instructions

  1. Preheat oven to 225 degrees Fahrenheit. Line a baking sheet with parchment paper or nonstick foil, and spray with canola oil. Set aside.
  2. Slice zucchini into thin medallions, about the thickness of a quarter. (You can either use a knife & a very steady hand, or a mandoline slicer.)
  3. Lay out slices on prepared baking sheet, and spray tops lightly with additional cooking spray. Sprinkle with seasonings of your choice. (A note on seasoning, however – use LESS than what seems appropriate. These shrink considerably in the oven, and if you use too much it gets very concentrated. It’s better to end up underseasoning and add more later.)
  4. Place in preheated oven and bake 45 minutes. Rotate baking sheet (don’t flip the chips though), and bake an additional 30-50 minutes, until chips are browned and crisped to your liking. These are best eaten within a couple hours of removing from the oven, as they start to get chewy if left out. One zucchini makes one serving (1/4 C. – 1/3 C. of chips depending on the size of your squash).
http://inspiredeats.net/baked-zucchini-chips/
 

From Maggie: 

To me, these chips taste kinda like thin & crispy pumpkin seeds.  (I guess that shouldn’t be too much of a surprise since they are relatives in the squash family).  Much lighter, but the taste is similar.

And the seasoning possibilities are endless – you can tailor them to your liking.  Garlic, paprika, chili powder… use your imagination!  I went with a basic Seasoned Salt and they came out great.  But whatever you choose, just make sure you go easy on the seasonings, and only use a little bit – these do shrink a lot in the oven, so what looks like a reasonable amount on the raw veggies could turn out to be way too much!

(more…)

I completely admire people who can cook; while I LOVE food, I sadly didn’t inherit the cooking gene so I default to recipes by those uber-talented folks I’ve discovered online. So today I share with you a recipe I ran across from a fellow Paleo girl. It looks divine and I’m hoping I can convince my hubby to make it for us this weekend 🙂 Thanks to Girlmeetspaleo for this inspired dish!

(more…)

For those of you following a gluten free and paleo diet, the occasional comfort food meal is encouraged, so long as you stick to the healthy Paleo guidelines. So when I saw this post on Cavegirl Cuisine’s site for a gluten free, paleo eggplant recipe, I had to share it. Our version is slightly modified, but you can see her original version here

What I love about this recipe is the almond meal which helps the eggplant maintain a crunchy, fried, aspect to it, even though it’s baked.  So you can enjoy this guilt-free, delish version of a formerly unhealthy meal! 

Paleo “Fried” Eggplant Marinara (on a bed of greens)

Prep Time: 15 minutes

Cook Time: 30 minutes

Total Time: 30 minutes

Yield: 4 servings

Paleo “Fried” Eggplant Marinara (on a bed of greens)

Ingredients

  • 1 medium eggplant
  • 2 cups almond meal
  • 1 cup marinara sauce or fresh diced tomatoes
  • 2 eggs
  • 4 cups of greens (I used arugula)
  • 1T macadamia nut oil

Instructions

  1. Preheat oven to 400 degrees.
  2. Line two cookie sheets with parchment paper.
  3. Peel eggplant and slice into 1/4 inch rounds.
  4. Whisk eggs in a medium bowl.
  5. Place almond meal in another bowl.
  6. Dredge each eggplant round in the eggs and then coat with the almond meal on each side.
  7. Place on the parchment paper
  8. Repeat for all of the eggplant.
  9. Drizzle or mist the oil over the coated rounds.
  10. Salt and pepper lightly.
  11. Cook for 30 minutes.
  12. In the meantime, place a cup of greens on each plate.
  13. Divide the cooked eggplant among the plates.
  14. Put a 1/4 cup of marinara sauce or fresh tomatoes over the top of each serving. Enjoy!
http://inspiredeats.net/paleo-fried-eggplant-marinara-on-a-bed-of-greens/


These tasty gluten and grain free chicken tenders came from a recipe I found on Marksdailyapple and are super easy to make.

They’re a great alternative for kids, and perfect to use atop a salad when you’re craving a bit of a salty/crunchy treat. Plus they’re perfect to pair with an asian-inspired or spicy-fruit dipping sauce (think mango chutney) if you want to serve them as an appetizer instead!

Enjoy 🙂


This is a quick and easy recipe for a side dish that I love to pair with meats and fish. It’s similar to the old-school wedge salads but doesn’t have all the fatty and high calorie badness from the Blue Cheese dressing, though it has the same creamy texture thanks to the avocado. And if you’re like us, you believe that most anything is made better with a touch of bacon 🙂 But for those avoiding meat, this is a great salad minus the bacon, and I’ve been told that almonds are a nice salty touch in its place. 

Super simple and delish – enjoy!