I used to go through life without thinking much about things. I wasn’t much of a planner at all; in fact, I was both irked by, and in awe of, people who were. How could they so confidently know what they were going to want in a few days, a week or even months? I had the hardest time picking a major in college because I couldn’t imagine that I knew at 19 years old what I was going to do for the rest of my life.

My reality today?  Having food allergies means I have now become the biggest planner.

I can’t count on the ease of quick grab-n-go type foods since they typically contain ingredients I can’t eat, so I end up bringing snacks with me everywhere. I’ve become one of those people who eats dinner for breakfast (avoiding grains, dairy and eggs make breakfast foods near impossible), and I find myself reheating leftovers while my husband and son indulge in my old favorites, including breakfast tacos. Sadly,  I live in Austin and can’t eat breakfast tacos! Speaking of my son, I’m raising a gluten, & dairy free kid which means I have to be prepared much more so than if I could simply rely on a quick drive thru or convenience store for a cure of the hunger pangs.


So, when a friend sent along a link to a book written by a set of Paleo parents trying to help others learn how to live a Paleo life with their children, I quickly bought a copy.  To be honest, raising a child is complicated enough, but when you throw in food allergies or sensitivities  it takes it to a different level.  I want to make sure he doesn’t feel left out, or like the oddball of his friends. So while I now carry the ‘mom bag’ packed with healthy snacks, and Yelp restaurants for allergy-free reviews often, it was nice to read from another set of parents who are living the allergy-free life and making it work!

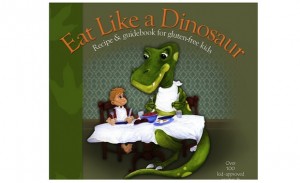
I agree with the parents behind the book, Eat Like a Dinosaur.  They’ve found a way to make special diets fun for their kids, and they help parents understand how to keep our children safe and healthy. By following a modified Paleo diet, they have helped heal their children from various auto-immune conditions, which is so important in preventing a series of much scarier health concerns down the line.

What I love about the book?

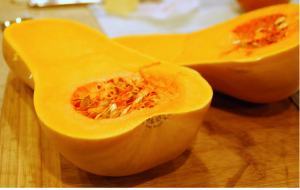
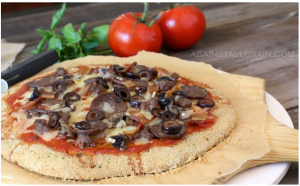
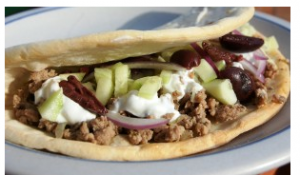
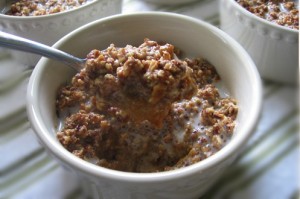
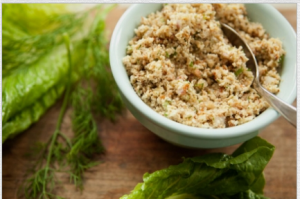
It focus not just on a Paleo diet, but rather on food allergies in general, and includes old favorites such as cereal, chicken nuggets and waffles, which are all grain-free. Their intent is not on excluding foods, but rather, on eating healthy and delicious ones which mimic the same foods we are accustomed to, but in a healthier version. 

All recipes are free of dairy, wheat, peanuts and soy.

All recipes are labeled so you know if they contain shellfish, tree nuts, fish or eggs.

Many of the recipes are set up to show your kiddos what parts they can help with, so they can help in the process of making these foods that are designed to help them live healthy lives. Plus they get to play a part in making some delish dishes!

It’s so important to help kids feel normal when they’re dealing with something that society has a bit of a stigma about, and I love that these foodie parents went all out to write a cookbook that helps their kids feel completely normal about their special diets.

Here’s a description of the book below and a video clip you can watch as well. I hope this helps you navigate the complexities of a ‘different’ lifestyle choice for you and your family too!


(more…)

This is a great gluten-free, dairy-free sweet casserole option for the holidays!

Using almonds and chia seeds rather than grains, and coconut milk and oil in place of dairy-based ingredients, this is an allergy-free friendly recipe that you can add to your holiday list with confidence that it will satisfy the pickiest (and allergy-free) palette. Since it’s rich in sugar, I don’t recommend this one on a regular basis but it’s a great option for that special menu night.

The original post can be seen here, and the author was happy to let us share it with you.

Enjoy!


Pumpkin Crunch Casserole or Breakfast Pudding

Prep Time: 45 minutes

Total Time: 45 minutes

Yield: 6 servings

Pumpkin Crunch Casserole or Breakfast Pudding

Ingredients

  • 2 tablespoons chia seeds
  • 6 tablespoons water
  • coconut oil
  • 15 ounces pumpkin puree
  • 1 tablespoon pumpkin pie spice
  • 6 tablespoons sugar
  • stevia, to taste
  • 1 teaspoon vanilla
  • 2/3 cup ground almonds (preferably already toasted)
  • 2 teaspoons ground cinnamon
  • 3 tablespoons coconut cream concentrate, melted
  • 2/3 cup coconut milk*

Instructions

  1. Preheat oven to 350 degrees F.
  2. Soak chia seeds in water for about 15 minutes, stirring occasionally.
  3. Use coconut oil to coat the inside of 6 8-ounce ramekins.
  4. In medium bowl mix soaked chia seeds, pumpkin puree, pumpkin pie spice, sugar, and vanilla.
  5. Take a tiny taste and add stevia if you want a little more sweetness.
  6. After everything is well incorporated, divide pumpkin mixture evenly among the 6 ramekins.
  7. In small bowl mix ground almonds, cinnamon and coconut cream concentrate.
  8. Sprinkle evenly over the pumpkin mix.
  9. Bake for 25 minutes at 350 using a water bath method.
  10. When almonds are starting to brown, remove from oven and pour coconut milk over top.
  11. Serve warm or cold.
  12. * For the freshest coconut milk make homemade coconut milk.

Notes

Recipe submitted by Joanne, Delmar, DE to Tropical Traditions Shared with permission from Tropical Traditions.

http://inspiredeats.net/gluten-free-dairy-free-pumpkin-crunch-casserole/

(more…)

I’ve heard that when you cut out a food from your diet, the cravings will fade, and your taste buds will change. And while I never really thought that was true (I had tried plenty of fad diets in the past and never noticed my cravings fade) it wasn’t until I cut out the common food allergens that I think it truly hit me. Suddenly I no longer craved sweets and carbs, and that decadent salty/sweet combo that I used to adore no longer plagues me daily as it used to. Don’t get me wrong, I still love the occasional salty/sweet treat, but my idea of sweet today is far different than it was a few years ago. Gone are the days of being able to stomach a decadent fudge cake. No, today I find 65% dark chocolate a bit on the sweet side. My how things have changed!

So, when I was sent this recipe for gluten-free Persimmon Spiced scones, I had visions of the swedish spiced cake my mom made every Christmas that I adrored, and I started to think this would be right up my not-so-sweet alley. And I was right.

If you’re not familiar with Persimmons, they’re an excellent source of vitamin C.  In fact,  I’ve been told by some friends that you can help ward off winter colds with a healthy drink by blending a peeled persimmon and kiwi, which make a juice rich in vitamin C and minerals.

Or, if you prefer to indulge a bit, you can go for this fabulous scone recipe, sent to us by our friends at Bona Dea, Austin-based makers of a gluten-free flour that my son swears makes the best muffins and scones he’s had yet.  As I mentioned, this recipe is sweet, but not too sweet, with just the right touch of cinnamon, nutmeg and cloves that pair perfectly with the persimmons. This is a perfect choice for the holidays, and works well as either a scone or muffin. I’ll bet if you were to ice it with a not-too-sweet coconut milk glaze it would be perfect for desert.

Check out the recipe from Bona Dea below; be sure to visit their site here if you haven’t yet and be sure to grab some of their delicious gluten-free flour in any of the many retailers here they’ve partnered with, or you can order on their site.


Gluten Free Persimmon Spiced Scones

Prep Time: 5 minutes

Cook Time: 15 minutes

Total Time: 20 minutes

Yield: 12 scones or 36 mini scones

Gluten Free Persimmon Spiced Scones

Ingredients

  • 1 package Scrumptious Scone mix
  • 1 ½ tsp cinnamon
  • 1 tsp nutmeg
  • ¼ tsp cloves
  • 5 TBSP cold diced butter (or Ghee)
  • 2 eggs
  • 1/3 c coconut cream
  • 4-5 medium persimmons, chopped
  • 1 TBSP turbinado sugar

Instructions

  1. Preheat over to 375
  2. Prepare baking sheet with cooking spray or parchment paper.
  3. Combine scone mix and spices in a large bowl. Using a pastry cutter, cut in butter until mix resembles fine crumbs.
  4. In a smaller bowl, whisk together eggs and cream.
  5. Slowly add liquid ingredients into dry, stirring just until combined.
  6. Blend in persimmons.
  7. Using a large spoon, drop dough into 12 equal rounds onto cookie sheet (or 36 for mini scones). Sprinkle with sugar.
  8. Bake 14-16 minutes or tops are lightly golden.
  9. Transfer to wire cooling racks.
http://inspiredeats.net/gluten-free-persimmon-spiced-scones/


Ever baked with persimmons before? I’d love to hear some of your favorite Persimmon recipes, so please share them in the comments below!

It’s one of the first chilly spells in Austin for the year, and we’re enjoying some college football (Go Horns and Gators!) and prepping our burgers. While our version today is made with ground turkey, we’re following this recipe for quick and delish bison burgers. You can view the recipe we’re following today, and a full Paleo meal plan on Bodybuilder’s site here. I hope to have meal plans on here for y’all one day, but for now, I’m sharing other’s Paleo plans that will help keep you on a healthy diet track.

Remember  – the path to better health starts with food, and the Paleo diet is one of the best ways to get there. It’s a simple, straightforward diet and I’ve written about it quite a bit. You can search Paleo on the top right of the site and find recipes and posts galore, or you can check out this post for Paleo approved foods, Paleo restricted foods  and check out this site for some Paleo Meal Plans.

Here’s the recipe we’re making and more helpful Paleo tips below.  The Paleo diet is a much researched and written about way of life; my best advice to you is to treat it like a launching pad for better health. Find your balance once you heal and you’ll discover the Paleo plan that’s right for you. For  now, I’m going to enjoy some tasty burgers, a  salad and some grilled asparagus. Yum!


Paleo Bison Burgers

Paleo Bison Burgers

Ingredients

  • 1 lb Organic Ground Bison
  • 1 Shallot
  • 2 Jalapeno Peppers
  • 1 Egg
  • 3 Garlic Cloves
  • Sea Salt and Pepper to taste

Instructions

  1. Turn oven to broil. Arrange rack so baking pan is close to heat.
  2. Cover baking pan with aluminum foil and set aside.
  3. Combine all ingredients and form into patties.
  4. Place patties on the center of the baking pan and broil for 6-8 minutes. Flip and broil for another 6-8 minutes.
  5. When both sides are golden brown, remove from oven.

Notes

Sharing from http://www.bodybuilding.com/fun/paleo-perfection-6-meals-to-kickstart-your-caveman-lifestyle.html?mcid=NL-NEWS05100712&rmid=NL_oct_100712&rrid=13141647

http://inspiredeats.net/bison-burgers-and-paleo-meal-plans/

(more…)

What do you get when you cross a fuel saving hybrid with a large plastic banana? A bananamobile of course!

If you live in the Austin or Dallas Fort Worth areas, and you aren’t yet buying from Greenling, you’re missing out on some of the freshest and best tasting local produce, delivered to your door! Currently, Greenling delivers to Austin and San Antonio with plans for Houston on the horizon, and according to the founder, Mason Arnold, they don’t plan to stop there.  Ultimately, he would like to expand the service nationwide.

“We’ve developed a system that’s a just-in-time inventory, so it reduces the time it takes for food to get from the farm to the table by more than half,” Arnold says. “We’re delivering a more nutritious product, and we’re able to deliver it much faster. We think everyone in the nation should have this available.”

But Greenling is not just about local produce. In fact, they are about fresh, healthy and delicious food. Period.

From their Local Box, which is delivered weekly and packed with the freshest local produce you can imagine, to their fully stocked online shop, you can browse from hundreds of products, including many gluten-free options! I’ve sampled some of their brands, and will follow up with product reviews this week, so until then, here are some quick tips on how to start taking advantage of their amazing services.  And remember, everything Greenling sells is either Certified Organic, or locally sourced and sustainably grown. So you can feel good about the food you’re eating, thanks to Greenling.


Connecting you with local farmers, every week!

With their Local Box, Greenling connects you with the freshest, best produce you can find. Local Boxes are delivered either weekly or twice monthly, bringing you farm fresh foods, delivered to your door, for about the same price as you would pay in the grocery store. And the best part? Your dollars stay local and help farmers continue to farm Organically, helping you to feel better and keeping all the harmful side effects of non-organic farming away from your table.

Greenling’s partner farmers are all local, Organic Texas farmers. Check out their list of featured local farmers  here.


In a hurry, or not much of a chef? Let Greenling do the work for you!


Be sure to check out their prepackaged meal plans;  listed  as “Recipe Kits”, these little guys are super handy and include apps, 1 Meal, 2 Meal, juicing, breakfast kits and more. Greenling has done a fantastic job of covering many special dietary needs, and they don’t disappoint to that effect with their Recipe Kits either. You can browse the ingredients on their kits here, and while they don’t currently have it broken down by gluten-free options, I’m  happy to say that they have plans to build a criteria to search by ‘gluten-free” items soon!

Healthy, allergy-free friendly Shop

Looking for healthy, fresh and delicious foods from local companies? Once again, Greenling doesn’t disappoint! With hundreds of products lovingly made by local companies, Greenling features some of the tastiest homemade products we’ve tried. With Vegan, gluten-free bread that my son devoured, to a gluten-free brownie that my husband swore was the best he’s tried yet, their products are fresh, healthy and delicious.

Browse their gluten-free items in the shop here; be sure to choose “Shop” then “Grocery” and you will see the image for gluten free items on the next page.

Here’s a snapshot of the menu option listing their gluten-free items:

So head on over to Greenling now, and sign up to view their amazing local and delicious selections today! Note that the Local Boxes are delivered on either a weekly or bi-weely schedule, but you can shop any of their other items as often as you like.

Here’s a quick video of Greenling’s founder, Mason Arnold sharing why he founded Greenling, and what shopping with Greenling does to help ensure better health, better farming practices, and safer food conditions.


Still have questions? Check out these quick tips on Greenling’s Local Box from their site:

What is a Local Box, anyway?

Our Local Box is a weekly changing selection of seasonal, sustainably grown produce, fresh from local farms! You’ll receive 8-10 different local fruits and veggies, along with a list of where they came from and suggestions on how to use them. More on the Local Box here.

What if we don’t deliver to your zip code?

Oh noes! We’re sorry about that. We track every zip code entered so we can gauge interest when we are ready to expand our delivery area. Perhaps try a friend or family member’s address that might be able to accept the order for you?

When will I get my Local Box?

Your delivery day is determined by your zip code – in order to route as sustainably as possible, we visit each area of town once per week. Once you create your account, we’ll let you know your next available delivery day, and you can choose a later date if you’d like. More on delivery specifics here.


Hopefully you’ve already stopped reading this and headed over to Greenling by now, but if not, please go now – you will thank me for it later!


There’s something about Fall that makes me crave warm, gooey foods; foods that satisfy a sweet tooth, or perhaps a hearty soup or chili.  However, living a mypaleo, allergy-free diet means I have to be a bit creative to enjoy them without guilt! And if you follow my site regularly, you know that I believe whole-heartedly in the power of foods to help us heal.

So, while I’m a bit strict in my approach to a healthful diet, I do encourage you to enjoy a cheat once a week. And by a cheat, I don’t mean a gluten-ful slice of cake, or a too-sugary candy; be sure to still focus on healthful foods that satisfy your urge, without setting you back.  Whenever I prepare foods to indulge in, like these amazing little peanut butter, banana and oatmeal cookies (which I discovered from my cousin Rita),  I freeze the majority of them so I can take a couple out to thaw, enjoying them as the urge hits.And if you’re saving up for a weekly cheat, I can’t think of many cookies I recommend more than these guys!

I love the consistency of the oats combined with banana and PB which makes a thick, rich and chewy cookie. Quick note – these tasty treats contain peanut butter, so if you are avoiding PB you can substitute almond or cashew butter, which will slightly change the flavor of the cookies, but still remains a delish treat!  Remember, living an allergy-free life doesn’t mean living without the occasional indulgence, nor does it mean that indlugence can’t still be good for us.

With a bit of creativity, you can create healthy, yummy treats that are loved by all – allergies or not!

Rita’s Healthy PB, Banana & Oatmeal cookies

Rita’s Healthy PB, Banana & Oatmeal cookies

Ingredients

  • 3 ripe bananas, mashed
  • 1 tablespoon GF vanilla
  • 1/2-1 cup natural chunky peanut butter, by preference for peanut buttery taste
  • 3 tablespoons maple syrup or agave
  • 2 cups GF Harvest Gluten Free Organic Rolled Oats
  • 1/2 cup almond flour
  • 1 teaspoon baking powder
  • 1/2 teaspoon salt (note: if you are using salted peanut butter, you may not need any salt, do a taste test with the batter)
  • ½ cup semi-sweet vegan or GF chocolate chips

Instructions

  1. Preheat oven to 350 degrees F
  2. In a large bowl, mix bananas, vanilla, peanut butter and maple syrup or agave into a creamy consistency (best to do with a hand mixer).
  3. In another bowl, combine oats, flour, baking powder and salt
  4. Add the dry ingredients to the wet ingredients and stir until they are well combined, the batter should be slightly sticky.
  5. Fold in the chocolate chips (note the batter will be somewhat runny)
  6. Place heaping tablespoon-sized balls of the batter onto a ‘greased’ baking sheet (can also place on wax paper) and cook for 15 minutes.
http://inspiredeats.net/ritas-healthy-pb-banana-oatmeal-cookies/

Stuck in a Paleo breakfast rut?

If you’re looking for a breakfast option that incorporates something other than eggs, and are happy to explore some exciting new options, these Blueberry Sausage Patties are sure to please! If you’re following the Paleo diet and/or are in the midst of a Whole30 challenge, these little guys will come in handy and ensure you’re staying on track with a hearty breakfast option that is Whole30 and Paleo approved.

You can read the original post here and explore the many other options that the author features. I chose to feature these simply because they’re a unique and interesting option for breakfast; a meal which many people complain about not having much variety in when following a grain-free diet.  Note these are super simple to make, and you can use frozen or fresh blueberries.

And in the words of the chef herself, the blueberries add a hint of natural sweetness, plus they are relatively low in sugar and packed with antioxidants.

Good food that’s good for us – enjoy!

Blueberry breakfast sausage; Paleo & Gluten free breakfast option

Prep Time: 5 minutes

Cook Time: 10 minutes

Total Time: 15 minutes

Yield: 6-8 patties

Serving Size: small breakfast patty

Blueberry breakfast sausage; Paleo & Gluten free breakfast option

Ingredients

  • 1 lb ground meat of choice (pork, chicken, or turkey)
  • 1/2 cup frozen (no need to thaw) or fresh blueberries, whole or chopped
  • 1 tsp rubbed sage
  • 1/2 tsp Aleppo pepper (or 1/4 tsp crushed red pepper + 1/4 tsp paprika)
  • 1/2 tsp salt
  • 1/4 tsp dried thyme
  • 1/4 tsp ground coriander
  • 1/4 tsp nutmeg
  • 1/4 tsp pepper
  • Instructions

Instructions

  1. Thoroughly combine all ingredients with your hands.
  2. Shape the meat into a log and place it on a large piece of plastic wrap.
  3. Roll it up in the plastic wrap, tightly twisting both ends.
  4. When ready to serve, slice it into patties (you should get about eight sausage patties)
  5. Cook in a lightly oiled skillet on medium heat, turning once, until both sides are browned.
  6. Reduce heat to low, cover, and cook until the meat is completely cooked throughout.
  7. Serve.

Notes

Make-ahead directions: You can freeze the individual raw patties on a baking sheet, then transfer to a freezer bag. Thaw overnight in the refrigerator and then cook as specified. Or, you can fully cook the patties, freeze them the same way, and just reheat the frozen sausage for approx 10 minutes on medium-high, or microwave for 2-3 mins when you're ready to eat.

http://inspiredeats.net/blueberry-breakfast-sausage-paleo-gluten-free-breakfast-option/

I have to admit I was a happy girl when I saw the Today Show showcase allergen-free, low glycemic foods on their segment today.  Too often, national TV shows feature allergen-laden foods that many of us can’t tolerate, so it’s encouraging to see an allergen-aware author have a moment to showcase her healthy recipes on national TV. 

In her cookbook and nutrition guide “Must Have Been Something I Ate,” Peggy Kotsopoulos (a registered Holistic Nutritionist) shares mouthwatering recipes that help boost energy and satisfy cravings. Here, she shows how to transform zucchini into noodles, hide quinoa in chocolate chip cookies and sneak pumpkin into chocolate mousse. Peggy says there is a connection between what you eat and how you look. – no kidding! She offers healthy alternatives to pasta, cookies and chocolate cake, and spotlights some lesser-known ingredients that have healthy benefits, such as Savi seeds, kelp and sunflower seeds.

Below are her recipes and you can watch her video clip from the Today Show here. Let’s hope they keep up the good work on showcasing healthy and allergen-free friendly foods!


Zucchini linguini with omega-rich pesto

Prep Time: 15 minutes

Cook Time: 15 minutes

Total Time: 30 minutes

Zucchini linguini with omega-rich pesto

This pasta dish looks like pasta and satisfies your pasta craving, but without all the refined carbs! A kitchen-gadget spirooli slicer transforms your regular summer squash into zucchini noodles!

And since the zucchini is served raw, the vital nutrients are maintained.

Ingredients

  • 2 medium zucchini or yellow summer squash
  • For the toppings:
  • 1/2 pint cherry or grape tomatoes
  • 1/2 cup black Kalamata olives
  • 1/2 cup sundried tomatoes, chopped
  • 1/4 cup Savi seeds
  • 1 teaspoon kelp granules
  • Sunflower sprouts
  • For the pesto:
  • 1/2 cup Savi seeds (plain/sea salt)
  • 2 tablespoons hemp seeds
  • 2 cups fresh basil
  • 3 cloves garlic
  • 1/2 cup extra virgin olive oil
  • Squeeze 1/4 lemon
  • 1 teaspoon sea salt

Instructions

  1. To prepare the noodles:
  2. Add zucchini to spirooli and turn until noodles are formed.
  3. Add noodles to a bowl, add sunflower sprouts and toss with pesto (recipe below).
  4. Then top with the following: cherry tomatoes, sundried tomatoes, olives, Savi seeds and kelp granules.
  5. To make the pesto:
  6. Add all ingredients to food processor and process until well combined.
  7. Add 2 tablespoons of pesto to 1 cup of zucchini linguini and mix until well combined.
  8. Top with fresh cherry tomatoes, Kalamata olives and sundried tomatoes.
http://inspiredeats.net/low-glycemic-gluten-free-goodies-featured-on-the-today-show/

(more…)

Following a Raw Foods, vegan, vegetarian, gluten/dairy free or Paleo/Primal Blueprint diet?

Luckily there are plenty of options for you these days! 

A friend passed this recipe along which she found on WholeFoodsMarket’s site; I haven’t yet tried it but am excited to give it a shot, so I’m getting it up on the site to have it ready when we test it out this weekend. 

Enjoy! 

Mock Tuna Salad (Paleo, GF, Vegan)

Prep Time: 10 minutes

Cook Time: 10 minutes

Total Time: 20 minutes

Yield: 3.5 cups

Mock Tuna Salad (Paleo, GF, Vegan)

Per serving (about 1/2 cup): 400 calories (290 from fat), 32g total fat, 2.5g saturated fat, 0mg cholesterol, 370mg sodium, 22g total carbohydrate (7g dietary fiber, 8g sugar), 14g protein Ingredients

Ingredients

  • 1 cup sunflower seeds
  • 1 cup raw almonds
  • 1/3 cup finely chopped celery
  • 1/3 cup finely chopped pickles
  • 1/4 cup finely chopped red onion
  • 2 tablespoons chopped fresh dill
  • 2 tablespoons maple syrup or agave nectar
  • 2 tablespoons lemon juice
  • 1 teaspoon kelp granules
  • 1 teaspoon ground black pepper
  • 1/2 teaspoon sea salt

Instructions

  1. Put sunflower seeds and almonds into a large bowl, cover by 2 inches with water, cover and set aside at room temperature to let soak for 10 to 12 hours; drain well.
  2. Pulse sunflower seeds and almonds in a food processor until very finely chopped, scraping down the sides of the bowl as you go. Transfer to a large bowl and stir in celery, pickles, onions, dill, maple syrup, lemon juice, kelp, pepper and salt. Serve immediately, or cover and chill until ready to serve.

Notes

Serve this tasty nut- and seed-based salad on its own, or spread onto wraps or nori with assorted veggies.

http://inspiredeats.net/mock-tuna-salad-paleo-gf-vegan/


Note: photo and recipe originally submitted on Whole Foods’s site. Click here for recipe.

No matter the season, I love a bowl of soup for dinner! There’s something about the warmth of a soup as it travels down to my belly that makes me happy  🙂 And since it’s summer and the heat is kicking here in Austin, we’re turning to a soup that is great hold or cold, and satisfies our need for coconut oil and yummy fresh veggies. 

This is a vegan friendly recipe too as it omits butter or cream and relies simply on the squash and sweet potatoes for the thick, creamy consistency.  Below is one of our fave recipes, and you can play with the topping suggestions until you figure out your fave dish. We love lightly toasted walnuts or almonds for a nice crunchy/salty treat. 

How do you prefer yours? 


Paleo squash & sweet potato soup

Paleo squash & sweet potato soup

Ingredients

  • 1 butternut squash, skin removed and cubed
  • 2-3 large sweet potatoes/yams, cubed
  • 2 small-medium onions, finely chopped
  • 5 cloves garlic, minced
  • 1-2 sprigs fresh rosemary
  • 1 can coconut milk
  • 4 cups of vegetable stock (homemade or store-bought)
  • 2 TBSP coconut oil
  • a pinch or two of ground nutmeg and cinnamon
  • ground pepper and sea salt to taste
  • a few dashes of hot sauce (optional)
  • fresh chives, chopped for garnish (optional)
  • bacon, chopped for garnish (optional)
  • toasted walnuts or almonds (optional)

Instructions

  1. Begin by taking your cubed butternut squash and sweet potato and roast in the oven at 350 degrees until slightly browned
  2. Remove from oven and toss with 1 TBSP coconut/olive oil and fresh rosemary in a large bowl
  3. Spread cubes on a baking sheet
  4. Meanwhile, sauté the onion and garlic in remaining coconut oil on low-medium heat until softened and translucent
  5. Add butternut squash, sweet potato and sautéed onion mixture to a large pot
  6. Pour in vegetable broth and bring to a boil
  7. Reduce heat and season with ground nutmeg and/or cinnamon
  8. Using an immersion blender, puree the soup until smooth
  9. Next add coconut milk slowly, and continue blending until desired consistency is reached (if too thick add additional broth or water)
  10. Allow time to simmer on low/medium heat for flavours to mingle together – stirring occasionally
  11. Remove from heat and serve in your favorite soup bowls
  12. Finish with a sprinkle os sea salt and ground pepper
  13. Garnish with bacon, chives, walnuts or hot sauce if desired.
  14. Enjoy!
http://inspiredeats.net/paleo-squash-sweet-potato-soup/

Pizza nights are back!

Danielle of Against All Grain has done it again!

This time she has come up with a grain free pizza crust that claims to be delicious, and to hold up against its gluten and grain-full competitors, unlike some of the other grain free crusts we’ve tried which don’t allow you to pick up and indulge in a little slice of pizza heaven. 

She tops her with some of the delicious and healthy meats from US Wellness Meats, though we left the toppings up to you on this one, so go ahead and indulge in your favorites. Some of ours include goat cheese, spinach, garlic and tomatoes.  Another fave is sauce, ham and pineapple.  And yet another is the meat lovers favorite with proscioutto, sausage, ground beef and jalapeno. 

Truth be told, top it with whatever fresh and delish toppings you want and simply enjoy the ability of savoring pizza again on a grain free diet! 


Paleo, Gluten Free Pizza Crust

Prep Time: 20 minutes

Cook Time: 25 minutes

Total Time: 45 minutes

Paleo, Gluten Free Pizza Crust

Ingredients

    INGREDIENTS - CRUST
  • 3/4 cup whole raw cashews (or 1 cup cashew flour)
  • 3 tablespoons almond flour
  • 1/4 cup coconut flour
  • 1/2 teaspoon baking soda
  • 1/2 teaspoon salt
  • 1/8 teaspoon garlic granules
  • 2 eggs
  • 2 tablespoon almond milk
  • 1/2 teaspoon apple cider vinegar
  • 2 1/2 tablespoons extra-virgin olive oil
  • 1 tablespoon cold water
  • 1 tablespoon fresh parsley
  • 2 tablespoons fresh basil
  • INGREDIENTS - PIZZA
  • 1/2 cup marinara sauce
  • 3/4 cup US Wellness Meats Raw Mozzarella Cheese, shredded
  • 1/4 USWM Salami, casing removed and thinly sliced
  • 1 USWM Italian Sausage, casing removed and pre-cooked
  • 2 pieces USWM sugar-free bacon, cooked and chopped
  • 1/4 cup mushrooms
  • 1/4 cup black olives, pitted and sliced

Instructions

  1. Preheat oven to 350 degrees.
  2. In a food processor, pulse the cashews until a fine flour has formed.
  3. Add in the almond flour, coconut flour, baking soda, salt, and garlic granules, then process the mixture for 1 minute.
  4. Add the eggs, almond milk, apple cider vinegar, olive oil, and water and process for another minute. Scrape down the sides of the bowl and pulse a few more times until you have a very smooth dough.
  5. Add the parsley and basil, and pulse two more times to roughly chop and incorporate the herbs.
  6. Let the dough rest for 2 minutes to let the coconut flour absorb some of the liquid.
  7. Sprinkle a piece of parchment paper with a little almond flour, then turn the dough out onto the counter. Sprinkle a little more flour on the top of the ball of dough, then place another piece of parchment on top.
  8. Use your hands to flatten the ball into a disc, then lightly roll out the dough into a circle that is 1/4 inch thick.
  9. Remove the top piece of parchment and carefully slide the other piece with the crust onto a pizza pan.
  10. Bake the crust for 12 minutes, or until it has puffed up and is golden brown around the edges.
  11. Top with sauce and your favorite toppings and bake for another 10-15 minutes.
  12. Enjoy!
http://inspiredeats.net/paleo-gluten-free-pizza-crust/

It’s Gyro Time!

While catching up on my Facebook fan pages today I noticed a comment by someone who’s FB page title caught my eye: Gluten free & other allergen free recipes. So of course I headed on over to her site to see what it was about, and its a straightforward recipe site she built to help those of us trying to live the allergy-free life which she discovered after her children were diagnosed with food allergies. There are so many of us out here who just can’t tolerate the top food allergens, and more and more wonderful resources are popping up to help us manage the allergy-free lifestyle. I’ve mentioned this before, but my hope for Inspiredeats is to offer a destination site where you can bookmark any recipe you run across online in one place (and if we haven’t found it yet, we want you to be able to add it to our site). Alongside a fully stocked “allergy-free”  shop (which right now is powered by Amazon until we get the real one built), product reviews and a local guide for allergy free friendly restaurants.  So until then, we (being myself and my fabulous hubby and son) will keep testing and posting recipes, tips, tricks, and more to help you along your allergy-free path! Ok, back to the post at hand: I know so many people who are diagnosed with a gluten sensitivity, and if you’re lucky enough to have found it early (as I was for my son) then you can most likely live a life filled with as much or as little grains as you like without an issue (though it’s not my recommendation for a quest of optimal health). And while I prefer a life free of grains and dairy (for health and intolerance reasons) I know so many of you that would like to continue to eat your typical staples like rice, bread, pasta, pizza, pastries, etc. And while I discourage mass consumption of those guys, I think moderation is key for most of you to continue on a healthy and happy path.    So, with that said, this post is dedicated to those folks who have gone gluten-free, but don’t yet want to give up their sandwiches. Thanks to http://meganlierman.com/ for this recipe. Since my son eats grains now and then, and is a big fan of Udi’s, I’ll be making this for him as a taste test. I would omit the sour cream for personal reasons, but I imagine you can substitute some goat’s or sheep’s milk cream or just stick with the Feta cheese. Oh, and quick note on Feta – read the label carefully to make sure you’re not con suing cow’s milk if you prefer to avoid it when buying Feta as some manufacturers claim the name “Feta” on their cheese, but it’s made from cow’s milk. According to the EU, real Feta cheese must be made of at least 70% sheep milk and up to 30% goat milk, and it must be produced to definite specifications.

Gluten-free turkey gyros

Gluten-free turkey gyros

Ingredients

  • 1 lb. ground turkey
  • 1 tsp. oregano
  • 1 tsp. onion powder
  • 1 tsp. basil
  • 2-3 cloves garlic, minced
  • salt & pepper to taste
  • 1/2 c. sour cream (omit for dairy free option)
  • 1/4 red onion, sliced thinly
  • 1/2 cucumber, peeled & diced
  • 1 package Udi's gluten free pizza crust
  • handful of kalamata olives, pitted & halved
  • Optional
  • 1/4 c. feta cheese

Instructions

  1. Saute ground turkey in a little olive oil with garlic & dry spices; cook until no longer pink.
  2. In the mean time, mix feta with sour cream (omit this step if not using cheese).
  3. Heat gluten free pizza crusts in microwave until pliable; load up with turkey mixture and top with olives, red onion, sour cream mixture & cucumbers.
  4. Enjoy!
http://inspiredeats.net/gluten-free-turkey-gyros/