Why a detox juice?

Image credit: Levi Brown

We’re eating foods that contain pesticides, herbicides and other chemicals. Our air is full of heavy metals, chemicals and toxins. Our meats contain steroids, antibiotic residue and herbicides from food ingested by the animal. Our water has prescription drug residues, harmful chemicals, herbicides and pesticides in it.

Because we live in a polluted world, our bodies are having to maintain balance in a situation they we’re not designed to handle. If you follow a typical American diet, your body is most likely in a state of inflammation and your over-worked immune system is constantly battling the invaders from the fried foods, fast foods, white flour, refined sugar, chemical sweeteners, etc. that you’re eating.

So if you’re looking for a sure-fire way to help soothe and calm your poor digestive system, this detox juice is an easy and tasty option.  And continuing the series of juices that don’t require a juicer, this one is packed with ingredients that your blender can happily handle.

High-fiber root veggies and fruit keep things moving through the digestive tract, while ginger calms your stomach.

Enjoy!

Detox Juice Recipe

Prep Time: 5 minutes

Total Time: 5 minutes

Calories per serving: 155

Ingredients

  • 1 inch Ginger
  • 2 beet
  • 1 cup carrots
  • 1 apple
  • 1 cup crushed ice
  • Water for consistency

Instructions

  1. Place all ingredients in blender, adding water as needed until desired thickness is reached.
  2. Blend and enjoy immediately!

Notes

Note: to increase thickness to a smoothie consistency, add 1/2 cup Greek Yogurt or about 1 cup of ice and Dairy-free Milk of choice. Other great options are to add 1 banana or 1 whole avocado.
http://inspiredeats.net/detox-juice-recipe/

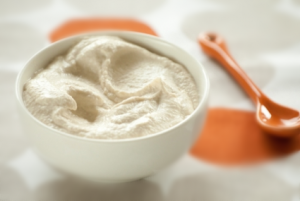
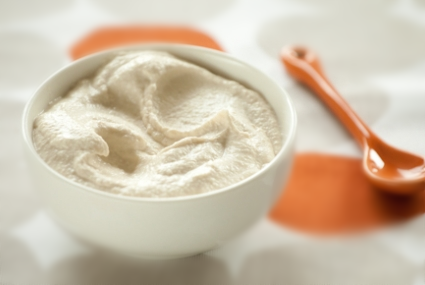
For those of you who can tolerate nuts, this is a cashew based mock sour cream recipe that’s perfectly suited for gluten free, dairy free, vegan and Paleo diets. It has a hint of sourness and its perfect for dipping raw veggies in, as a topper to tacos, enchiladas, or anywhere that you would have used traditional sour cream. 

Enjoy!

Cashew ‘Sour Cream’ (GF, DF, Paleo, Vegan)

Prep Time: 60 minutes

Cook Time: 5 minutes

Yield: 4 servings

Serving Size: 1/4 cup

Calories per serving: 150 calories (110 from fat)

Fat per serving: 12g total fat, 2g saturated fat

Cashew ‘Sour Cream’ (GF, DF, Paleo, Vegan)

Ingredients

  • 2 cups raw cashews
  • 1 TBSP apple cider vinegar
  • 2 TBSP lemon juice
  • 1/8 teaspoon fine sea salt
  • 1-2 TBSP fresh herbs
  • Water to thin

Instructions

  1. Place cashews in a cup or small bowl and cover by about 1/2 inch with boiling water.
  2. Let soak 30 - 60 minutes.
  3. Drain cashews, reserving the liquid.
  4. Place cashews in a blender with vinegar, lemon, salt and about 1/4 cup of the soaking liquid.
  5. Blend until very smooth, adding more water as required to purée the mixture.

Notes

0mg cholesterol 60mg sodium 8g carbohydrate (1g dietary fiber, 2g sugar) 5g protein

http://inspiredeats.net/cashew-sour-cream-gf-df-paleo-vegan/

When we made the move to Austin a little over a year ago, it was one of the hottest summers on record. We consistently beat the record for the number of days over 100 degrees, topping it off with more than 113 days and a record high of 111 degrees. And while you typically spend the first few months of a new town getting adjusted to the city, exploring the sites, discovering the wonders and unique aspects of it, we spent most every day in a local pool or watering hole so we could keep cool. And while we did manage to explore the local eats, it wasn’t until it cooled down a bit that I felt like truly discovering the many amazing eateries that help make Austin such a fun, eclectic and fabulous town.  I’ve written in the past about the Austin Food Cart scene, and the abundance of gluten free restaurants here, but until now I haven’t yet focused on the meat-free restaurants gracing our quaint little town.  And while I appreciate the importance of a plant based diet, and definitely eat my fair share of veggies, I don’t live a vegan life, so I was happy to stumble across this list from Food Republic of vegan and vegetarian restaurants in Austin.

I know how amazing our little city is, but there are plenty of you out there who have never been, and have no idea how wonderfully supportive Austin is. Yes, it’s a foodie town packed with its fair share of BBQ and Tex Mex joints, but as this list below shows, Austin is a fabulous supporter of meat-free living. I mean, how many other cities can you go to an African food cart, and ask for a Paleo salad which was full of fresh spinach, roasted lamb and delicious raw veggies? Ok, that’s not exactly a Vegan example, but I could have left off the lamb and it would have been equally as divine. 

So without any more delay, here’s the list from Food Republic complete with site links and contact info so you can check them out!

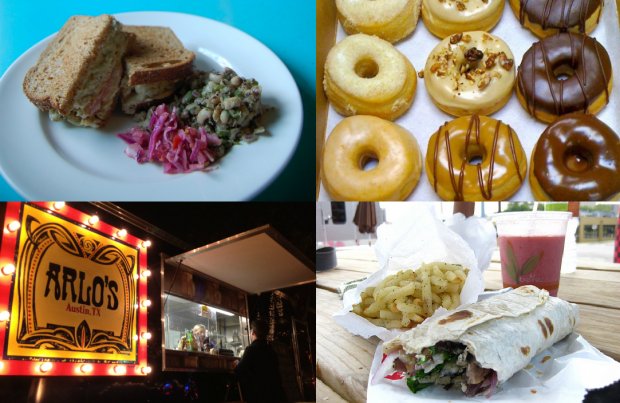
Clockwise: The Meltdown (faux tuna) at Counter Culture, vegan donuts at Red Rabbit bakery, wraps at Conscious Cravings, a late night stop at Arlo’s.


(more…)

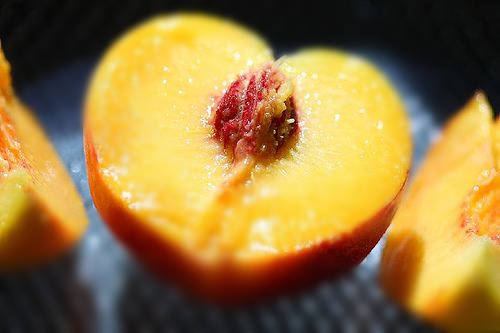
Bring on the hot summers, not so cool nights (gotta love our Texas weather!) and we start craving somethin’ sweet!  In an effort to avoid the abundance of uber-sweet, sugary ice cone places all around Austin, we prefer to make our own goodies around here.  And this is one of our new faves. 

This is a delicious, refreshing dessert packed with flavor and natural sweetness from the ripe peaches, and with the use of coconut milk and grape juice rather than cow’s milk, it remains gluten free, dairy free, vegan and 100% delish! 


Peach Coconut Freeze Dessert (GF, DF)

Prep Time: 10 minutes

Total Time: 10 minutes

Yield: 4 servings

Serving Size: 1 cup

Calories per serving: 180 calories

Fat per serving: 10g total fat (8g sat fat)

Peach Coconut Freeze Dessert (GF, DF)

Ingredients

  • 4 large ripe peaches, peeled and finely diced
  • 1/2 cup canned or fresh, coconut milk
  • 1/2 cup unsweetened peach or white grape juice
  • 1/2 cup unsweetened dried or frozen coconut flakes

Instructions

  1. Place diced peached in an airtight container and freeze until solid, at least 4 hours.
  2. Break up any big chunks and transfer peaches to a food processor.
  3. Add coconut milk and juice and process until fairly smooth (a few chunks of peach for textruse is nice).
  4. Spoon into bowls and sprinkle with coconut flakes.
  5. Enjoy!
http://inspiredeats.net/peach-coconut-freeze-dessert-gf-df/


As many of you following a paleo diet can relate to (and as this Italian-raised girl often blogs about) the old pasta dish is one of the most commonly missed dishes in my home. I grew up on homemade pasta dishes covered in homemade sauces, used as a base for lasagna and nestled in between fresh mozz and ricotta cheeses as a baked ziti.  So when I found out I had to give up pasta, I felt sad and a bit scared; scared of never enjoying my old favorites again. 

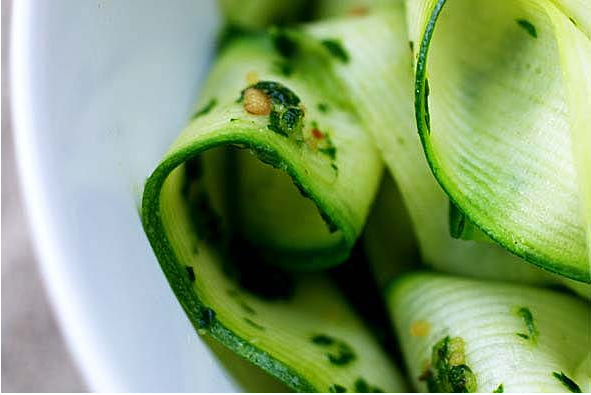
And it didn’t take long for me to hop online searching for an alternative pasta once I went paleo and kicked out all grains for good. Soon I discovered many posts about “zuchinni pasta”.  Sliced lengthwise, about one-eighth-inch thick (which you can also do it with a sharp knife, but it’s easier with a mandoline), zucchini ribbons can stand in for regular pasta. (Steam them for a couple of minutes until they’re crisp-tender.)

So when we ran across this paleo, dairy free ‘pasta’ dish on All Against the Grain, we were so excited to give it a test as it meets not only our gluten free, but our paleo needs too. And as Danielle who writes All Against the Grain often does, she was inspired by a similar recipe she found online and tweaked it a bit for her own tastes. 

The version we made at home was slightly different, so you can read her original post here and below for our modified version. 

This tasty little treat is not only grain free, but it’s dairy free as well, and with a quick omission of the prosciutto, it’s vegan friendly too. How perfectly balanced is that?  Food and health in harmony; life is good 🙂


Paleo zucchini “pasta”

Prep Time: 15 minutes

Cook Time: 15 minutes

Total Time: 30 minutes

Yield: 4 servings

Serving Size: 1 plate

Paleo zucchini “pasta”

Ingredients

  • 4 medium zucchini, peeled and sliced into thin noodles
  • 1 cup asparagus pieces
  • 2 tablespoons virgin olive oil
  • 1/2 cup cherry tomatoes, cut in half
  • 1 cup fresh chopped mushrooms
  • 4 cups boiling water
  • 1 garlic clove
  • 2 tablespoons chopped basil
  • 1/4 teaspoon salt
  • dash of pepper
  • Garnish with toasted pine nuts and fresh basil

Instructions

  1. Steam or pre-boil the zucchini slices until they're slightly tender (about 3-4 minutes)
  2. Heat olive oil in a nonstick pan
  3. Mince cloves of garlic and add zucchini, asparagus and mushrooms together over medium heat until the zucchini softens but isn't mushy.
  4. Add tomatoes and remove from heat.
  5. Garnish with toasted pine nuts and fresh basil.

Notes

Alternate options include:

2 ounces prosciutto (omit for vegan and add 1/4 teaspoon salt) 1/2 cup frozen peas (omit if you’d like for Paleo)

http://inspiredeats.net/dairy-and-grain-free-creamy-pesto-pasta-with-spring-vegetables/
Paleo creamy pesto zucchini “pasta”


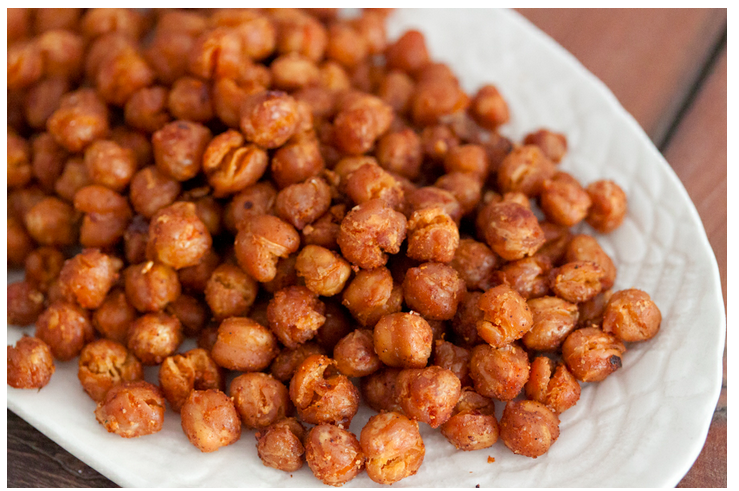
Sometimes I miss the salty crunch of chips, pretzels or crackers, so when the urge kicks in I turn to these guys; roasted, spicy chickpeas. They’re a tasty, easy to make treat and I typically have all the ingredients in the pantry. I discovered the recipe on What’s Gaby Cooking and I have to admit, I love the warm, spicy, toasty, salty combo! They make a great snack on their own, or as a side dish to your fave main course. 

All you need is 30 minutes, a can of garbanzo beans and some typical household spices. Kick up the heat for those of you with a flair for spicy. Enjoy!


Allergy-free, paleo roasted chickpeas

Prep Time: 5 minutes

Cook Time: 20 minutes

Total Time: 25 minutes

Yield: 1 yummy bowlful

Allergy-free, paleo roasted chickpeas

Ingredients

  • 1 15-oz can Garbanzo Beans
  • 1/2 tsp salt
  • 1/2 tsp garlic powder
  • 1/2 tsp red pepper flakes
  • 1/2 tsp paprika

Instructions

  1. Preheat the oven to 400 degree F.
  2. Drain and rinse the garbanzo beans in a large colander. Continue to rinse until all the foamy liquid goes away.
  3. Line the counter with a few sheets of paper towel. Place the drained garbanzo beans on top of the paper towel and let them dry for a few minutes.
  4. Once the beans are dried, place them on a parchment lined baking sheet. Drizzle with olive oil and then sprinkle on the spices. Using your hands, toss the beans around so they are all fully coated.
  5. Place the baking sheet in the oven for 20 minutes and all to roast. After 20 minutes, remove the pan from the oven and give the beans a little shake and then place back into the oven for another 20 minutes.
  6. Season with salt if needed once fully roasted and then serve.
http://inspiredeats.net/allergy-free-paleo-roasted-chickpeas/

Sweet, salty, creamy and crunchy. Too good to pass up!

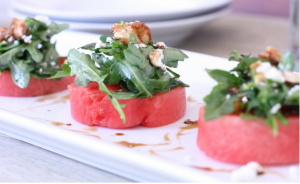
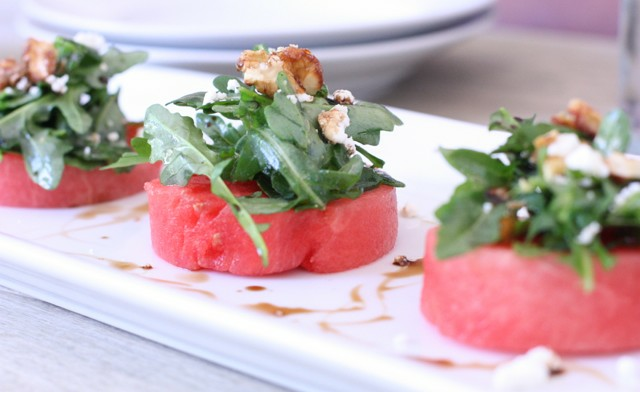
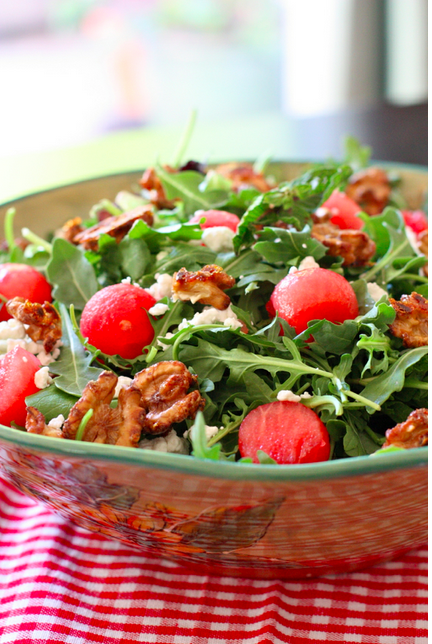
I’ve mentioned how much I like this site, Against All Grain, in the past so today I’m showcasing another of her fab recipes which is perfect for summer! As someone who eats a lot of salads, I can tell you I’m excited to give this one a shot.  The idea of combining the sweet and gritty texture of watermelon with arugula and goat cheese is just too tasty to imagine. So while I head out to the store to grab some watermelon, I wanted to throw this recipe up so you can enjoy it in the meantime. 


watermelon salad with arugula, goat cheese & candied walnuts

Yield: 6 servings

Serving Size: 1 individual salad

watermelon salad with arugula, goat cheese & candied walnuts

Ingredients

  • 6 pieces of watermelon, cut to 1 inch thickness
  • 2 cups baby arugula
  • 2 tablespoons fresh mint, chopped
  • 2 teaspoons extra virgin olive oil
  • 1 teaspoon fresh lemon juice
  • pinch of salt and pepper
  • 1/4 cup crumbled goat cheese (omit Goat Cheese or sub in Vegan cheese for vegan options)
  • 1 teaspoon balsamic vinegar
  • 1/2 cup Spiced Candied Walnuts, roughly chopped

Instructions

  1. Using a large biscuit cutter, or just great circle cutting knife skills!, cut the watermelon slices into round circles. Use a knife to trim off any parts that make the circle uneven so it sits flat on a plate.
  2. In a medium bowl, toss the arugula with the mint, olive oil, lemon juice, salt, and pepper.
  3. Arrange the watermelon circles on a plate, then top each with a small handful of the arugula mixture (roughly 1/3 cup each).
  4. Sprinkle each salad with goat cheese and the chopped walnuts, then drizzle the balsamic vinegar over the tops.
  5. Enjoy!

Notes

* If you’re serving to a larger crowd, or don’t want to take the time to cut the watermelon into rounds, you can use a melon baller to create cute balls or just simply cut the watermelon into chunks and pile it all into a salad bowl.

http://inspiredeats.net/watermelon-salad-with-arugula-goat-cheese-candied-walnuts/


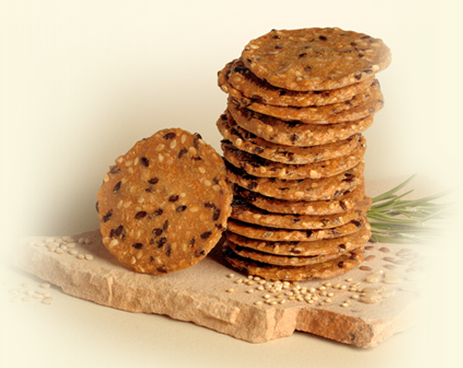
Mary’s Gone Crackers!

And cookies, pretzels and crumbs too 🙂 So it seems 

Not only do we love their name, but these are some darn good crackers, cookies, pretzels and crumbs too!  Mary’s lines are embedded in what she calls “Conscious Eating”. And I have to admit, I wish I would have thought of that perfectly clear and catchy little phrase first! It eloquently describes why we embrace allergy-free and kind eating habits, and Mary’s Gone Crackers offers several products to help you along that path. From crackers to cookies, pretzels and baking crumbs, Mary’s Gone Crackers believes in Conscious Eating. Eating consciously means being aware of how food impacts our minds, bodies and the planet, which is why Mary’s Gone Crackers uses organic, gluten free and non-GMO whole food ingredients. Yay!!

My son loves the crackers and cookies, though we have yet to try to the pretzels or crumbs but fully intend to do so. Sadly, I can’t eat quinoa, bot for those of you who can, these delish little crackers get 2 thumbs up from an 8 year old’s discerning palette.
We also love how Mary’s invites you to join their community and submit recipes online, with any lucky winners’ recipes who are chosen to be featured on their site receiving a free box of Mary’s Gone Crackers cookies. YUMMY rewards!
Using their postal code locator on their site here, you can browse the stores that carry Mary’s in your area. If you’re not among the lucky who have Mary’s nearby, we are hoping to offer them on our online store soon enough. Until then, you can always contact the supportive and friendly staff at Mary’s who will surely be happy to help you.

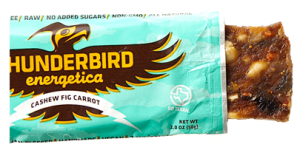
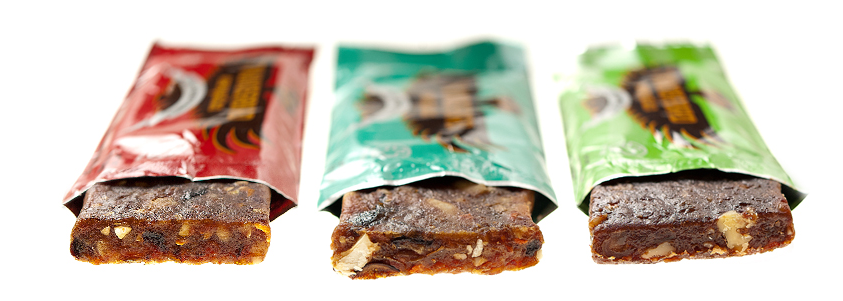
 Why we love Thunderbird – well, first, we haven’t tasted one we didn’t love! Not only are they handy and allergy-free friendly, they’ve literally saved us from a low-sugar driven faint spell. Well, it wasn’t quite that drastic, but they certainly helped stave off a cranky fit due to hunger pangs. Grab any of their 6+ delish bars and rest assured you will love any of their healthy, allergy-free friendly bars wrapped in eco-friendly wrappers.

I find them super handy to keep in my bags in case I find myself hungry at a sporting event, conference, travels, etc. and that inconvenient hunger pang hits when there are little (if any) allergy-free options around. My fave is the cashew fig because it’s not too sweet, and with the dates as a base, its moist, soft and totally satisfies! But with flavors ranging from Cashew Fig Carrot, Sweet Lemon Rain Dance, Cocao Hemp Walnut to name a few, these bars are sure to please every palette.

Good food, that is good for you and our pretty little planet. How can you go wrong?

In their words: Thunderbird Energetica specializes in creating epic tasting whole food energy bars. Containing uniquely pure and highly powerful ingredients, Thunderbird bars provide consumers with conveniently packaged, nutrient dense, plant-based goodness. Each bar is meticulously handmade using the finest and freshest available whole foods that Mother Earth has to offer.

Thunderbird Bars are 100% soy free, dairy free, gluten free, contain no added sugar energy  and give you the same clean burning fuel humans have enjoyed over the last 10,000 years.

Check out their site and buy some of these amazing bars today!

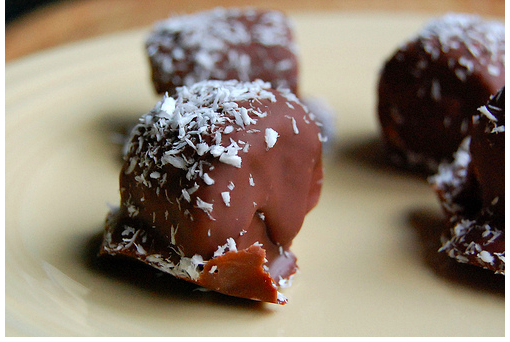
I don’t know about you, but one of the things I tend to crave when the cravings hit (and I should mention that they don’t come very often when you follow the paleo diet) is chocolate. So I was so happy to run across this tasty, guilt free treat to help satisfy those cravings when they hit!

I was browsing some of my fave sites today and ran across a new one so I can’t yet vouch for these, but they look delish and after reading a bit about the site’s owners and browsing their other recipes, I’m pretty excited to give this one a shot! Note that you can make them vegan by using dairy-free dark chocolate – yum!

Head on over to their site and view the orignal recipe here; http://www.neverhomemaker.com/2010/06/frozen-banana-bites.html 

Enjoy!!


Frozen chocolate peanut butter banana bites

Prep Time: 10 minutes

Cook Time: 5 minutes

Total Time: 15 minutes

Ingredients

  • 2 large bananas
  • 1/4 to 1/3 cup vegan chocolate chips
  • 1/4 to 1/3 cup natural peanut butter
  • Unsweetened coconut flakes

Instructions

  1. Set out a large plate or bowl with a piece of parchment or wax paper on it.
  2. Cut up the bananas into good-sized chunks. Each banana should give you around 5 to 6 pieces.
  3. Heat the peanut butter and chocolate chips in the microwave on high for about a minute. Then stir until smooth.
  4. Dip the banana pieces in the chocolate-peanut butter mixture. Lay them out leaving some space between them on the parchment/wax paper. Then when you've "covered" them all, use the remaining mixture to spoon over the tops (for even more chocolate-y goodness).
  5. Then sprinkle the unsweetened coconut flakes on top. Transfer to the freezer for about an hour until hardened.

Notes

You can enjoy them right after they're made (but they aren't frozen yet -- and when they're frozen, the banana tastes like vanilla ice cream). I suggest then covering with some plastic wrap (or really you can do all of this in some kind of Rubbermaid container) and let them freeze overnight.

http://inspiredeats.net/frozen-chocolate-banana-bites-vegan/


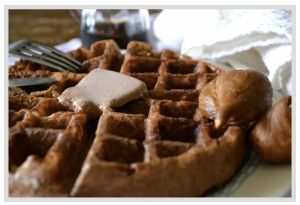
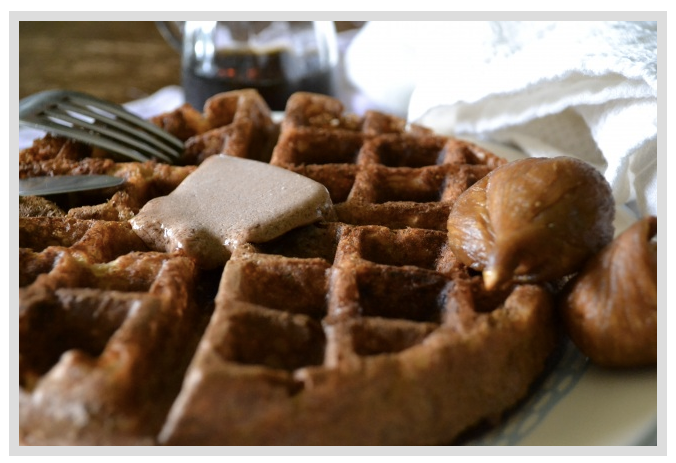
I just discovered a new vegan foodie blog today and found this delish looking recipe for gluten free, vegan waffles. When you get a chance, hop over to visit An Unrefined Vegan, described as Unprocessed, unbleached and cruelty-free:  low-fat, low-sugar, whole food and plant-based recipes to nurture body, brain and conscience. Her food choices are creative, sound incredible and I love her photos! Great blog to bookmark 🙂

I’m sure it would taste just as good with traditional eggs and buttermilk for the non vegans here, so go ahead and experiment a bit and tell me how it turns out!

Gluten free, vegan: Banana-Chai Buttermilk Waffles with Cocoa-Coconut Butter

Prep Time: 10 minutes

Cook Time: 10 minutes

Total Time: 20 minutes

Yield: 3+ 8" waffles

Serving Size: 1 8

Ingredients

  • 1 cup spelt flour (use gluten-free flour or flour substitute such as almond flour for gluten free version)
  • 1/3 cup oat flour (use certified gluten free oats and process them in a food processor)
  • 1/2 cup almond meal (I used the meal left over from making almond milk, dried and processed in food processor)
  • 1 1/2 tsp. baking powder
  • 1/2 tsp. salt
  • 1/4 tsp. baking soda
  • 1/4 tsp. powdered stevia
  • 1/4 tsp. anise seeds (ground in coffee grinder)
  • 1/4 tsp. powdered cardamom
  • 2 pinches ground black pepper
  • 1/4 tsp. ground cinnamon
  • 1/8 tsp. ground cloves
  • 1/4 tsp ground ginger
  • 2 tbsp. egg replacer + 6 tbsp. water (whisk together until frothy, then let sit for a minute)
  • 1 large, very ripe banana, mashed
  • 1 1/2 cups vegan buttermilk
  • 1 tsp. vanilla extract

Instructions

  1. Combine the flours, almond meal, baking powder, salt, baking soda, stevia and spices in a large bowl.
  2. In a smaller bowl, whisk together the egg replacer, banana, buttermilk and vanilla extract. Add the wet ingredients to the dry ingredients and stir just until the dry ingredients are just moistened. Let the batter sit for about 15 minutes. (Turn the oven on to 200F so you can warm the plates and keep the cooked waffles crispy – and heat up the waffle iron, too.)
  3. Lightly spray waffle iron with cooking oil and ladle on the batter. Cook for about 4-5 minutes and gently remove waffle and place on oven rack to keep warm while you prepare the rest of the waffles.
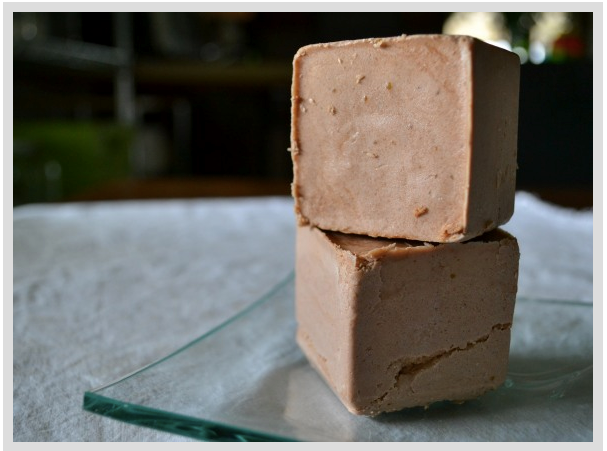
  4. Top with a dab, slab or slice of Cocoa-Coconut Butter and your other favorite waffle toppings!
http://inspiredeats.net/gluten-free-vegan-banana-chai-buttermilk-waffles-with-cocoa-coconut-butter/


Cocoa-Coconut Butter

Ingredients

  • Cocoa-Coconut Butter
  • 1/4 cup + 2 tsp. soy milk
  • 1 tsp. apple cider vinegar
  • 1/8-1/4 tsp. salt
  • 2 1/4 tsp. soy lecithin granules
  • 1/4 tsp. xanthan gum
  • 1/2 tbsp. unsweetened cocoa powder
  • 3 tsp. agave nectar
  • 1/4 tsp. vanilla extract
  • 1/2 cup + 2 tbsp. + 1 tsp. refined coconut oil
  • 1 tbsp. canola or vegetable oil

Instructions

  1. In a small measuring cup, whisk together the soy milk and cocoa powder until thoroughly combined. Whisk in the salt and apple cider vinegar and let sit for 10 minutes.
  2. Melt the coconut oil in a small measuring cup. It’s not necessary to completely melt it down – some small solid bits are okay. In the bowl of a food processor, add the melted coconut oil, canola oil, soy milk mixture, soy lecithin granules, xanthan gum, agave nectar and vanilla extract.
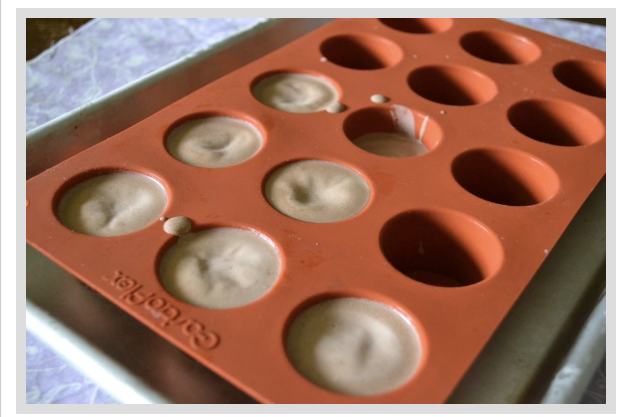
  3. Process for 1 minute, then scrap down the sides and bottom – sometimes the soy lecithin granules get stuck near the blade. Process for an additional minute, then carefully pour the mixture into the molds.
  4. Chill in the freezer for at least one hour before removing from molds. Store in the refrigerator or freezer.
http://inspiredeats.net/gluten-free-vegan-banana-chai-buttermilk-waffles-with-cocoa-coconut-butter/


I happen to love latin-inspired foods, and we eat a lot of cilantro-laden and often spicy foods around here. Fortunately our son enjoys the heat too, so we can prepare foods to suit our tastes, but occasionally we have to modify the heat a bit to his liking. So when I ran across this recipe in Whole Foods recently, we tested it out and agreed it was suitable for all of us. 

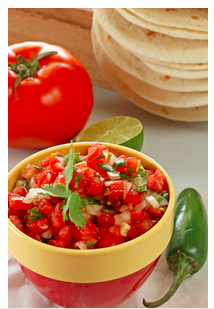
Courtesy of Whole Foods, this is a slightly spicy, light and fresh salsa that makes a great dip for chips or addition to fajitas hot off the grill and breakfast tacos. So depending on your family’s preference, add chiles to suit your tolerance for fire, and enjoy a delish, gluten free, paleo friendly salsa to complement pork, chicken, beef or simply as a stand alone for your preferred dipping choices (we recommend celery or fresh, home-made zucchini or kale chips). 


SPICY TOMATO SALSA WITH CILANTRO AND CHILES

Prep Time: 15 minutes

Yield: 6-8

Calories per serving: 10

Fat per serving: 0

Ingredients

  • 2 medium cluster tomatoes, seeds removed and cut into small dice
  • 15 sprigs fresh cilantro, leaves roughly chopped (discard stems)
  • 1 large garlic clove, minced
  • 1/2 medium-size onion, diced
  • 2 teaspoons fresh lime juice, or to taste
  • 1/4 teaspoon sea salt
  • 1 fresh serrano chile, minced (discard seeds)
  • 1 fresh jalapeño chile, minced (discard seeds)

Instructions

  1. Place diced tomatoes in medium-size bowl, add cilantro, garlic, onion, lime juice and salt. Taste a tiny bit of both serrano and jalapeno chiles to gauge degree of heat and add according to preference.

Notes

Nutrition Per serving: 10 calories (0 from fat), 0g total fat, 0g saturated fat, 0g protein, 3g total carbohydrate (1g dietary fiber, 1g sugar), 0mg cholesterol, 85mg sodium

http://inspiredeats.net/spicy-tomato-salsa-with-cilantro-and-chiles/