When I launched Inspiredeats, I had a simple idea in mind; to help people (who are sick and lost along their healing journey) by connecting them with helpful information and medical professionals who could help them heal.

Over the last year I’ve shared hundreds of recipes, reviewed allergy-free products, shared tips on restaurants that are allergy-free and connected readers with helpful resources to answer their questions about how and why they just can’t feel better. I’ve shared what I’ve learned along my journey, and while I have a lot of helpful info swirling around in my head, I’m not a licensed practitioner, so I always hesitate to offer much advice.  Rather, I share what my journey has entailed in the hopes that it helps you to know you’re not alone.

Why Nutrition?

I was sick, tired, spiritually broken and ready to give up, until someone came along who wanted to help me, and who had a pretty good idea of what was wrong with me. She changed my world forever, and along the way, I have met many other people like her who are devoted to this healing journey.

So today I’m excited to announce our partnership with The Wellness Pantry! Margaret Connor, founder of The Wellness Pantry, helps optimize your health through nutrition and lifestyle support so you can reduce daily stress, stop mealtime battles and bring healing foods & connection back to the family table.

Margaret offers consulting services that are suited to you, and your family’s, unique needs.  Below are just a few of the many amazing services she offers, and these can all be done locally in Austin, or remotely via phone calls and/or Skype.

Note – be sure to tell Margaret you heard about her from us and she’ll give you a special bonus as a new client. 


personal-consulting

TO GET YOUR PANTRY GLUTEN-FREE WE PROVIDE:

  • A review of favorite foods and your personal/family diet to help customize the contents of your new, gluten-free pantry. We can incorporate additional dietary restrictions (to nuts, eggs, soy, etc.) if necessary.
  • A customized gluten-free shopping list to meet you or your family’s needs. You’ll get lots of options so you won’t get bored!
  • The Grocery guide: Where to buy everything on your list
  • A follow up phone-call to decide what is working, what isn’t and discuss further strategies to help you get through the tough time of transition! (30 minutes)

OTHER GLUTEN-FREE OPTIONS & RESOURCES:

  • Customized gluten-free recipes for you (easy and taste-tested!). These will be built around your favorite foods and/or additional dietary restrictions.
  • Gluten-free customized recipes that work for kids
  • A gluten-free grocery shopping trip/guide
  • Started off strong ? Needing some fresh ideas? Try a follow-up session

PERSONAL NUTRITION PLANS

Personal Nutrition Plans can include any combination of the following:

  • Cost-effective shopping guide at your favorite market
  • Customized shopping list to help you achieve your nutrition goals. Includes our list of “Best Brands”of your favorite foods
  • Home assessment of your pantry, fridge and freezer to pull out the foods that have the most harmful additives and preservatives. These are the foods that are making weight-loss impossible, lowering energy levels, and making your kids hyperactive.
  • Personal shopping service
  • Customized recipe suggestions incorporating your favorite foods
  • Follow-up support to keep your food choices fresh and exciting


For more information, please contact Margaret, and be sure you heard of her from InspiredEats for a SPECIAL OFFER!

GET IN TOUCH!

Mailing Address:
2700 West Anderson Ln. #205
Austin, TX 78757 (more…)

Dry, crumbly gluten-free bread spoiling your school lunches?

Recently I was talking with some other moms who are raising gluten-free kids, and they both commented that every time they open their children’s lunch boxes at the end of the day, the sandwiches are still there. Untouched, as if mocking them for trying to raise an allergic child in a healthy way.  Their kids complain that the bread is hard, crumbly and doesn’t taste good. They look up at their moms, sadly, and she can picture visions of fluffy white bread running through their heads.

Since they know my son eats his gluten-free sandwich every day, they wanted to know what my secret was. How was it that I was able to get him to eat this hard, crumbly, less than ideal sandwich every day? Was it just good luck? Did I just have the least picky kid on the planet?

Not really; it turns out I’ve just had a bit more time trying different gluten-free options, combined with living in the right place at the right time.

Several years ago when my son and I were diagnosed with a gluten allergy I hit the health food stores and taste tested every gluten-free bread I could find. From Ezekiel sprouted to rice bread, and all the more ‘mainstream’ gluten free breads on the market, and here’s what I found out; most of them are hard and tasteless. My son wanted something like the bread he was used to. A sandwich that was soft, yet held together by the time his lunch break rolled around, and that didn’t taste uber-healthy. And to be honest, I didn’t think I was going to find anything, so when he was unhappy with all of those, I bought a Zojirushi Virtuoso Bread maker and took to making our own blends.  I tried almond flour, coconut flour and rice flour blends. We bought storage containers, bread slicers and gave it the full whirl. In the end, while he loved them, I found it to be a lot of work for a little reward.

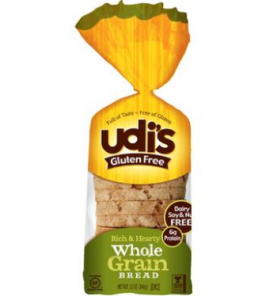
And here’s where the luck part comes in. One day we were at our local farmers market in beautiful Boulder, Colorado, and stumbled upon a stand for Udi’s Artisan Breads. Turns out they weren’t kidding about the “Artisan” part. I stared, longingly at the fabulous looking baguettes and fresh loaves that I previously would have happily purchased. And just when we were about to walk away, we overheard someone ask for a loaf of their gluten-free bread. The Udi’s employee reached underneath the booth and pulled out a prepared, pre-sliced loaf of gluten-free bread. I listened to them chat about how soft and delicious this bread was. I moved in closer while they talked about how light and fluffy the bread was. How to store it, how to cook with it and shared their favorite recipes ideas. When they were done, I asked for a gluten-free loaf, paid the $6 (the sticker-shock on these prices fades as you realize that’s just the deal with gluten-free goodies) and off we went to see if Udi’s would live up to the hype.

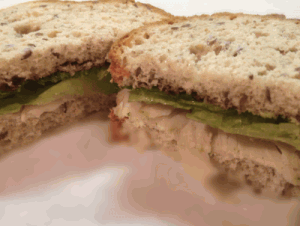
The idea that I could pick up a locally made, gluten-free loaf of bread that my new-found gluten-free farmers market friend raved about was so exciting, yet I worried that my expectations would differ from hers, and my son might once again be disappointed.  So we headed home and gave it a whirl. Though the bread wasn’t frozen, the girl from Udi’s advised us to freeze it to preserve freshness and said it only needed to thaw for a few minutes before you can make a fresh sandwich. So we took out a couple of slices, and put the rest in the freezer. Our son was excited to try his new bread, and since I wanted to see how soft it truly was, we prepped a turkey sandwich with lettuce and jam (his fave). He took one bite, then another, and finally a smile – he was thrilled. So there you have it – luck had us happen upon Udi’s farmer market stand, at the perfect moment to overhear a conversation about their gluten-free breads.

I tried a few ways of making his sandwiches; I toasted them from frozen, toasted from thawed, and simply let it thaw before making the sandwich. As it turns out, toasting it essentially turns it into a crouton, no matter whether it’s toasted from frozen or thawed. The only version he happily ate every bite of was the thawed version. Simply remove the bread from the freezer, let it thaw a minute or two, then prep your sandwich, wrap it in foil or cling wrap and send your kiddo off with a sandwich they will eat!

So there you have it – not overly impressive, I know, but hopefully our experience will help save you some time, headaches and tears and help your kiddos learn to love eating gluten-free sandwiches!

How to make a soft gluten-free sandwich that will hold together by lunchtime (no crumbles, just soft, yummy bread!):  

Step 1:

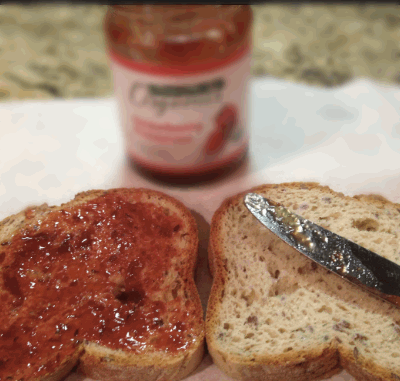
Pull out 2 slices of frozen gluten-free bread from the freezer, allowing them to thaw for a couple of minutes.

Step 2:

Prep the sandwiches (here’s one of our son’s faves: turkey with lettuce and strawbery jam)


(more…)

Is a gluten-free diet really healthier for us?

I’ve been asked often if a gluten-free diet is healthier for someone who isn’t gluten intolerant. Meaning, does everyone gain something from going gluten-free, or just those with a sensitivity or allergy (Celiac)? This is a tough one because it really comes down to how you treat the gluten-free lifestyle. If you’re simply replacing your gluten-ful products with their gluten-free counterparts, than my answer is NO, it’s not a healthier diet.

If however, you take this as a chance to get back to basics, and explore the many amazing foods that are available which don’t come processed and pre-packaged, you’re absolutely on your way to a healthier lifestyle. I have reversed some pretty scary health issues by removing grains and dairy from my diet, and I have talked to countless other folks who have as well. If you follow the Primal or Paleo movements, you know that there are medical professionals who share stories of patients who have reversed diabetes, lost  weight, reduced anxiety and depression, overcome fatigue, balanced blood pressure levels, stabilized thyroid functions and more.

While I avoid almost all packaged foods, I completely understand the need for having something quick and easy on-hand for those moments when hunger pangs strike. We all know what it feels like to have your sugar levels go crazy; in fact, we joke that our son is like the Snickers commercials – he’s just not himself when he’s hungry!

But let’s face it, the gluten-free versions of bread, muffins, cookies, crackers and the like are often made from rice grains, potato starch, sugar and/or HFCS (high fructose corn syrup) which can wreak havoc on our digestive tracts and our blood sugar levels. So unfortunately, the gluten-free stuff you’re eating now might not be any better for you, which is why it’s important to not over-due these foods (if at all).

So here are some tips for keeping it simple when you’re gluten (and grain) free. 

First, focus on nature’s foods. Fresh fruits and veggies, nuts, seeds and whatever protein sources you like. By cutting back on starchy carbs, you will naturally avoid the sugar spikes they cause and help your body to aid in easier digestion by focusing on foods which it was naturally designed to eat.

Second, be prepared. Yep, this lifestyle requires a bit more prep work than you’re used to, and while you can still enjoy the occasional gluten-free snacks, it’s best not to count on them.  We make our lunches the night before, prep our meals on Sunday for the week, pre-cook what we can, go to the grocery store often so our food is fresh and our supplies are full, and share recipes with friends and family who are on the same path so we can keep things interesting !

Here are some of the fresh snacks I keep on hand every day (had to upgrade my purse a bit to accommodate all our snacks, but it’s totally worth it): fresh sliced fruit, grapes, berries, nuts, seeds and trail mixes (just watch that the ingredients are gluten-free).  Some of the brands we love are Thunderbird Energetica bars, Larabars, Happy Hemp seeds and Kind Life snack kits.

And remember, it will take some time for your palette to adjust to the difference in appreciating naturally sweetened foods from artificially sweetened ones. There’s a big difference, and it will take a little while for both the cravings to stop, and for you to appreciate healthier foods.

Third, be kind to yourself. This whole journey will take some time to get used to, and you will have moments where you feel stronger than others. If you fall off the wagon into a glutenous cupcake, just get back up again when you’re done, and get back on track. if you’re intolerant or allergic, that misstep will set you back a week or two from the amazing improvements you had enjoyed, but it doesn’t mean you can’t get back to feeling great again.  And if you’re focused on a gluten-free diet because you just feel better when you avoid processed foods, then the same will be true of your progress, though you won’t feel nearly as bad as the allergic folks will from a set back.

So what do you think? Are you feeling better since going gluten-free? I’d love to hear your stories, what works for you, or even if you gave up and went back to gluten. No judgements – we can always take away something from other people’s journeys, so please share below!


My son’s holiday party is today, and the kids were asked to bring in a special treat that symbolizes their family heritage. Since my family tended to center around the kitchen, that wasn’t a problem for me. The real challenge was in making an updated gluten-free, dairy-free version that my son could enjoy too.  Since he can eat eggs I made this version with eggs, but if you’re following an egg-free diet, you can use your preferred egg substitution (ours is typically 1 TSP ground flax seed and 3 TSP water per egg).  If you’re not into flax, here are some other options that have been shared with us.  Some I’ve tried, many I haven’t, so I can’t speak for all of them.

1 egg =

  • 1/2 mashed banana
  • ¼ cup applesauce or pureed fruit
  • ½ cup soy yogurt
  • 1-1/2 teaspoons of Ener-G  Foods Egg Replacer  +  2 tablespoons  lukewarm water (Ener-G is a powder commercial egg substitute)
  • 1 tablespoon ground flaxseed meal + 3 tablespoons water
  • 1 tablespoon ground flaxseed meal + 3 tablespoons water + 1 tablespoon mild flavored cooking oil + 1 teaspoon low sodium baking powder + 1 teaspoon tapioca or potato starch or corn starch
  • ¼ cup mashed white potatoes or  sweet potatoes
  • 2 tablespoon potato starch, cornstarch, or arrowroot
  • 2-3 tablespoons of tomato paste
  • ¼ cup cooked oats
  • 2-3 tablespoons of bread crumbs
  • 2-3 tablespoons of flour
  • 1/4 cup of tofu blended (any kind) with the liquid ingredients in the recipe


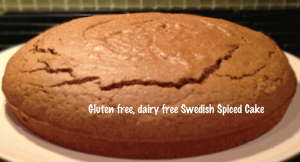
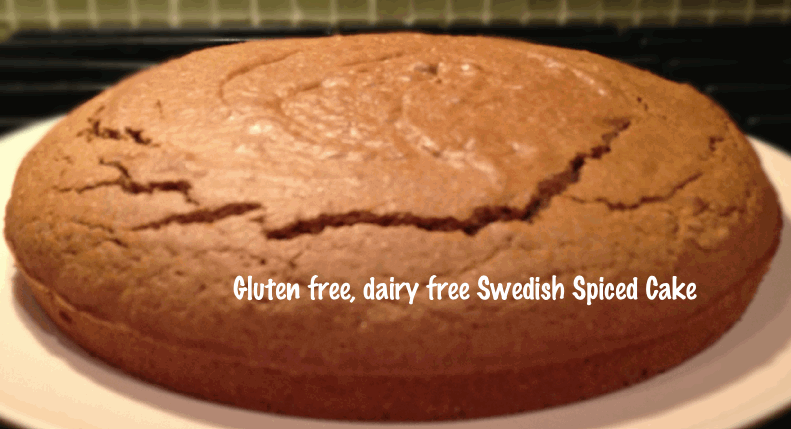
As for our spiced cake, this is a play off of a favorite of mine from childhood; a Swedish spice cake called Pepparkakor. My updated version is gluten and dairy-free, and since I can’t try it I had to rely on my son’s review… “it’s AWESOME mom” 🙂


Gluten-free, Dairy-free Swedish Spiced Cake spicedcake2

What you’ll need: 

  1. 2 1/2 cups blanched almond flour (or preferred GF flour substitute)
  2. 1/2 teaspoon salt
  3. 1/2 teaspoon baking soda
  4. 1 tablespoon ground cinnamon
  5. 1 teaspoon ground allspice
  6. 1/2 teaspoon ground nutmeg
  7. 1/4 teaspoon ground cloves
  8. 1/4 cup brown sugar
  9. 1/4 cup coconut oil, melted over low heat and cooled slightly (can substitute for butter)
  10. 3 large eggs
  11. 1/2 cup honey
  12. 1/4 cup pure maple syrup
  13. 1 tablespoon vanilla extract


How you’ll make it: 

1. Preheat the oven to 350F. Grease an 8-inch square baking dish (you can also use a 9×9) with oil and dust with almond flour.

2. In a large bowl combine the almond flour, salt, baking soda, spices, and brown sugar.

3. In another medium bowl combine the melted coconut oil (make sure it isn’t hot or you will scramble the eggs), eggs, honey, maple syrup, and vanilla.

4. Stir the wet ingredients into the dry until thoroughly combined.  Scoop batter into the prepared baking dish.

5. Bake for 30-35 minutes or until a toothpick inserted into the center comes out clean.

6. Let the cake cool for 1 hour then serve.


Enjoy!


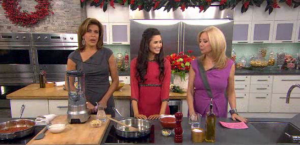
I was excited to see the Today Show sharing some healthy, allergy-free friendly foods on the Today Show. Chloe, of Chloe’s Kitchen is a Vegan chef who shares some Vegan, Dairy-free and Gluten-free options. From creamy Penne ala Vodka, creamed with a homemade cashew cream, to Roasted Veggies and a Vegan Chocolate Ice Cream made of Coconut and Almond milk, Chloe shares some quick and easy recipes.

Love these ideas and the fact that mainstream media is catching on to the need for allergy-free foods. Not to mention that they can be delicious as well as healthy!


Visit NBCNews.com for breaking news, world news, and news about the economy

Last night we had some friends over for dinner, and with 3 kids and a few special diets to accomodate, I wanted a meal that was quick and easy, and could keep a vegan and some gluten and dairy free peeps happy.

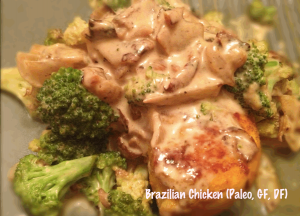
I needed something that wouldn’t keep me in the kitchen the whole time cooking since I had invited a friend and her 2 boys over, so I chose this Brazilian Chicken which has a rich, creamy texture in a dairy-free sauce. This recipe allowed me to prep some of the ingredients ahead of time, which left me time to chit chat, and the boys time to bond. Here’s a pic of our boys; her little guy just adores my son, and since mine is an only child, he loves the attention 🙂

Since I was starting with a base of gluten and dairy-free, this Brazilian Chicken is a great choice as it’s a Paleo meal that uses some simple spices to add an exotic flair, and gets it gravy-like consistency from rich coconut milk. The process is simple, and as my friend said, it “tastes a lot more complicated than it really is”. Gotta love an impressive dish that doesn’t kill you in the kitchen!

While this is adapted from All Recipes  we’ve made some adjustments along the way to make it our own and accomodate a nightshade free diet (the original recipe calls for tomatoes and jalapeño peppers).  I’m sure you can do the same by adding in some of what we’ve omitted  including cayenne pepper, jalapeños and parsley.

Turns out this recipe kept most of the guests happy, with the older boys devouring the chicken, though the littlest guest wasn’t having any of it.

While we tried our best, he wasn’t digging the chicken, spinach or roasted carrots but he was happy to chill with his big brother while he ate the goods. Here he is desperately searching for something yummy in the fridge after deciding he wasn’t loving my dinner.

Glad I could keep one of the guests’ bellies full of some good food!

(more…)

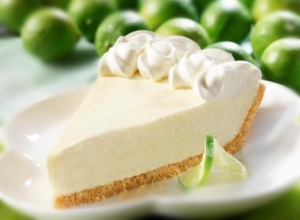
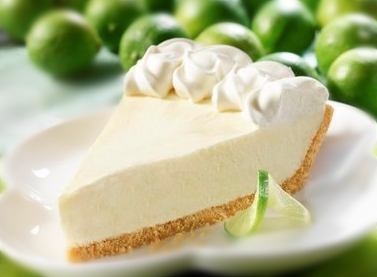
Our guest blogger, Manilyn with Bettercater has whipped up a tasty gluten-free KeyLime Pie recipe that she likes to use to satisfy her sweet tooth cravings. I can’t say that key lime is a favorite of mine, nor have I ever made it, so I’m taking her word for it on this one!

Now, I’ve always been warned that I could go back to my old, XL size if I don’t quit eating pies and cakes. Nothing to worry about – I’ve got the right recipe to savor what my toothy palate craves for, without ever, ever adding an inch to my body. A few months ago, I tried making gluten-free Key Lime pie; it was a hot summer day and the taste was so refreshing that I ate two slices of them. Not entirely guilt-free, but almost!

I have tried baking different types of pies, but this gluten-free Key Lime pie is the simplest to make without sacrificing on taste. Gluten-free Key Lime Pie got its name from the Florida Keys, the same island where it originated in the 1800s. During those days, the islands had little supply of cows, though canned milk was readily available. Originally, this was prepared using condensed milk, egg yolk and locally-grown limes, while sugar was added to preserve the sweetness.  Eventually, Key lime’s popularity spread beyond the islands, spawning many different takes on the traditional KeyLime Pie.

Here’s my basic KeyLime Pie recipe, using a gluten-free crust. You can innovate the recipe if you want to make your own unique version, but just make sure to stick with the essentials!


Gluten-free Key Lime Pie

Gluten-free Key Lime Pie

Ingredients

  • 1 gluten-free graham cracker pie crust
  • 400 mL of lowfat or nonfat condensed milk.
  • 5 large egg yolks
  • 1 cup lime juice (But if you want a more authentic taste, try to use Key limes)
  • 1 tablespoon grated lime zest

Instructions

  1. Set the oven at 350 F.
  2. Prepare a Graham cracker crust. It should be nine inch-round and unbaked.
  3. Mix all the ingredients. Beat until they turn smooth and creamy.
  4. Pour the mixture into the pie crust. Smooth the top.
  5. Bake for 10-15 minutes or until the filling solidifies.
  6. Set aside to cool then refrigerate for 2-3 hours.
  7. Garnish with whip cream and lime before serving.
http://inspiredeats.net/gluten-free-key-lime-pie/


About the Author –  This article is contributed by Manilyn Moreno, on behalf of Better Cater, a company providing catering software that is easy to learn and use.

I used to go through life without thinking much about things. I wasn’t much of a planner at all; in fact, I was both irked by, and in awe of, people who were. How could they so confidently know what they were going to want in a few days, a week or even months? I had the hardest time picking a major in college because I couldn’t imagine that I knew at 19 years old what I was going to do for the rest of my life.

My reality today?  Having food allergies means I have now become the biggest planner.

I can’t count on the ease of quick grab-n-go type foods since they typically contain ingredients I can’t eat, so I end up bringing snacks with me everywhere. I’ve become one of those people who eats dinner for breakfast (avoiding grains, dairy and eggs make breakfast foods near impossible), and I find myself reheating leftovers while my husband and son indulge in my old favorites, including breakfast tacos. Sadly,  I live in Austin and can’t eat breakfast tacos! Speaking of my son, I’m raising a gluten, & dairy free kid which means I have to be prepared much more so than if I could simply rely on a quick drive thru or convenience store for a cure of the hunger pangs.


So, when a friend sent along a link to a book written by a set of Paleo parents trying to help others learn how to live a Paleo life with their children, I quickly bought a copy.  To be honest, raising a child is complicated enough, but when you throw in food allergies or sensitivities  it takes it to a different level.  I want to make sure he doesn’t feel left out, or like the oddball of his friends. So while I now carry the ‘mom bag’ packed with healthy snacks, and Yelp restaurants for allergy-free reviews often, it was nice to read from another set of parents who are living the allergy-free life and making it work!

I agree with the parents behind the book, Eat Like a Dinosaur.  They’ve found a way to make special diets fun for their kids, and they help parents understand how to keep our children safe and healthy. By following a modified Paleo diet, they have helped heal their children from various auto-immune conditions, which is so important in preventing a series of much scarier health concerns down the line.

What I love about the book?

It focus not just on a Paleo diet, but rather on food allergies in general, and includes old favorites such as cereal, chicken nuggets and waffles, which are all grain-free. Their intent is not on excluding foods, but rather, on eating healthy and delicious ones which mimic the same foods we are accustomed to, but in a healthier version. 

All recipes are free of dairy, wheat, peanuts and soy.

All recipes are labeled so you know if they contain shellfish, tree nuts, fish or eggs.

Many of the recipes are set up to show your kiddos what parts they can help with, so they can help in the process of making these foods that are designed to help them live healthy lives. Plus they get to play a part in making some delish dishes!

It’s so important to help kids feel normal when they’re dealing with something that society has a bit of a stigma about, and I love that these foodie parents went all out to write a cookbook that helps their kids feel completely normal about their special diets.

Here’s a description of the book below and a video clip you can watch as well. I hope this helps you navigate the complexities of a ‘different’ lifestyle choice for you and your family too!


(more…)

This time of year our fridge is packed with foods for Thanksgiving, and our counters tend to spill over with items we’ll need to have on hand on Thursday. While I prefer my counters to be clutter-free (my husband thinks I take the whole “neat freak” thing to a new level) I make an exception around the holidays to avoid us rummaging though the pantry like maniacs in search of items that always elude you just when you need them.

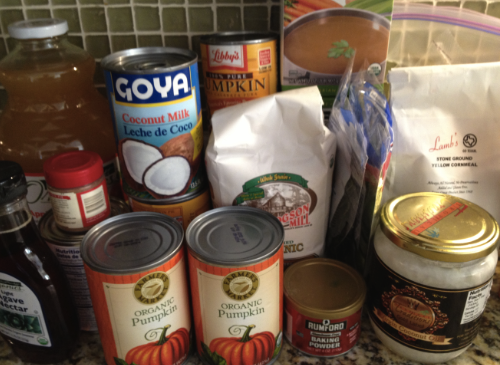
In fact, this is a picture I took today of our counter; you can see it’s covered with ingredients used for some of our favorite foods for Thanksgiving.

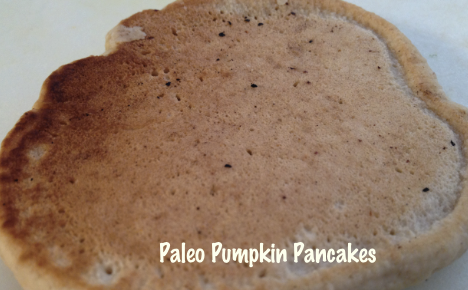
This year our menu will consist of turkey, gluten & dairy free cornbread dressing (aka stuffing), collard greens and a roasted butternut squash soup to start. I’ll be posting the recipes throughout the week, but I wanted to share a new favorite breakfast item: gluten, dairy & egg-free pumpkin pancakes. What a perfect way to start turkey day!

This recipe calls for a flax seed and water mixture in place of the eggs, however, like with most egg substitute recipes you can use chia seeds or any other preferred method.

My favorite pumpkin puree to use is from a company called Farmers Market. Their canned pumpkin comes in a BPA free can and is simply pureed pumpkin, so you can prep this tasty little recipe without worry of hidden ingredients that might taint your turkey day. As someone who has several food allergies to watch out for, and follows a grain, egg, dairy fee diet (naturally found myself Paleo when all the allergens were identified) I’m always reading labels to make sure there are no hidden ingredients that will set off either a food allergy or auto-immune response. Both suck and are not at all what you want to start your Thanksgiving day with!

So, here’s a fun, delish way to start your turkey day. Worry free foods that taste good, and keep my belly happy. A perfect combo!

Gluten, Dairy & Egg-free Pumpkin Pancakes

Prep Time: 5 minutes

Cook Time: 10 minutes

Total Time: 15 minutes

Yield: Makes about 8 small pancakes

Gluten, Dairy & Egg-free Pumpkin Pancakes

Ingredients

  • 2 Tsp Flax oil mixed with 6 Tsp water (or preferred Egg substitute) Or 2 eggs if not following an egg-free diet
  • 1 Tbsp coconut oil
  • ¼ Cup pumpkin puree
  • ⅛ Tsp cinnamon (more or less to taste)
  • Ghee, Raw honey or raw maple syrup as desired

Instructions

  1. Warm a pan over medium high heat (cast iron is always preferred)
  2. In a small bowl, whisk together the flax seed and water and set aside for a couple minutes until it sets
  3. In a medium bowl, whisk pumpkin puree and cinnamon
  4. Add coconut oil to the hot pan
  5. Whisk egg replacement mixture in with pumpkin puree
  6. Measure approximately 2 Tbsp of batter for each pancake
  7. Cook until golden on the bottom and slightly opaque in the center and around the edges
  8. Flip, brown on the other side, and serve
http://inspiredeats.net/gluten-dairy-egg-free-pumpkin-pancakes/

Here’s a Gluten free deal to take advantage of, and on behalf of products we love too!

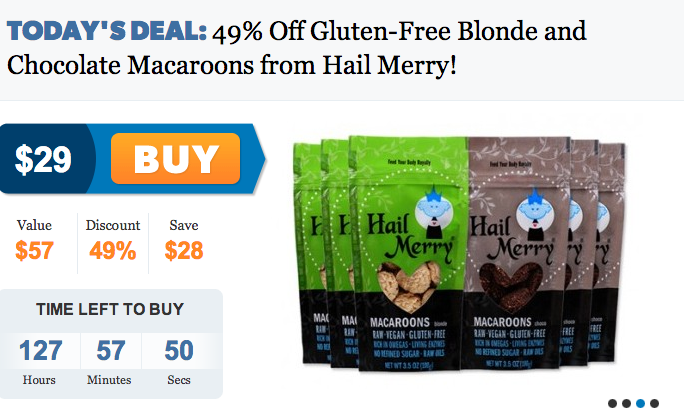
Enjoy an almost 50% savings off Hail Merry’s Macaroons (these little guys are fave around here and a sure fire way to satisfy your sweet cravings without totally reversing all the good you’ve done on a healthy eating path). They’re RAW, Gluten Free and Low Glycemic – woot!

Plus they’re certified by the Non GMO Project. Just another reason to love these guys 🙂


The Fine Print

Limit 1 deal per customer.
Valid for residents in all 50 states.
Cannot be combined with any other promotions from Hail Merry.
This is an exclusive voucherless deal, so you can sit back and relax while your Hail Merry macaroons are shipped directly to your door!
All orders will be shipped 3 business days after purchased.


(more…)

I’ve heard that when you cut out a food from your diet, the cravings will fade, and your taste buds will change. And while I never really thought that was true (I had tried plenty of fad diets in the past and never noticed my cravings fade) it wasn’t until I cut out the common food allergens that I think it truly hit me. Suddenly I no longer craved sweets and carbs, and that decadent salty/sweet combo that I used to adore no longer plagues me daily as it used to. Don’t get me wrong, I still love the occasional salty/sweet treat, but my idea of sweet today is far different than it was a few years ago. Gone are the days of being able to stomach a decadent fudge cake. No, today I find 65% dark chocolate a bit on the sweet side. My how things have changed!

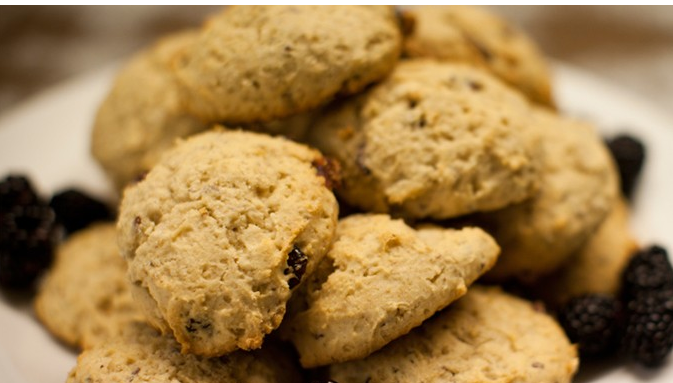
So, when I was sent this recipe for gluten-free Persimmon Spiced scones, I had visions of the swedish spiced cake my mom made every Christmas that I adrored, and I started to think this would be right up my not-so-sweet alley. And I was right.

If you’re not familiar with Persimmons, they’re an excellent source of vitamin C.  In fact,  I’ve been told by some friends that you can help ward off winter colds with a healthy drink by blending a peeled persimmon and kiwi, which make a juice rich in vitamin C and minerals.

Or, if you prefer to indulge a bit, you can go for this fabulous scone recipe, sent to us by our friends at Bona Dea, Austin-based makers of a gluten-free flour that my son swears makes the best muffins and scones he’s had yet.  As I mentioned, this recipe is sweet, but not too sweet, with just the right touch of cinnamon, nutmeg and cloves that pair perfectly with the persimmons. This is a perfect choice for the holidays, and works well as either a scone or muffin. I’ll bet if you were to ice it with a not-too-sweet coconut milk glaze it would be perfect for desert.

Check out the recipe from Bona Dea below; be sure to visit their site here if you haven’t yet and be sure to grab some of their delicious gluten-free flour in any of the many retailers here they’ve partnered with, or you can order on their site.


Gluten Free Persimmon Spiced Scones

Prep Time: 5 minutes

Cook Time: 15 minutes

Total Time: 20 minutes

Yield: 12 scones or 36 mini scones

Gluten Free Persimmon Spiced Scones

Ingredients

  • 1 package Scrumptious Scone mix
  • 1 ½ tsp cinnamon
  • 1 tsp nutmeg
  • ¼ tsp cloves
  • 5 TBSP cold diced butter (or Ghee)
  • 2 eggs
  • 1/3 c coconut cream
  • 4-5 medium persimmons, chopped
  • 1 TBSP turbinado sugar

Instructions

  1. Preheat over to 375
  2. Prepare baking sheet with cooking spray or parchment paper.
  3. Combine scone mix and spices in a large bowl. Using a pastry cutter, cut in butter until mix resembles fine crumbs.
  4. In a smaller bowl, whisk together eggs and cream.
  5. Slowly add liquid ingredients into dry, stirring just until combined.
  6. Blend in persimmons.
  7. Using a large spoon, drop dough into 12 equal rounds onto cookie sheet (or 36 for mini scones). Sprinkle with sugar.
  8. Bake 14-16 minutes or tops are lightly golden.
  9. Transfer to wire cooling racks.
http://inspiredeats.net/gluten-free-persimmon-spiced-scones/


Ever baked with persimmons before? I’d love to hear some of your favorite Persimmon recipes, so please share them in the comments below!

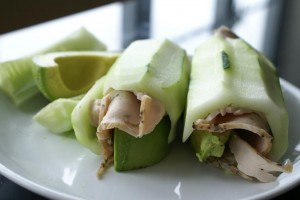
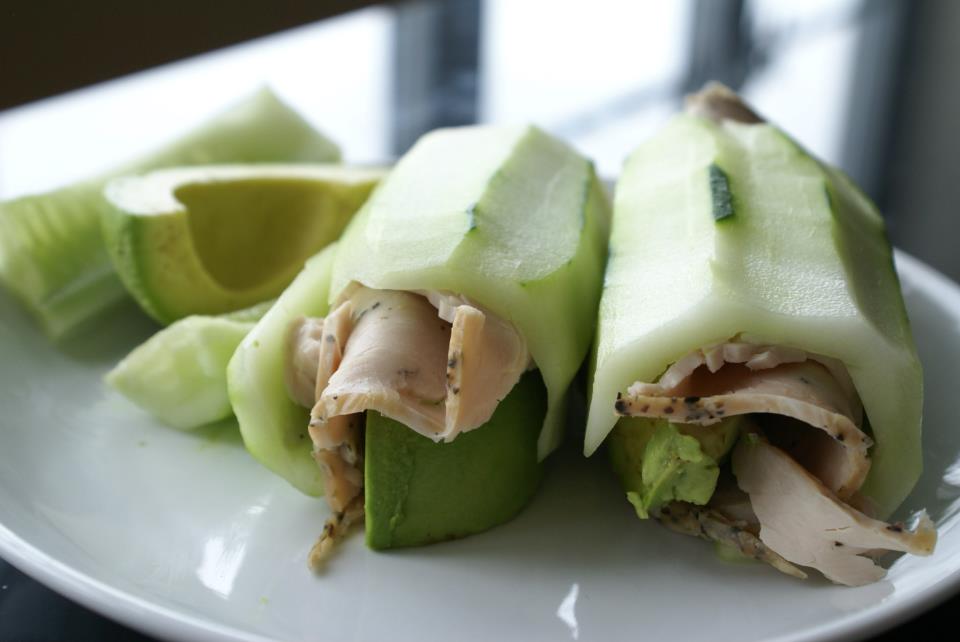
Last night while browsing some of my favorite Facebook pages, I ran across this recipe on Primal Fitness Performance’s page; another version of the quick and simple, grain-less lunch option for our kid’s lunch boxes. I love the simplicity of the recipe, and it reminds me a bit of the sushi roll I posted about recently! The salt of the cucumber pairs well with the creamy avocado, and while the original recipe calls for shaved turkey, you can also substitute shaved chicken, or beef.

Keeping it vegan? Go with humus and sliced bell peppers, or perhaps some puree’d beans and sprouts.

In case you missed our last post on how to keep your child’s lunchbox grain-free, you can view it here and see how we suggest using sliced apples in place of bread.

There are so many smart options for going grain free these days, taking gluten-free to a new level. Remember, gluten allergies often go hand in hand with other grain sensitivities so if you’re trying a grain free diet to help heal your gut, this is a great option that lets you still pick up your ‘sandwich’.

Please share your ideas for grainless sandwiches with us in the comments below, and remember to always live inspired!

Paleo Turkey Avocado Cucumber Rolls

Prep Time: 10 minutes

Total Time: 10 minutes

Paleo Turkey Avocado Cucumber Rolls

Ingredients

  • 2 cucumbers
  • 8oz sliced turkey breast
  • 2 ripe avocado

Instructions

  1. First, peel your cucumbers - you can leave a tiny bit of skin on for the added texture if preferred.
  2. Cut the cucumber in half (not lengthwise!).
  3. Next, with a sharp paring knife, make an initial indentation lengthwise and start cutting the core of the cucumber out, creating a hollow log shape out of the cucumber.
  4. Next, core and slice your avocado in quarters.
  5. Layer the turkey in the cucumber and place the avocado in the turkey.
  6. Voila! You have yourself a fresh, paleo snack that’s refreshing and delicious!
  7. Feel free to add some basil or other herbs to add more flavors.

Notes

Serves 2 Shared from Primal Fitness Performance

http://inspiredeats.net/keeping-your-childs-lunch-box-grain-free-with-cucumber-sandwich-rolls/