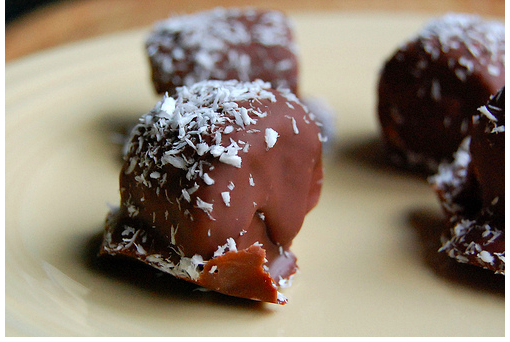
I don’t know about you, but one of the things I tend to crave when the cravings hit (and I should mention that they don’t come very often when you follow the paleo diet) is chocolate. So I was so happy to run across this tasty, guilt free treat to help satisfy those cravings when they hit!

I was browsing some of my fave sites today and ran across a new one so I can’t yet vouch for these, but they look delish and after reading a bit about the site’s owners and browsing their other recipes, I’m pretty excited to give this one a shot! Note that you can make them vegan by using dairy-free dark chocolate – yum!

Head on over to their site and view the orignal recipe here; http://www.neverhomemaker.com/2010/06/frozen-banana-bites.html 

Enjoy!!


Frozen chocolate peanut butter banana bites

Prep Time: 10 minutes

Cook Time: 5 minutes

Total Time: 15 minutes

Ingredients

  • 2 large bananas
  • 1/4 to 1/3 cup vegan chocolate chips
  • 1/4 to 1/3 cup natural peanut butter
  • Unsweetened coconut flakes

Instructions

  1. Set out a large plate or bowl with a piece of parchment or wax paper on it.
  2. Cut up the bananas into good-sized chunks. Each banana should give you around 5 to 6 pieces.
  3. Heat the peanut butter and chocolate chips in the microwave on high for about a minute. Then stir until smooth.
  4. Dip the banana pieces in the chocolate-peanut butter mixture. Lay them out leaving some space between them on the parchment/wax paper. Then when you've "covered" them all, use the remaining mixture to spoon over the tops (for even more chocolate-y goodness).
  5. Then sprinkle the unsweetened coconut flakes on top. Transfer to the freezer for about an hour until hardened.

Notes

You can enjoy them right after they're made (but they aren't frozen yet -- and when they're frozen, the banana tastes like vanilla ice cream). I suggest then covering with some plastic wrap (or really you can do all of this in some kind of Rubbermaid container) and let them freeze overnight.
http://inspiredeats.net/frozen-chocolate-banana-bites-vegan/


Thanks to the Frugal Farmwife for this gluten free flour recipe! It’s a wonderful recipe to use and store in an airtight container, which typically keeps for a couple months.  I’ve included her description of the ingredients and comments about how she makes the mix below as I haven’t actually made this version of gluten free flour myself.  If you would like to hop on over to her site, you can do so here: http://frugalfarmwife.com/ 

Enjoy!

(more…)

I happen to love latin-inspired foods, and we eat a lot of cilantro-laden and often spicy foods around here. Fortunately our son enjoys the heat too, so we can prepare foods to suit our tastes, but occasionally we have to modify the heat a bit to his liking. So when I ran across this recipe in Whole Foods recently, we tested it out and agreed it was suitable for all of us. 

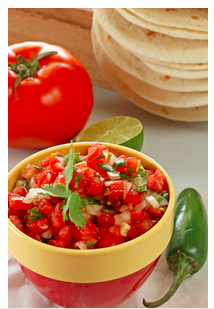
Courtesy of Whole Foods, this is a slightly spicy, light and fresh salsa that makes a great dip for chips or addition to fajitas hot off the grill and breakfast tacos. So depending on your family’s preference, add chiles to suit your tolerance for fire, and enjoy a delish, gluten free, paleo friendly salsa to complement pork, chicken, beef or simply as a stand alone for your preferred dipping choices (we recommend celery or fresh, home-made zucchini or kale chips). 


SPICY TOMATO SALSA WITH CILANTRO AND CHILES

Prep Time: 15 minutes

Yield: 6-8

Calories per serving: 10

Fat per serving: 0

Ingredients

  • 2 medium cluster tomatoes, seeds removed and cut into small dice
  • 15 sprigs fresh cilantro, leaves roughly chopped (discard stems)
  • 1 large garlic clove, minced
  • 1/2 medium-size onion, diced
  • 2 teaspoons fresh lime juice, or to taste
  • 1/4 teaspoon sea salt
  • 1 fresh serrano chile, minced (discard seeds)
  • 1 fresh jalapeño chile, minced (discard seeds)

Instructions

  1. Place diced tomatoes in medium-size bowl, add cilantro, garlic, onion, lime juice and salt. Taste a tiny bit of both serrano and jalapeno chiles to gauge degree of heat and add according to preference.

Notes

Nutrition Per serving: 10 calories (0 from fat), 0g total fat, 0g saturated fat, 0g protein, 3g total carbohydrate (1g dietary fiber, 1g sugar), 0mg cholesterol, 85mg sodium

http://inspiredeats.net/spicy-tomato-salsa-with-cilantro-and-chiles/

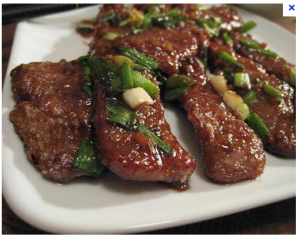
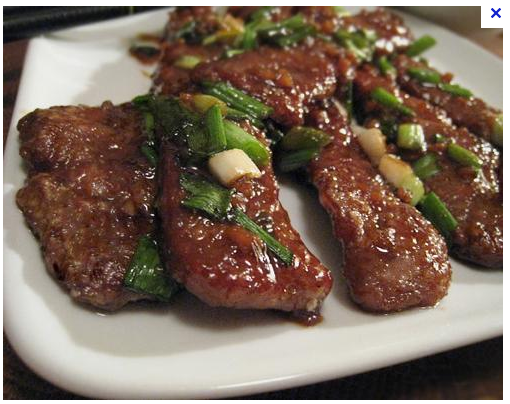
Are you gluten-free, but still want to enjoy some of the sinfully delicious recipes you were used to, such as P.F Chang’s Mongolian Beef?  Well now you can! Here’s a recipe for PF Chang’s Mongolian Beef (one of my hubby’s faves) as prepared gluten free. 

Note the nutritional content on the recipe below and keep in mind this is a splurge/indulgence 🙂 

Enjoy!


P.f. Chang’s Mongolian Beef (Gluten Free)

Prep Time: 30 minutes

Cook Time: 30 minutes

Yield: 2

Serving Size: 1 (492 g)

Calories per serving: 848.2

Fat per serving: 23.4

Ingredients

  • 2 teaspoons vegetable oil
  • 1/2 teaspoon ginger , minced
  • 1 tablespoon garlic , chopped
  • 1/2 cup tamari soy sauce (aka gluten-free soy sauce. DO NOT use regular soy sauce)
  • 1/2 cup water
  • 3/4 cup dark brown sugar
  • vegetable oil , for frying (about 1 cup)
  • 1 lb flank steak
  • 1/4 cup cornstarch (verify it has no wheat or wheat flour)
  • 2 large green onions

Instructions

  1. Make the sauce by heating 2 tsp of vegetable oil in a medium saucepan over med/low heat.
  2. Don't get the oil too hot.
  3. Add ginger and garlic to the pan and quickly add the soy sauce and water before the garlic scorches.
  4. Dissolve the brown sugar in the sauce, then raise the heat to about medium and boil the sauce for 2-3 minutes or until the sauce thickens.
  5. Remove it from the heat.
  6. Slice the flank steak against the grain into 1/4" thick bite-size slices.
  7. Tilt the blade of your knife at about a forty five degree angle to the top of the steak so that you get wider cuts.
  8. Dip the steak pieces into the cornstarch to apply a very thin dusting to both sides of each piece of beef.
  9. Let the beef sit for about 10 minutes so that the cornstarch sticks.
  10. As the beef sits, heat up one cup of oil in a wok (you may also use a skillet for this step as long as the beef will be mostly covered with oil).
  11. Heat the oil over medium heat until it's nice and hot, but not smoking.
  12. Add the beef to the oil and sauté for just two minutes, or until the beef just begins to darken on the edges.
  13. You don't need a thorough cooking here since the beef is going to go back on the heat later.
  14. Stir the meat around a little so that it cooks evenly.
  15. After a couple minutes, use a large slotted spoon to take the meat out and onto paper towels, then pour the oil out of the wok or skillet.
  16. Put the pan back over the heat, dump the meat back into it and simmer for one minute.
  17. Add the sauce, cook for one minute while stirring, then add all the green onions.
  18. Cook for one more minute, then remove the beef and onions with tongs or a slotted spoon to a serving plate.
  19. Leave the excess sauce behind in the pan.

Notes

Amount Per Serving % Daily Value Calories 848.2 Calories from Fat 211 24% Total Fat 23.4 g 36% Saturated Fat 8.4 g 42% Cholesterol 154.2 mg 51% Sodium 4255.9 mg 177% Total Carbohydrate 103.1 g 34% Dietary Fiber 1.5 g 6% Sugars 81.9 g 327% Protein 56.7 g 113

http://inspiredeats.net/p-f-changs-mongolian-beef-gluten-free/

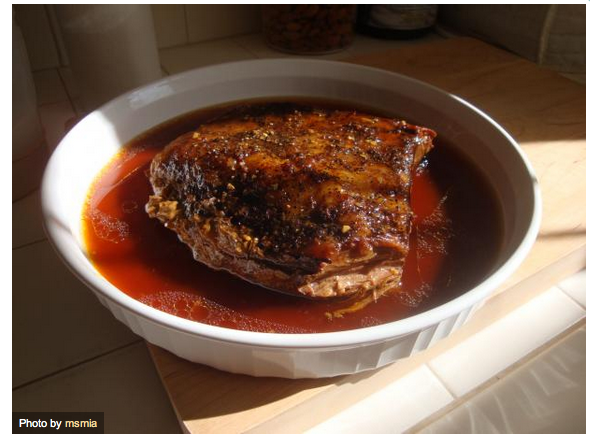
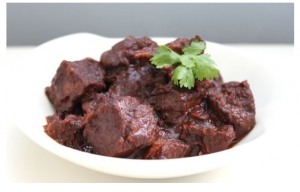
Easy breezy, this brisket recipe is a no-brainer for an easy and delish dinner option.

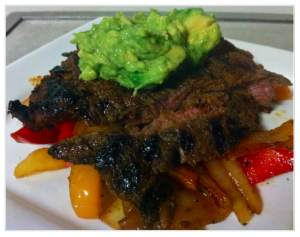
With the use of Braggs Aminos, its not only paleo but gluten-free friendly too! So grab the crockpot, set it on simmer and come home to a house filled with the amazing aroma of brisket.  We enjoy this with mashed cauliflower, but asparagus, broccoli or any other fave veggie are great as well. 


(more…)

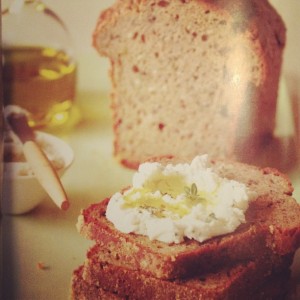
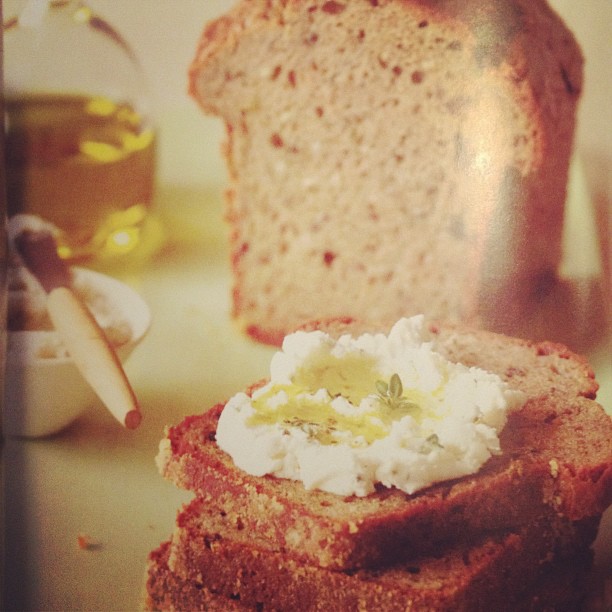
For those of us living a gluten-free life, mastering a tasty, fluffy bread can be a bit challenging. Thanks to one of my fave cookbooks, The Gluten Free Almond Flour Cookbook, this delish bread is a great base for sandwiches, hors d’oeuvres or as a simple tasty snack. You can cut this loaf into thin slices, spread on a baking sheet and toast in the oven at 350° F for 5 to 10 minutes. Spread the resulting cracker with hummus, goat cheese, feta, or drizzled with your favorite olive oil.

The possibilities are endless!


(more…)

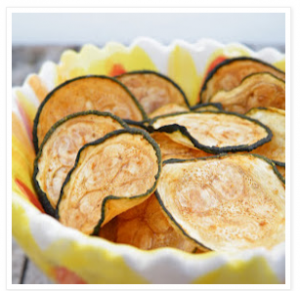
Today I stumbled upon a new site and found some delish looking baked zucchini chips which are a perfect solution for a no-grain diet. The site isn’t focused on allergy-free eating, but if you find yourself wanting some inspiration for yummy looking baked goods, it seems like Maggie of Vittles an Bits will be a good source I’ve copied her comments about the recipe below for reference and note that she’s very responsive if you have any questions so feel free to post them on her site.

For reference here is her link

Baked Zucchini Chips

Ingredients

  • 1 zucchini
  • Cooking spray
  • Seasoned salt, or other seasoning(s) of your choice

Instructions

  1. Preheat oven to 225 degrees Fahrenheit. Line a baking sheet with parchment paper or nonstick foil, and spray with canola oil. Set aside.
  2. Slice zucchini into thin medallions, about the thickness of a quarter. (You can either use a knife & a very steady hand, or a mandoline slicer.)
  3. Lay out slices on prepared baking sheet, and spray tops lightly with additional cooking spray. Sprinkle with seasonings of your choice. (A note on seasoning, however – use LESS than what seems appropriate. These shrink considerably in the oven, and if you use too much it gets very concentrated. It’s better to end up underseasoning and add more later.)
  4. Place in preheated oven and bake 45 minutes. Rotate baking sheet (don’t flip the chips though), and bake an additional 30-50 minutes, until chips are browned and crisped to your liking. These are best eaten within a couple hours of removing from the oven, as they start to get chewy if left out. One zucchini makes one serving (1/4 C. – 1/3 C. of chips depending on the size of your squash).
http://inspiredeats.net/baked-zucchini-chips/
 

From Maggie: 

To me, these chips taste kinda like thin & crispy pumpkin seeds.  (I guess that shouldn’t be too much of a surprise since they are relatives in the squash family).  Much lighter, but the taste is similar.

And the seasoning possibilities are endless – you can tailor them to your liking.  Garlic, paprika, chili powder… use your imagination!  I went with a basic Seasoned Salt and they came out great.  But whatever you choose, just make sure you go easy on the seasonings, and only use a little bit – these do shrink a lot in the oven, so what looks like a reasonable amount on the raw veggies could turn out to be way too much!

(more…)

While working on the recipe section tonight I was compiling some kid-friendly, gluten free lunch ideas and I ran across this one I had saved from the Washington Post some time ago. It’s a great option for a cold lunch and the plantains make for a delish and healthy addition with the black beans. Plantains have a heart healthy combo of nutrients, including vitamin B6, vitamin C, potassium and fiber. They also contain resistant starch, which acts as a prebiotic, selectively nourishing the “good gut” bacteria that line the intestinal tract and protect against food borne illness. Yummy and good for us- yay! 🙂

(more…)

I completely admire people who can cook; while I LOVE food, I sadly didn’t inherit the cooking gene so I default to recipes by those uber-talented folks I’ve discovered online. So today I share with you a recipe I ran across from a fellow Paleo girl. It looks divine and I’m hoping I can convince my hubby to make it for us this weekend 🙂 Thanks to Girlmeetspaleo for this inspired dish!

(more…)

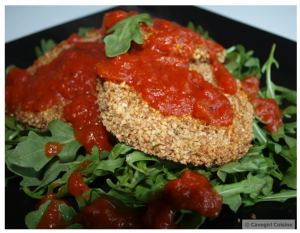
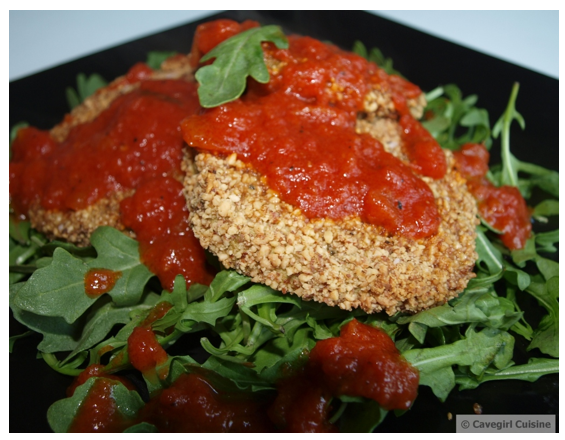
For those of you following a gluten free and paleo diet, the occasional comfort food meal is encouraged, so long as you stick to the healthy Paleo guidelines. So when I saw this post on Cavegirl Cuisine’s site for a gluten free, paleo eggplant recipe, I had to share it. Our version is slightly modified, but you can see her original version here

What I love about this recipe is the almond meal which helps the eggplant maintain a crunchy, fried, aspect to it, even though it’s baked.  So you can enjoy this guilt-free, delish version of a formerly unhealthy meal! 

Paleo “Fried” Eggplant Marinara (on a bed of greens)

Prep Time: 15 minutes

Cook Time: 30 minutes

Total Time: 30 minutes

Yield: 4 servings

Paleo “Fried” Eggplant Marinara (on a bed of greens)

Ingredients

  • 1 medium eggplant
  • 2 cups almond meal
  • 1 cup marinara sauce or fresh diced tomatoes
  • 2 eggs
  • 4 cups of greens (I used arugula)
  • 1T macadamia nut oil

Instructions

  1. Preheat oven to 400 degrees.
  2. Line two cookie sheets with parchment paper.
  3. Peel eggplant and slice into 1/4 inch rounds.
  4. Whisk eggs in a medium bowl.
  5. Place almond meal in another bowl.
  6. Dredge each eggplant round in the eggs and then coat with the almond meal on each side.
  7. Place on the parchment paper
  8. Repeat for all of the eggplant.
  9. Drizzle or mist the oil over the coated rounds.
  10. Salt and pepper lightly.
  11. Cook for 30 minutes.
  12. In the meantime, place a cup of greens on each plate.
  13. Divide the cooked eggplant among the plates.
  14. Put a 1/4 cup of marinara sauce or fresh tomatoes over the top of each serving. Enjoy!
http://inspiredeats.net/paleo-fried-eggplant-marinara-on-a-bed-of-greens/


For those of us following the Paleo or Primal Blueprint diets, pancakes are a thing of the past, right?

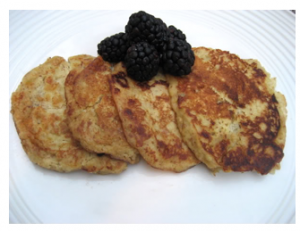
At least, that’s what I thought until I ran across this recipe on Mark’s Daily Apple. It’s definitely more carb-centric than much of what he suggests but as he states many times, those of us following the Primal Blueprint can allow for an indulgence now and then and still keep on track with our goals for health, wellness, weight loss, etc. That said, this is a delish and healthy indulgence and one I’m excited to make again this weekend. I hope you enjoy it too!


Paleo ‘Pancakes’

Prep Time: 10 minutes

Cook Time: 10 minutes

Total Time: 20 minutes

Yield: 4 pancakes

Paleo ‘Pancakes’

Ingredients

  • 2 bananas
  • 1 egg
  • 1-2 Tbs almond butter
  • fresh blueberries
  • 1/4 cup walnuts, chopped
  • 1 tsp. coconut oil

Instructions

  1. Mash the bananas, add the egg and mix well.
  2. Stir in the almond butter, adding more than a tablespoon if you want a more pancake-like texture.
  3. Warm the coconut oil in a pan and pour batter into small cakes.
  4. Brown on each side and serve warm topped with fresh blueberries.
  5. Enjoy!!
http://inspiredeats.net/paleo-pancakes/