About 6 months ago I discovered a blog that has quickly become one of my favorites; devoted to living a life free of grains, Lisa Leake runs 100 Days of Real Food where she dishes on living free of grains, gracing us with amazing recipes that grain-ful dieters would envy.  Browsing through her site, you quickly realize how talented she is in the kitchen, and her dedication to finding ways to help us live without grains is unmatched online. Here’s a quick snippet from her site that sheds some light on how she began this journey…

“At the beginning of 2010 our eating habits were just like those of any other average family. We thought we were making fairly healthy food choices, although we certainly weren’t following any special rules. Then came along the Oprah show “Food 101 withMichael Pollan”. As it turned out, a lot of what we thought were “healthy” food choices were actually just highly processed and what the food industry was labeling as ‘healthy.’

So it wasn’t easy at first, but we slowly revamped everything from what we bought, to where we shopped, to how we cooked… If all of us make the right choices together then we can make a big impact, which will help change our country’s food system for the better.”
How can you not love her?

Lisa, like many of us, is fighting the good fight to help change the way we think of our food supply. By eating natural, organic, unprocessed and unrefined foods, we are taking a very important step towards affecting the change needed to ensure our health is protected, and that our children can thrive free of the modern day health issues which plague so many of us.

So today I share a recipe that Lisa has allowed us to share – thanks Lisa!

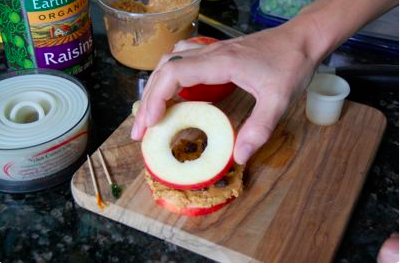
This is a simple substitution we can make to avoid using bread for our child’s sandwich. Instead, Lisa uses an apple in place of bread, and fills the sandwich with peanut butter (any nut butter would do here) and raisins.  Other options are homemade chicken salad, or any organic carved lunch meats. Using toothpicks to hold it together is a smart trick and will make sure your child opens their lunch box and is greeted with a smart, healthy and delish meal.

I hope it inspires you to make some small changes that will make a big impact on your, and your children’s health.

Follow this link to learn how to make an apple sandwich today!

ps- here are some tips from her readers that I thought were worth sharing:

1. Dip the apple in salt water before making the sandwich to prevent browning.

2. Sprinkle some fresh lemon juice on the apple slices to prevent browning

3. Use chico chips in place of raisins for a sweeter touch

4. Create an apple, banana, choco chip cake

5. Use sun butter, cashew butter or almond butter to make it Paleo friendly
Dry, crumbly gluten-free bread spoiling your school lunches?

Recently I was talking with some other moms who are raising gluten-free kids, and they both commented that every time they open their children’s lunch boxes at the end of the day, the sandwiches are still there. Untouched, as if mocking them for trying to raise an allergic child in a healthy way.  Their kids complain that the bread is hard, crumbly and doesn’t taste good. They look up at their moms, sadly, and she can picture visions of fluffy white bread running through their heads.

Since they know my son eats his gluten-free sandwich every day, they wanted to know what my secret was. How was it that I was able to get him to eat this hard, crumbly, less than ideal sandwich every day? Was it just good luck? Did I just have the least picky kid on the planet?

Not really; it turns out I’ve just had a bit more time trying different gluten-free options, combined with living in the right place at the right time.

Several years ago when my son and I were diagnosed with a gluten allergy I hit the health food stores and taste tested every gluten-free bread I could find. From Ezekiel sprouted to rice bread, and all the more ‘mainstream’ gluten free breads on the market, and here’s what I found out; most of them are hard and tasteless. My son wanted something like the bread he was used to. A sandwich that was soft, yet held together by the time his lunch break rolled around, and that didn’t taste uber-healthy. And to be honest, I didn’t think I was going to find anything, so when he was unhappy with all of those, I bought a Zojirushi Virtuoso Bread maker and took to making our own blends.  I tried almond flour, coconut flour and rice flour blends. We bought storage containers, bread slicers and gave it the full whirl. In the end, while he loved them, I found it to be a lot of work for a little reward.

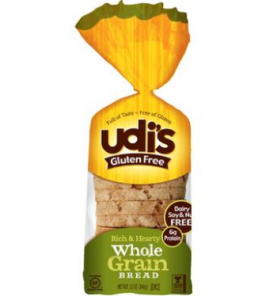
And here’s where the luck part comes in. One day we were at our local farmers market in beautiful Boulder, Colorado, and stumbled upon a stand for Udi’s Artisan Breads. Turns out they weren’t kidding about the “Artisan” part. I stared, longingly at the fabulous looking baguettes and fresh loaves that I previously would have happily purchased. And just when we were about to walk away, we overheard someone ask for a loaf of their gluten-free bread. The Udi’s employee reached underneath the booth and pulled out a prepared, pre-sliced loaf of gluten-free bread. I listened to them chat about how soft and delicious this bread was. I moved in closer while they talked about how light and fluffy the bread was. How to store it, how to cook with it and shared their favorite recipes ideas. When they were done, I asked for a gluten-free loaf, paid the $6 (the sticker-shock on these prices fades as you realize that’s just the deal with gluten-free goodies) and off we went to see if Udi’s would live up to the hype.

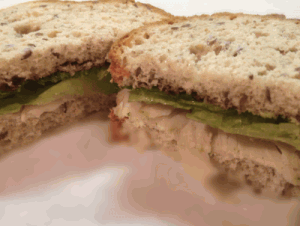
The idea that I could pick up a locally made, gluten-free loaf of bread that my new-found gluten-free farmers market friend raved about was so exciting, yet I worried that my expectations would differ from hers, and my son might once again be disappointed.  So we headed home and gave it a whirl. Though the bread wasn’t frozen, the girl from Udi’s advised us to freeze it to preserve freshness and said it only needed to thaw for a few minutes before you can make a fresh sandwich. So we took out a couple of slices, and put the rest in the freezer. Our son was excited to try his new bread, and since I wanted to see how soft it truly was, we prepped a turkey sandwich with lettuce and jam (his fave). He took one bite, then another, and finally a smile – he was thrilled. So there you have it – luck had us happen upon Udi’s farmer market stand, at the perfect moment to overhear a conversation about their gluten-free breads.

I tried a few ways of making his sandwiches; I toasted them from frozen, toasted from thawed, and simply let it thaw before making the sandwich. As it turns out, toasting it essentially turns it into a crouton, no matter whether it’s toasted from frozen or thawed. The only version he happily ate every bite of was the thawed version. Simply remove the bread from the freezer, let it thaw a minute or two, then prep your sandwich, wrap it in foil or cling wrap and send your kiddo off with a sandwich they will eat!

So there you have it – not overly impressive, I know, but hopefully our experience will help save you some time, headaches and tears and help your kiddos learn to love eating gluten-free sandwiches!

How to make a soft gluten-free sandwich that will hold together by lunchtime (no crumbles, just soft, yummy bread!):  

Step 1:

Pull out 2 slices of frozen gluten-free bread from the freezer, allowing them to thaw for a couple of minutes.

Step 2:

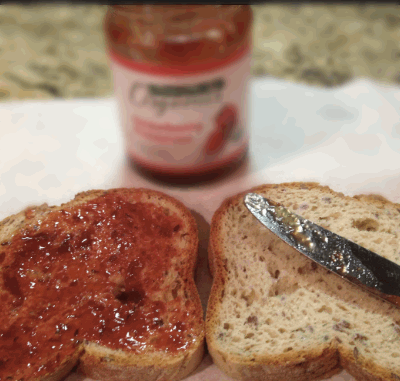
Prep the sandwiches (here’s one of our son’s faves: turkey with lettuce and strawbery jam)


(more…)

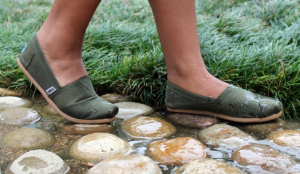
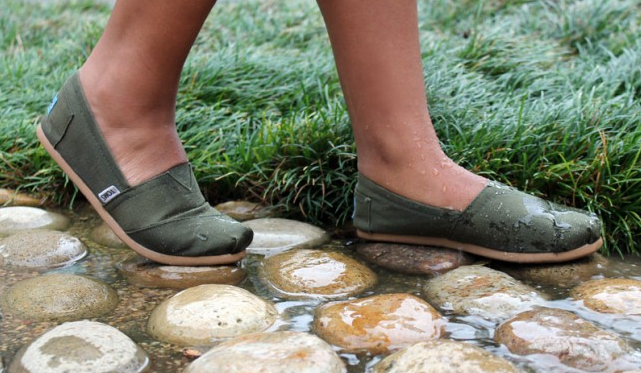
This helpful tip is titled How To Water Proof your Shoes, Naturally, and is presented by Brit of Brit & Co, one of our favorite sites for interesting, off-beat life tips. We loved this handy little How To, and it makes us think about adding other categories of How To’s that use natural ingredients to accomplish a simple task.

While this has little to do with food, it resonates with our desire to solve a problem from a natural solution (beeswax!)

Covering Living, Tech, Food,Style, Health & Events, Brit dishes on a variety of topics. She’s as cute as she is clever and I highly recommend you visit her site to see what she’s got cooking.  Click on the image below to see her full post about waterproofing your shoes with Beeswax. Enjoy!